Watch it draw itself · tap to replay
How to Draw an SUV
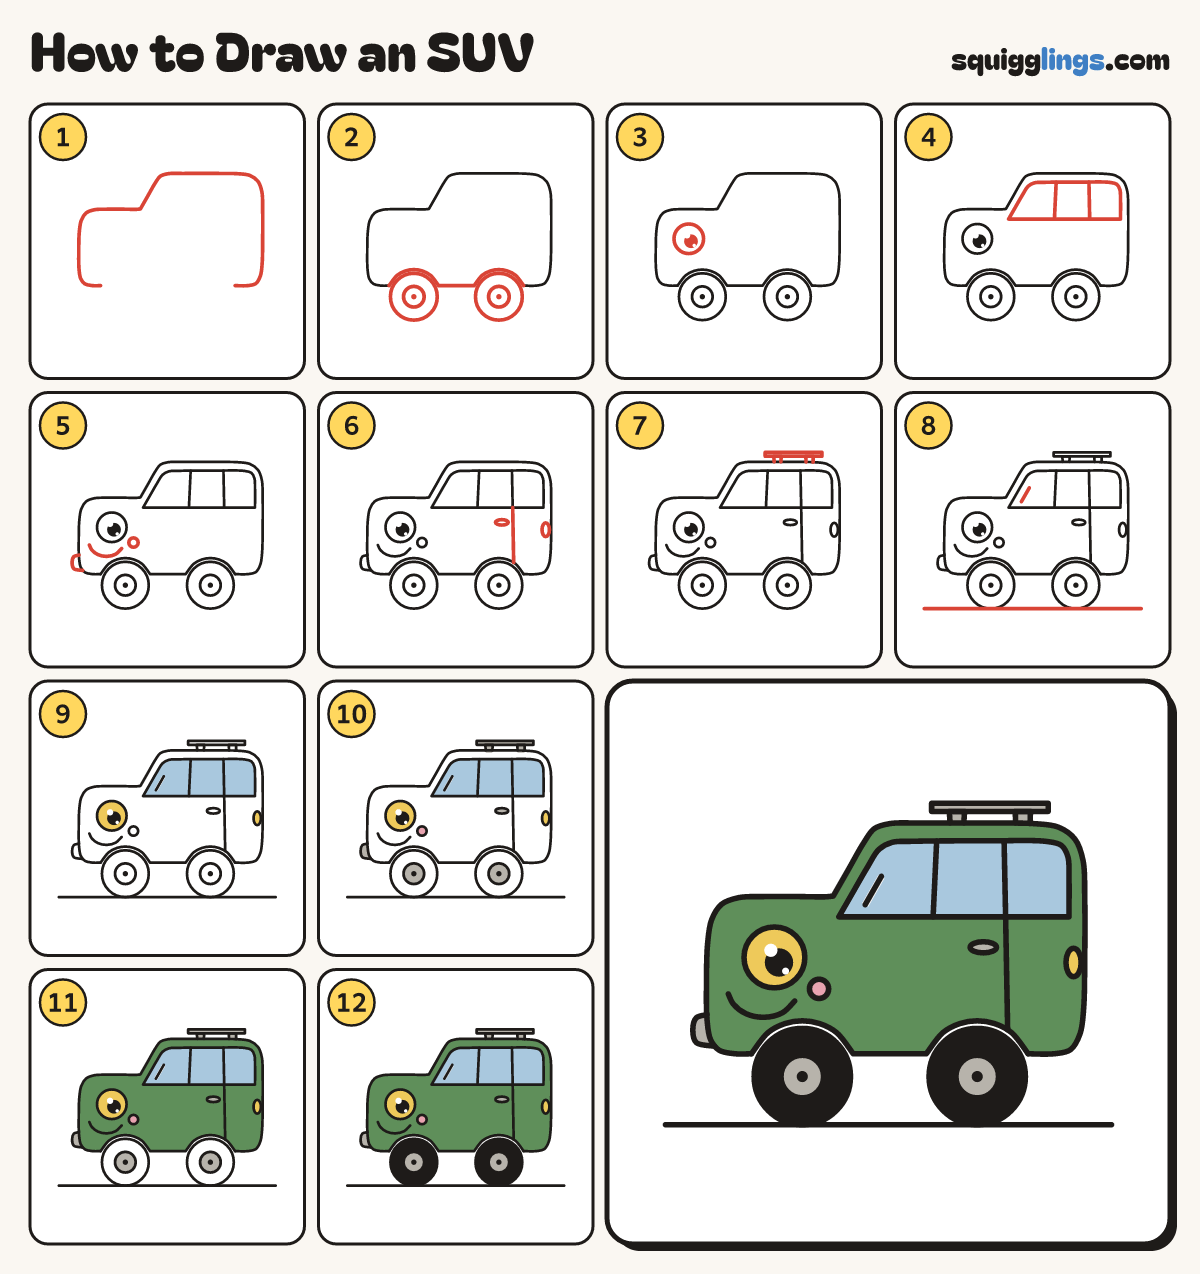
Draw an SUV in 12 easy steps, about 9 minutes. Free, with a printable worksheet.
Each picture adds one red line. Draw that line, then scroll to the next picture. Rub out any dashed helper lines at the end. First up: nose, roof and boot.
Step 1: Nose, roof and boot
Start low left. Go up the nose, over a short bonnet, up to the roof and down. Stop low right.
Tip Short high bonnet, tall flat roof, square back. Both ends stop at the same height.
Step 2: Belly and tyres
Start where you stopped. Draw arch, belly, arch and stop at the nose. Draw a fat tyre under each arch.
Tip Add a hub circle with a black dot in each tyre. Keep a little air above each tyre.
Step 3: Big headlight eye
On the bonnet, near the nose, draw a big round headlight eye with a black dot.
Step 4: Windows and pillars
Start just past the bonnet. Draw a long window under the roof, back to the start. Add 2 pillars.
Step 5: Smile and bumper
Start under the eye, draw a U smile, stop a finger before the nose. Add a round cheek and bumper.
Step 6: Door, handle, tail light
Start under the back pillar, draw straight down and stop on the back arch. Add a handle and tail light.
Step 7: Roof rack
Start on the roof, draw 2 posts up to a long bar.
Step 8: Road and shine
Start before the nose. Draw a straight road under the tyres and stop past the back. Add a shine dash.
Step 9: Yellow lights, sky windows
Colour the lights yellow and the 3 windows sky blue, leaving every shine white.
Step 10: Pink cheek, grey bits
Colour the cheek pink. Colour the roof rack, bumper, handle and hubs grey, going around the black dots.
Step 11: Green SUV
Colour the body green, going around the windows, lights, cheek and handle.
Step 12: Black tyres
Go over your lines. Colour the tyres black, going around the grey hubs.
Your finished drawing
Follow the steps above and this is where you end up: an SUV, drawn by you.
Every step in one picture