Watch it draw itself · tap to replay
How to Draw a Tiger Cub
Draw a tiger cub in 15 steps, about 11 minutes. Free, with a printable worksheet.
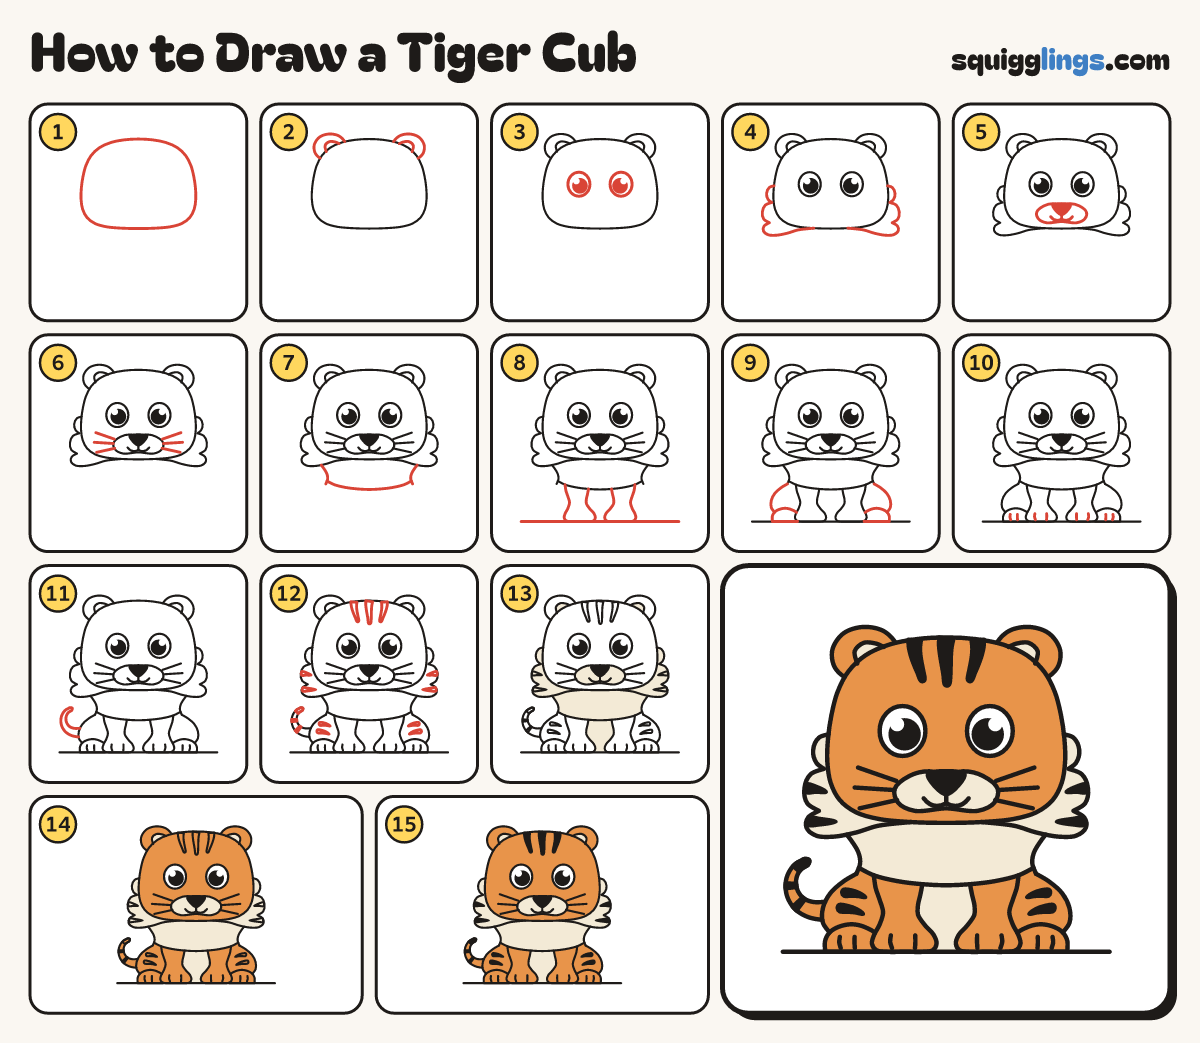
Each picture adds one red line. Draw that line, then scroll to the next picture. Rub out any dashed helper lines at the end. First up: big bean head.
Step 1: Big bean head
Near the top of your paper draw a big chubby head like a wide bean. Make it wider than tall.
Tip A cub is mostly head, so go big!
Step 2: Round ears
Draw a round bump on each top corner of the head for ears. Add a small rainbow inside each.
Tip Each ear starts and stops on the head line.
Step 3: Big eyes
Draw 2 big egg eyes across the middle of the head, a little apart.
Tip Put a big black dot in each eye with a white shine.
Step 4: Fluffy cheeks
Start at the head line by an eye. Draw 3 fluff bumps down to the chin. Do both sides.
Tip The bumps sit outside the head line, and each is bigger than the one above.
Step 5: Nose and mouth
Under the eyes draw a peanut with a black nose. Draw a line from the nose down to a w.
Tip The nose is a rounded triangle, as wide as an eye.
Step 6: Whiskers
Draw 3 whiskers on each side of the nose. Flick them out, but stop before the fluff bumps.
Tip One whisker points up, one straight out, one down.
Step 7: Little body
From under each cheek, draw a short body line down. Join their ends with a wide smile for the chest.
Step 8: Front legs
Draw the ground line. Start on the chest smile and draw a long U down to a paw. Do both.
Tip The paws sit on the ground, about a head's height below the chin.
Step 9: Back legs and paws
From each body line draw a big C down to the front paw. Add a bun paw beside it.
Tip The back leg is a fat round C that pokes out past the body.
Step 10: Toes
Draw 2 short curved toe lines on each paw, a little above the bottom.
Step 11: Curly tail
Start behind the left back leg at hip height. Draw a fat tail that curls up to a point.
Tip The tail is fat where it leaves the leg and thin at the tip.
Step 12: Tiger stripes
Draw 3 forehead stripes, 2 on each cheek and each back leg, and 2 bands across the tail.
Tip Add a line across the tail near the tip. Each stripe is fat at one end and pointy at the other.
Step 13: Cream patches
Colour the nose patch, cheek fluff, chest and inside of the ears cream.
Step 14: Colour it orange
Colour the head, ears, body, legs and tail orange, around the cream patches and stripes. Leave the eyes white.
Step 15: Black stripes
Colour all the stripes and the tail tip black.
Your finished drawing
Follow the steps above and this is where you end up: a tiger cub, drawn by you.
Every step in one picture