Watch it draw itself · tap to replay
How to Draw a Tasmanian Tiger
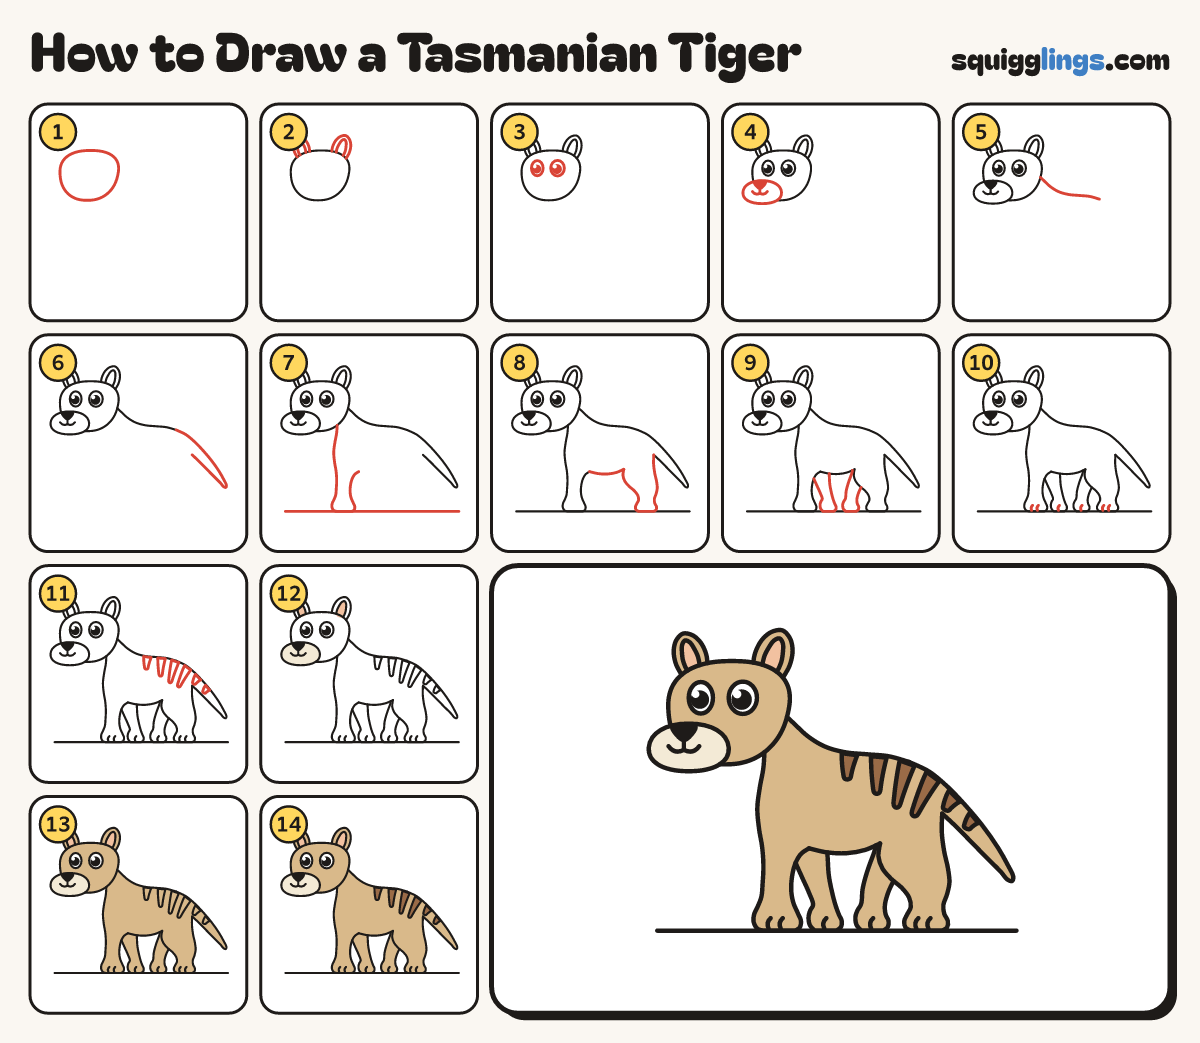
Draw a tasmanian tiger in 14 easy steps, about 11 minutes. Free, with a printable worksheet.
Each picture adds one red line. Draw that line, then scroll to the next picture. Rub out any dashed helper lines at the end. First up: big egg head.
Step 1: Big egg head
Near the top left draw a big egg head lying down, a little narrower at the bottom.
Tip A big head makes it cute. Leave room on the right for the body.
Step 2: Round ears
On each top corner of the head draw an upright ear with a round tip. Add a small leaf inside.
Tip The left ear is a little smaller, because the head is turned.
Step 3: Big eyes
On the head, a little to the left, draw 2 big oval eyes with black dots.
Tip Leave a tiny white shine in each eye.
Step 4: Long snout
Under the eyes draw a long snout poking past the head. From its black nose, draw down into a w.
Tip Rub out the head line inside the snout.
Step 5: Neck and back
Start below the right ear. Draw down the neck and along a long flat back. Stop well before the edge.
Tip The neck slopes down, then the back runs almost flat.
Step 6: Stiff tail
Start at the end of the back. Draw a thick tail down to a soft point, then back underneath.
Tip The tail is as thick as a leg where it starts. It does not curl.
Step 7: Chest and front leg
Draw a ground line. From under the chin, draw the chest down into a leg, a paw, and back up.
Tip The leg gets thinner near the paw.
Step 8: Tummy and back leg
From the front leg draw the tummy. Then a round thigh down to a paw and up to the tail.
Tip The back leg bends backwards just above the paw.
Step 9: Far legs
Under the tummy draw 2 more legs peeking out from behind, each with a paw on the ground.
Step 10: Toes
On each big paw draw 2 short curved toe lines. Draw 1 on each small paw.
Step 11: Back stripes
Draw 4 stripes hanging down from the back. Add 2 shorter ones on the top of the tail.
Tip Stripes only go on the back half. The front half stays plain.
Step 12: Cream and peach
Colour the snout cream and the inside of each ear peach.
Step 13: Sandy coat
Colour the head, ears, body, legs and tail light brown, around the stripes and snout. Leave the eyes white.
Step 14: Dark brown stripes
Colour all 6 stripes dark brown. Your Tasmanian tiger is done!
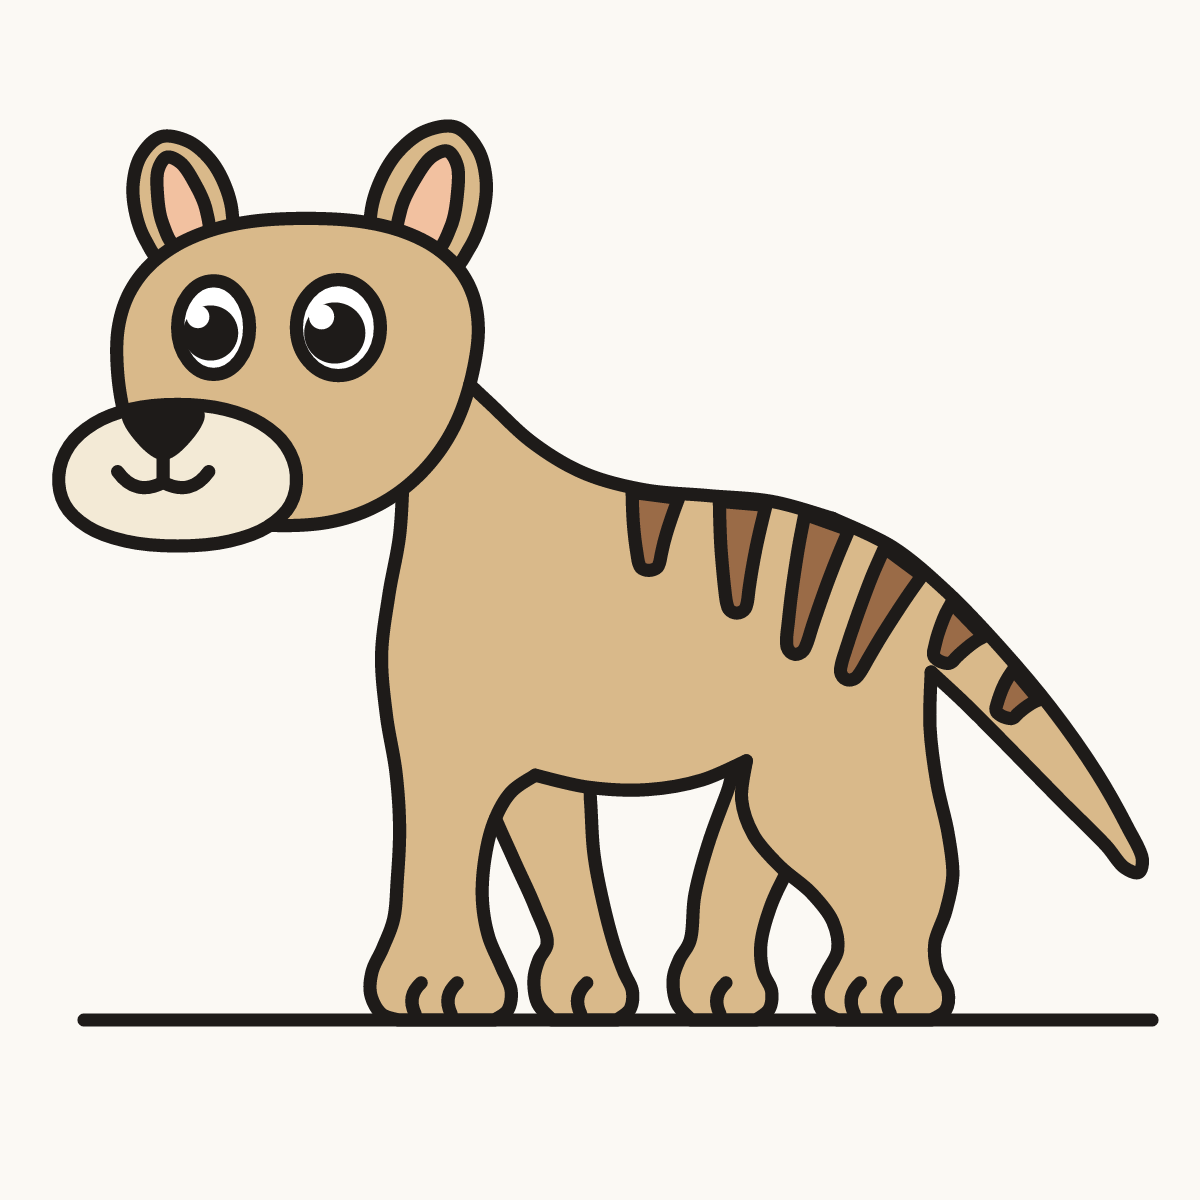
Your finished drawing
Follow the steps above and this is where you end up: a tasmanian tiger, drawn by you.
Every step in one picture