Watch it draw itself · tap to replay
How to Draw a Whale Tail
Draw a whale tail in 9 easy steps, about 7 minutes. Free, with a printable worksheet.
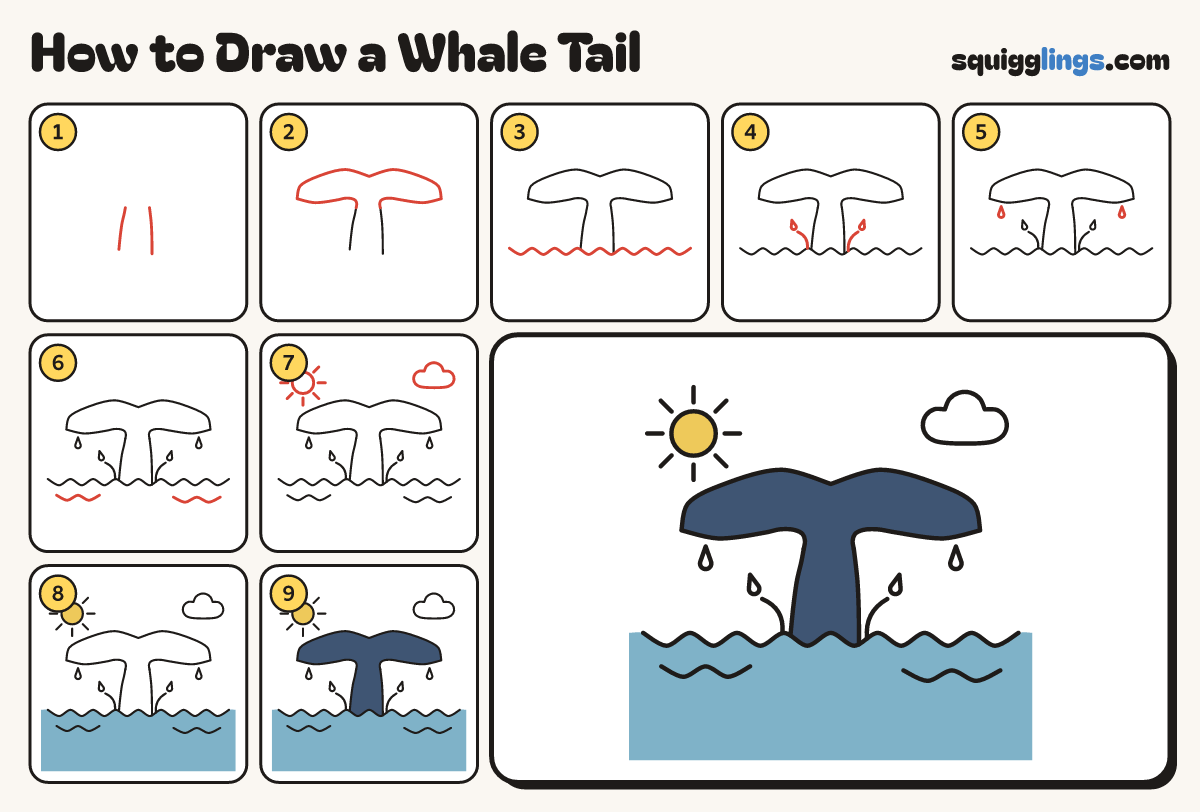
Each picture adds one red line. Draw that line, then scroll to the next picture. Rub out any dashed helper lines at the end. First up: the tail stem.
Step 1: The tail stem
Start low in the middle of your paper. Draw 2 lines rising up, a hand apart, and stop halfway up.
Tip Thick at the water, a bit thinner at the top.
Step 2: Two wide flukes
From the top of the stem, curve out into wide droopy flukes on each side, then back to the stem.
Tip Like a big moustache or a bird's wings, a little droopy at the tips.
Step 3: The water line
Start at the left edge. Draw a wavy line through the bottom of the stem, stopping at the right edge.
Step 4: Splashes
Where the stem meets the water draw a curved splash curling up each side, with a little drop above each.
Step 5: Drips
Under the tips of the flukes draw 2 little falling drops, round at the bottom and pointy on top.
Step 6: More waves
Under the water line draw 2 short wavy lines, one each side, a little lower.
Step 7: Sun and cloud
Top left, draw a sun with 8 short rays. Top right, draw a puffy cloud with 3 bumps.
Step 8: Blue sea, yellow sun
Go over your lines. Colour the sun yellow, then the sea blue below the wavy line, to the edges.
Step 9: Navy tail
Colour the whole tail navy, from the water right up to the tips of the flukes.
Your finished drawing
Follow the steps above and this is where you end up: a whale tail, drawn by you.
Every step in one picture