Watch it draw itself · tap to replay
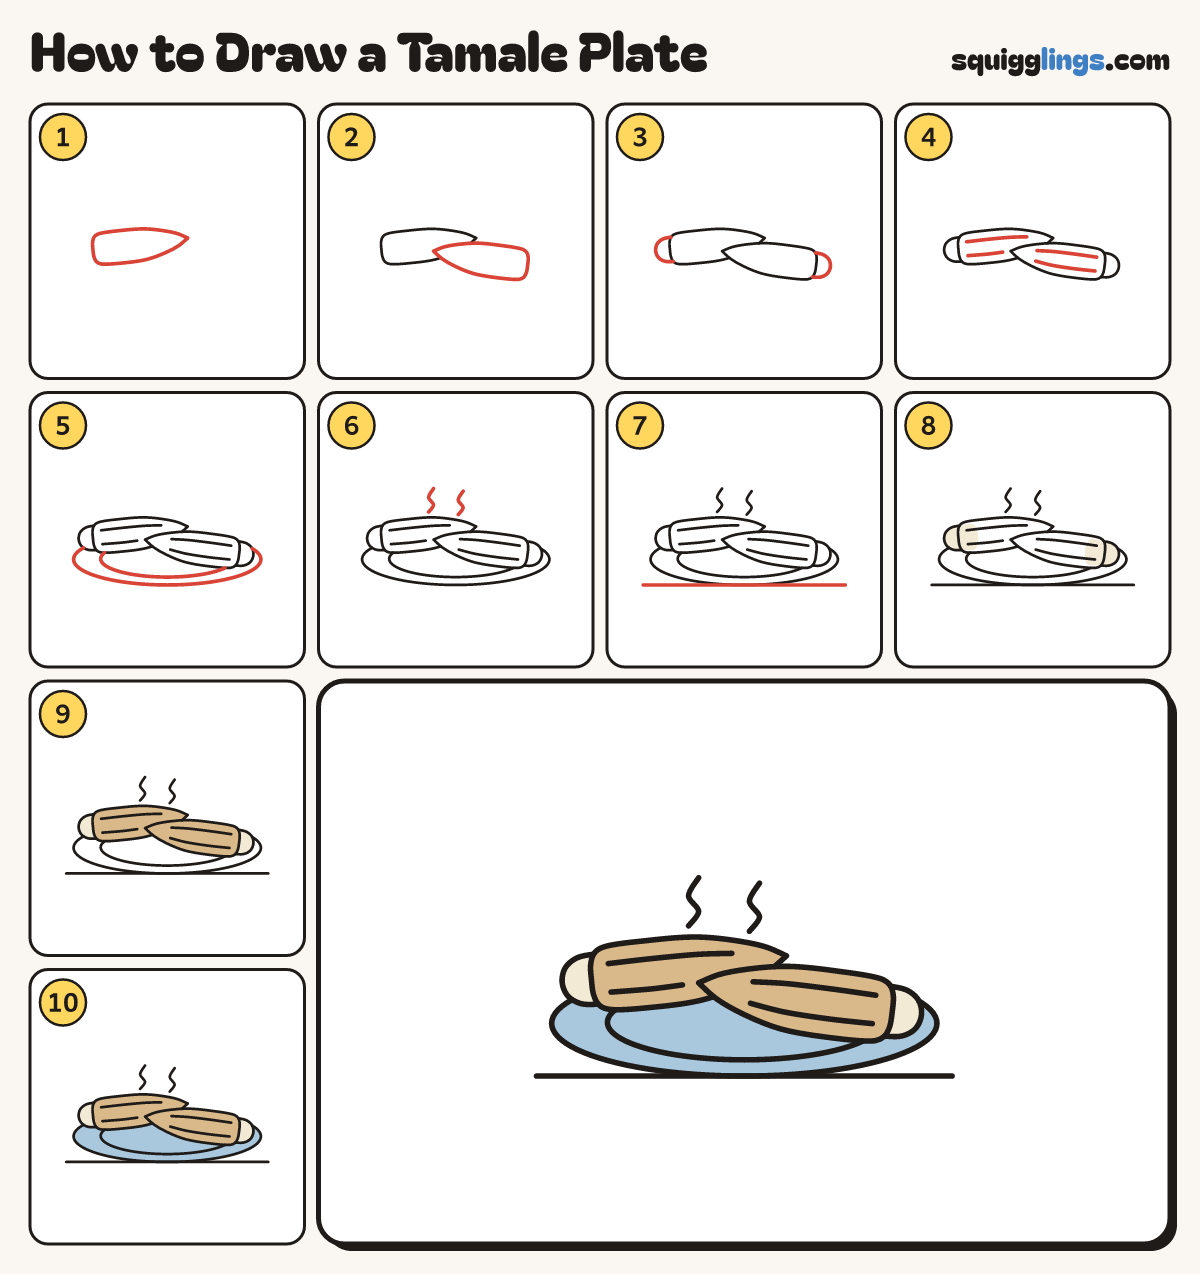
How to Draw a Tamale Plate
Draw a tamale plate in 13 easy steps, about 10 minutes. Free, with a printable worksheet.
Each picture adds one red line. Draw that line, then scroll to the next picture. Rub out any dashed helper lines at the end. First up: an open husk.
Step 1: An open husk
Below the middle draw a long leaf shape, pointed at both ends, tipping down a little to the right.
Tip This is a corn husk lying open like a little boat.
Step 2: The masa
Inside the husk draw a plump log of masa, round at both ends. Leave more husk showing on the right.
Step 3: The filling
Near the log's right end draw a curved line from top to bottom, then a small oval of filling.
Step 4: Husk lines
On the right husk tip draw 2 lines from the masa towards the point. Stop before the point.
Step 5: A wrapped tamale
Behind the husk, up to the left, draw a plump pillow shape. Start and stop on the husk's top edge.
Tip Make it fat, like a little pillow.
Step 6: Folded ends
Near each end of the pillow draw a sideways V from top edge to bottom edge, pointing to the middle.
Step 7: More husk lines
Between the 2 folds draw 2 long lines along the wrapped tamale. Stop before each fold.
Step 8: A plate
Behind the tamales draw a big flat oval plate, wider than everything. Add a second oval inside for the rim.
Step 9: Steam
Above the wrapped tamale draw 2 wiggly steam lines going up.
Step 10: The table
Draw a straight line under the plate, a little wider than it, just touching its bottom.
Step 11: Cream masa
Go over your lines. Colour the masa cream, around the filling. Colour the filling orange.
Step 12: Tan husks
Colour the open husk tan, around the masa. Colour the wrapped tamale tan too.
Step 13: Sky plate
Colour the plate sky blue around the tamales, and your tamales are done!
Your finished drawing
Follow the steps above and this is where you end up: a tamale plate, drawn by you.
Every step in one picture