Watch it draw itself · tap to replay
How to Draw a Swift
Draw a swift in 10 easy steps, about 8 minutes. Free, with a printable worksheet.
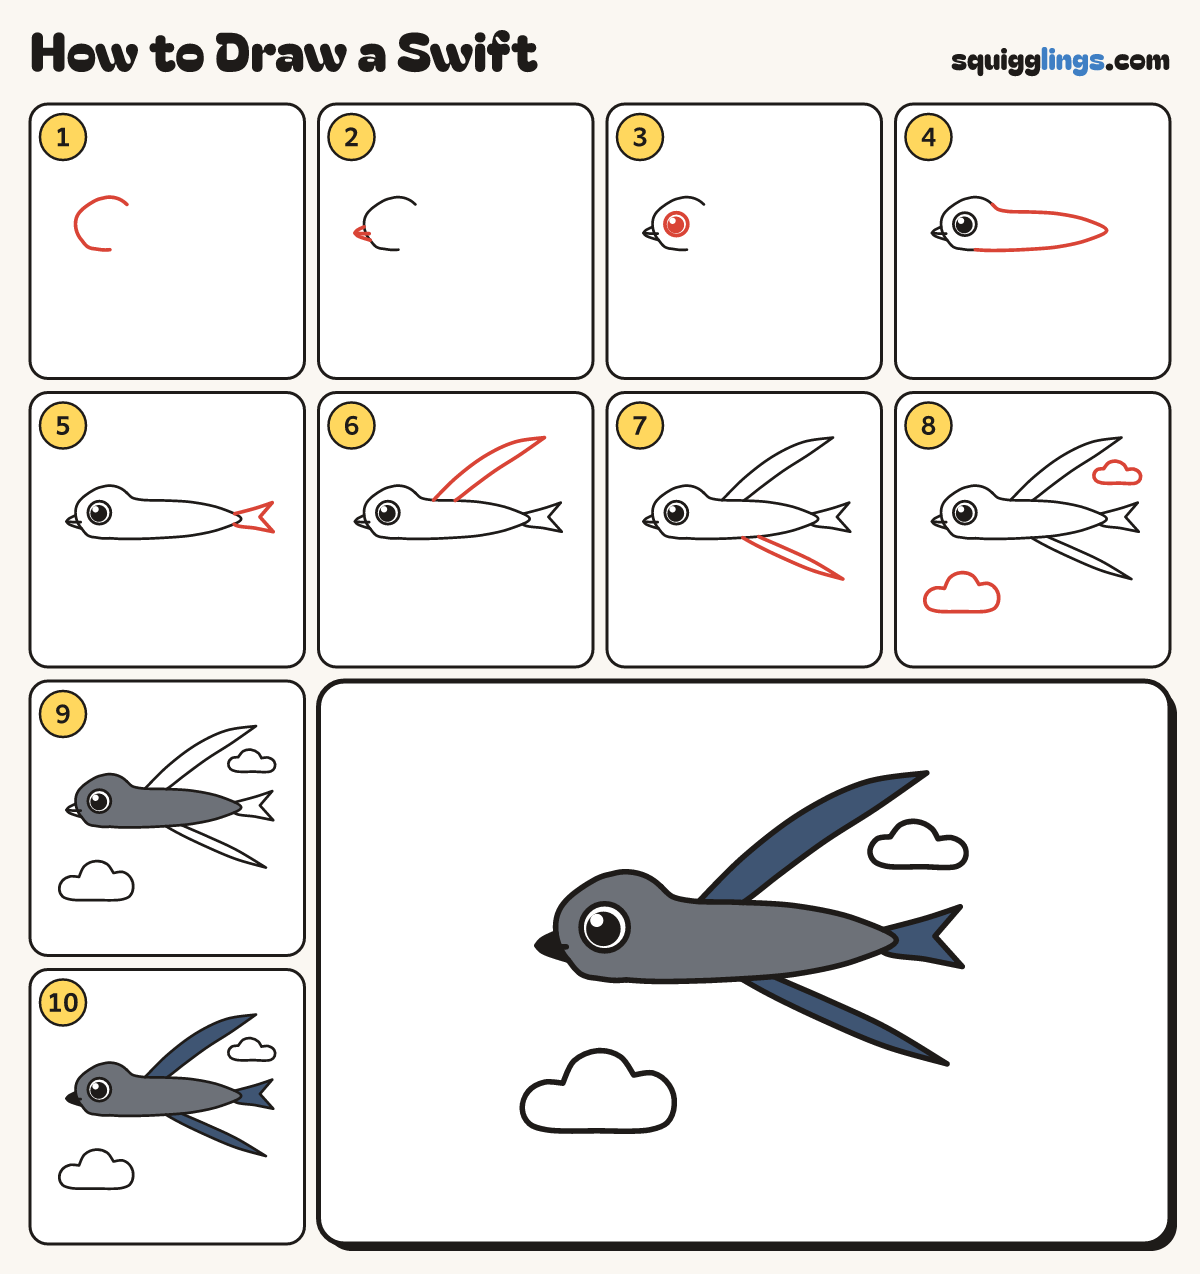
Each picture adds one red line. Draw that line, then scroll to the next picture. Rub out any dashed helper lines at the end. First up: a round head.
Step 1: A round head
On the left, draw a round head like a big C. Start top right and stop bottom right.
Step 2: Tiny beak
On the front of the head, draw a tiny triangle beak pointing left. Add a short mouth line.
Step 3: One big eye
In the middle of the head, draw a big round eye. Fill it with a big black dot.
Tip Leave a strip of cheek between the beak and the eye.
Step 4: Sleek flat body
From the top of the head, draw a flat torpedo to a point, then the tummy back to the chin.
Tip A flying swift is long and flat, not an upright egg.
Step 5: Short forked tail
At the pointed end, draw a short forked tail: 2 little points with a dip between them.
Step 6: Upper wing
From the back behind the head, draw a long thin wing sweeping back and up to a sharp point.
Tip A swift's wings are long thin curves swept back, longer than the body.
Step 7: Lower wing
From the tummy, draw the other wing the same way, sweeping back and down to a sharp point.
Step 8: Clouds
Bottom left, draw a cloud: 3 round puffs on a flat bottom. Add a smaller one in the top right.
Step 9: Dark head and body
Colour the head and the body dark slate grey, leaving the eye white.
Step 10: Navy wings and tail
Colour both wings and the forked tail navy, and the tiny beak black. Leave the clouds white.
Your finished drawing
Follow the steps above and this is where you end up: a swift, drawn by you.
Every step in one picture