Watch it draw itself · tap to replay
How to Draw a Black Cat with an Arched Back
Draw a black cat with an arched back in 12 easy steps, about 9 minutes. Free, with a printable worksheet.
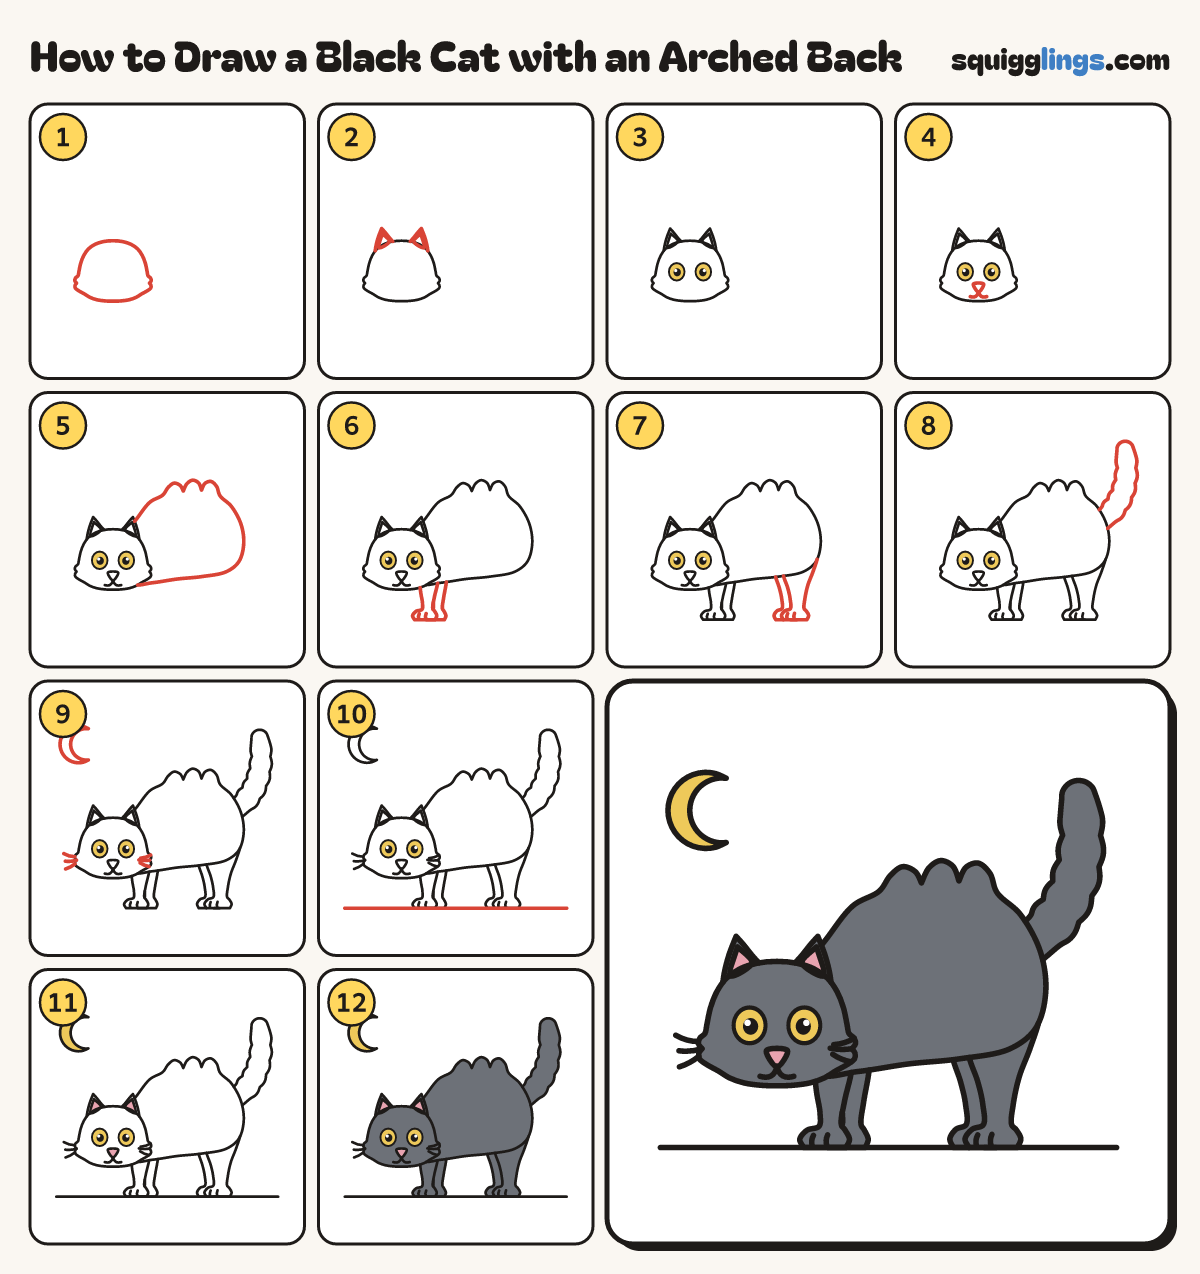
Each picture adds one red line. Draw that line, then scroll to the next picture. Rub out any dashed helper lines at the end. First up: the head.
Step 1: The head
Low on the left of your paper, draw a sideways egg head. Give each cheek 2 soft fur tufts.
Tip The head is small and low; the body rises up behind it.
Step 2: Pointy ears
Start on the head's left. Draw a pointy ear, stopping on the head. Add a triangle inside. Same right.
Step 3: Two big eyes
In the middle of the head, draw 2 big eyes with round pupils. Colour them yellow, leaving a white shine.
Step 4: Nose and W smile
Below the eyes, draw an upside-down triangle nose. From its point, draw a W smile out to each side.
Step 5: Arched back
From behind the head, draw an arch with 3 soft fur bumps, round the rump and back under the tummy.
Step 6: Front legs
Under the chin, draw a leg narrowing to a round paw and back up. Add a far leg peeking behind.
Step 7: Back legs
Under the rump, draw a leg narrowing to a round paw and back up. Add the far leg peeking out.
Step 8: Puffed-up tail
Start on the rump. Draw a fat tail with soft bumpy sides, up to a round tip and back down.
Tip Fat and fluffy, like a bottle brush.
Step 9: Whiskers and moon
Draw 3 whiskers out of the left cheek, 3 inside the right cheek, and a crescent moon top left.
Step 10: The ground
Draw a ground line under the paws, from left to right under the whole cat.
Step 11: Pink and yellow
Colour the inside of each ear and the nose pink, and the moon yellow.
Step 12: Black fur
Colour the cat black around the eyes, nose and pink ears. Your black cat is done!
Your finished drawing
Follow the steps above and this is where you end up: a black cat with an arched back, drawn by you.
Every step in one picture