Watch it draw itself · tap to replay
How to Draw a Sweater
Draw a sweater in 12 easy steps, about 9 minutes. Free, with a printable worksheet.
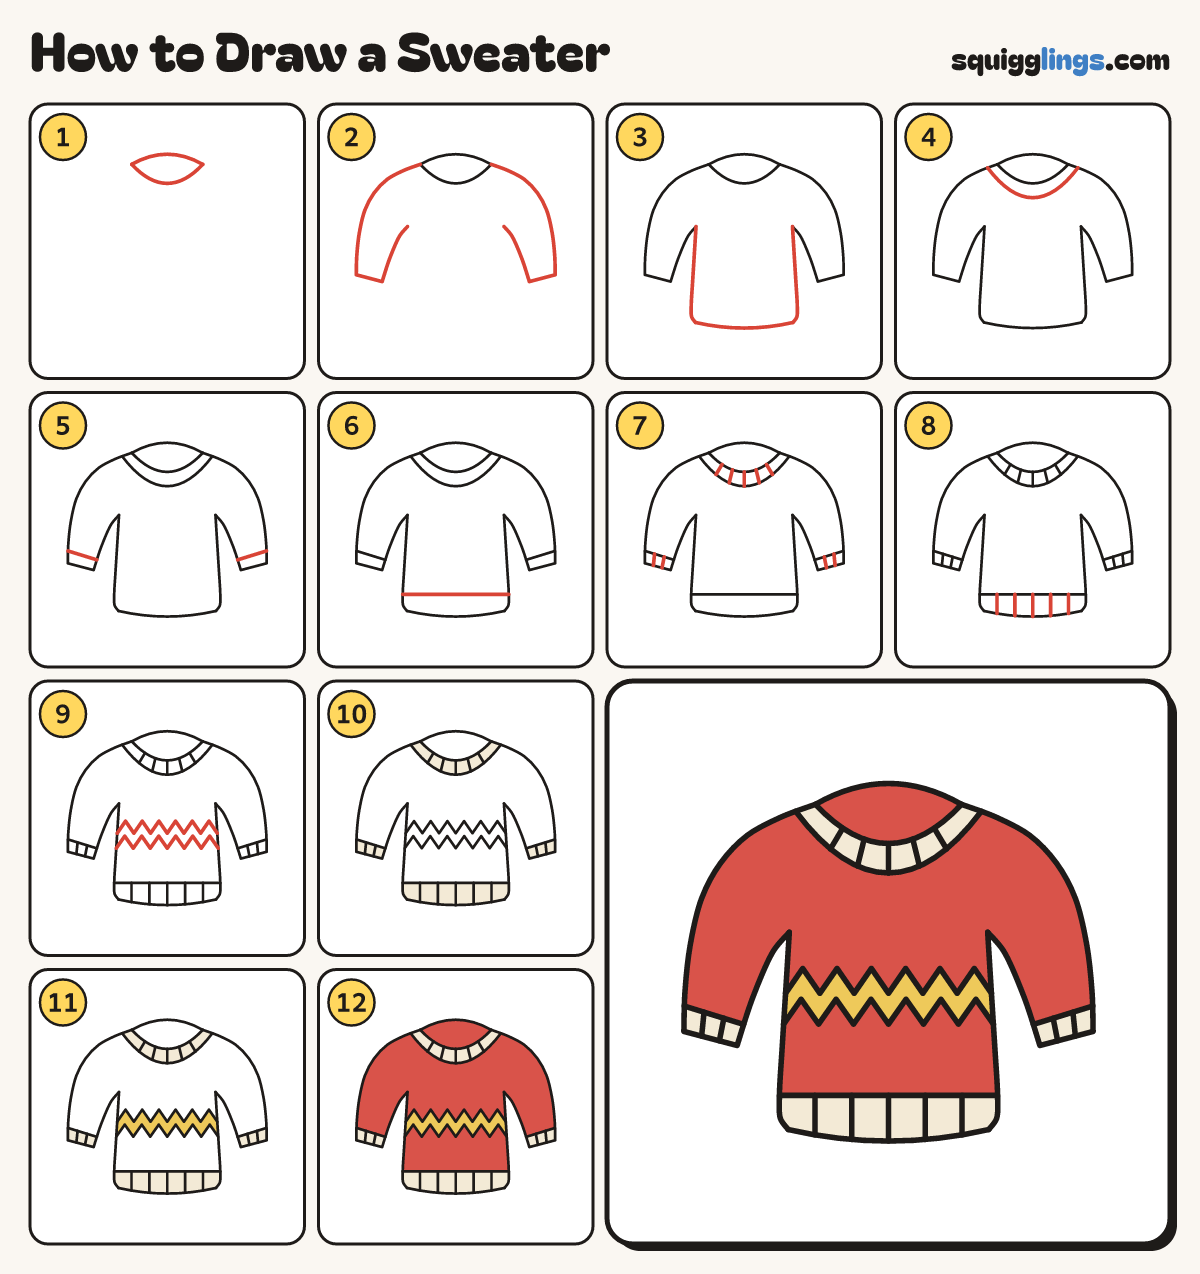
Each picture adds one red line. Draw that line, then scroll to the next picture. Rub out any dashed helper lines at the end. First up: the neck hole.
Step 1: The neck hole
Draw a rainbow 3 fingers wide. From its left end, draw a U dipping down to its right end.
Step 2: Long sleeves
From each end of the rainbow, slope over a shoulder, down a long sleeve, and back up to the armpit.
Tip Make each sleeve end flat and a little slanted.
Step 3: The body
From each armpit, draw a nearly straight side down to a round corner. Join the corners with a drooping hem.
Step 4: Neck band
Start on the left shoulder. Draw a bigger U under the neck hole, stopping on the right shoulder.
Step 5: Cuff bands
On each sleeve, a finger above the cuff, draw a slanted line from the outside edge across to the inside.
Step 6: Hem band
Above the hem, start on the left side and draw a straight line across, stopping on the right side.
Step 7: Neck and cuff ribs
Draw 5 short lines across the neck band, and 2 short lines across each cuff.
Tip Ribs are the stretchy knit lines that hug your neck and wrists.
Step 8: Hem ribs
Draw 5 short lines down across the hem band, evenly spaced.
Step 9: Zigzag stripe
Start on the left side. Draw a zigzag across the chest to the right side, then a matching one below.
Tip Count 6 points on each zigzag so the two match.
Step 10: Cream bands
Go over your lines. Colour the neck band, the 2 cuffs and the hem band cream.
Step 11: Yellow stripe
Colour the zigzag stripe yellow, between the 2 zigzag lines.
Step 12: Red sweater
Colour the rest of the sweater red, around the cream bands and the yellow stripe. Your sweater is done!
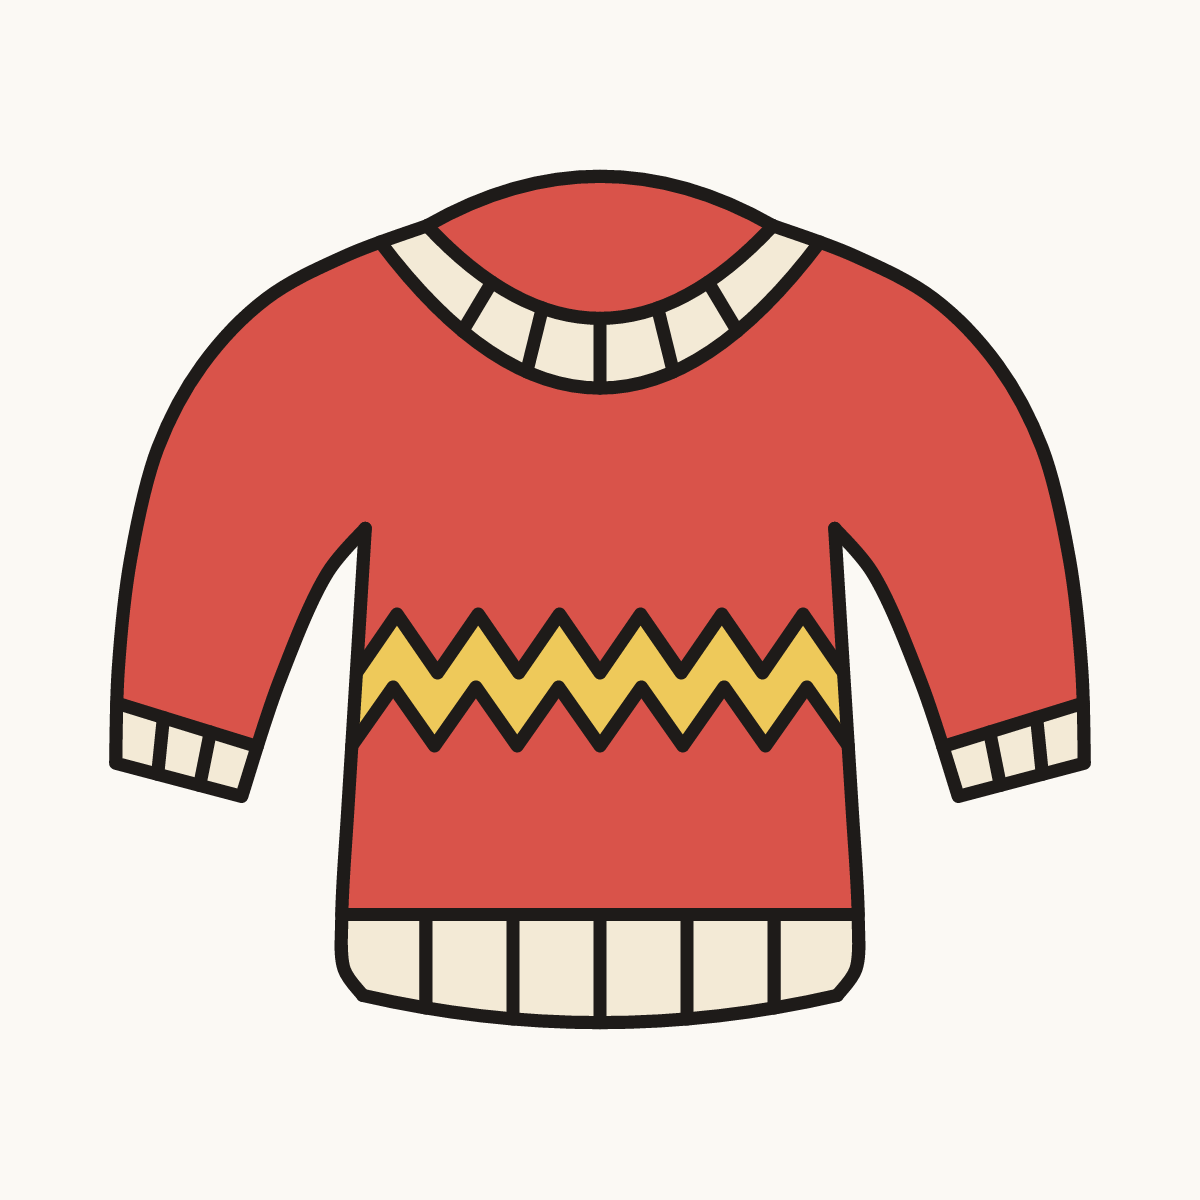
Your finished drawing
Follow the steps above and this is where you end up: a sweater, drawn by you.
Every step in one picture