Watch it draw itself · tap to replay
How to Draw a Chandelier
Draw a chandelier in 11 easy steps, about 8 minutes. Free, with a printable worksheet.
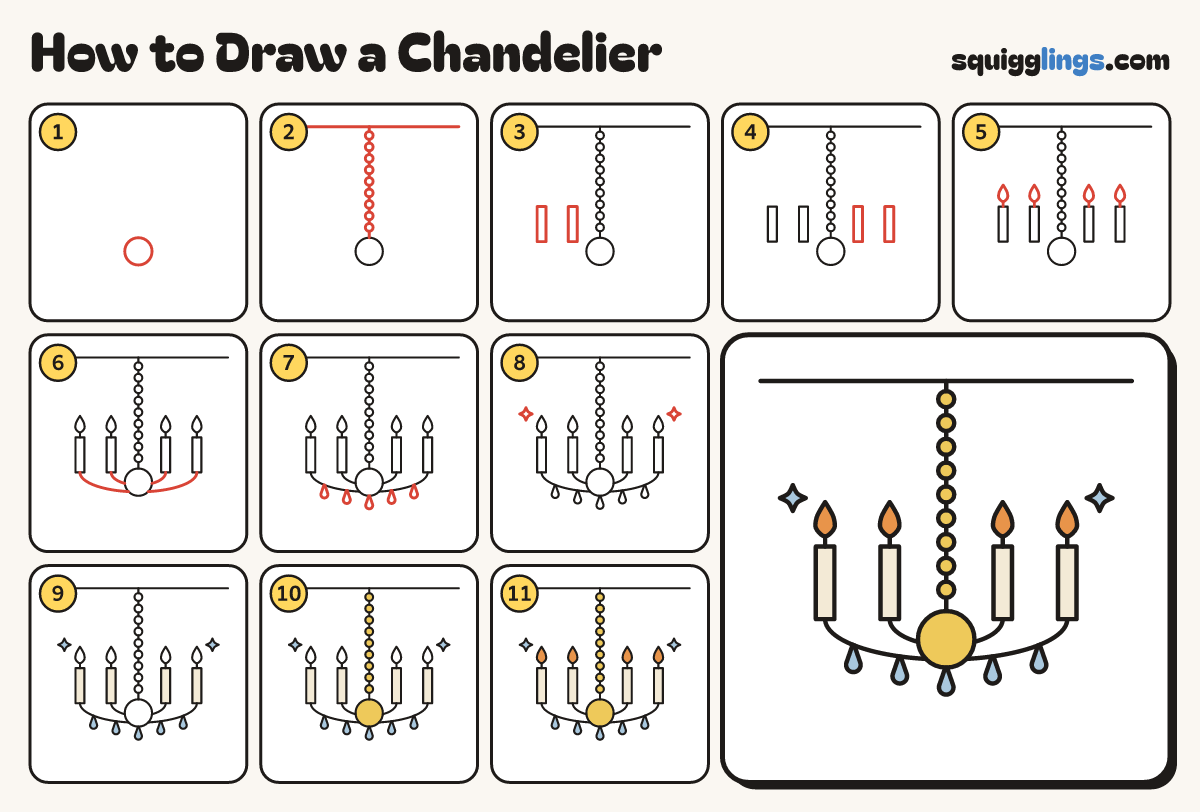
Each picture adds one red line. Draw that line, then scroll to the next picture. Rub out any dashed helper lines at the end. First up: the hub.
Step 1: The hub
Below the middle of your paper draw a round ball, as big as a coin. Everything hangs from it.
Tip Leave lots of room above it for the chain and candles.
Step 2: Chain and ceiling
Draw a ceiling line across the top. From it, draw a chain of tiny rings down to the hub.
Step 3: Two left candles
Up and to the left of the hub draw 2 tall thin candles, a finger wide, with a gap between.
Step 4: Two right candles
Do the same on the right: 2 candles to match the left side.
Step 5: Four flames
On top of every candle draw a short wick and a round teardrop flame, point up.
Step 6: The arms
From each outer candle swoop a big curve down into the hub. Curve a small one from each inner candle.
Tip Both Us go behind the hub, so you only draw their sides.
Step 7: Crystal drops
Hang 4 crystal drops under the big curves, point on top, 2 each side. Hang 1 more under the hub.
Step 8: Sparkles
Draw a sparkle star up on each side of the candles.
Step 9: Cream candles, blue crystals
Go over your lines. Colour the 4 candles cream, and the drops and sparkles light sky blue.
Step 10: Gold hub and chain
Colour the hub and the chain rings yellow gold.
Step 11: Orange flames
Colour the 4 flames orange. Your chandelier is glowing!
Your finished drawing
Follow the steps above and this is where you end up: a chandelier, drawn by you.
Every step in one picture