Watch it draw itself · tap to replay
How to Draw Doctor Tools
Draw doctor tools in 14 easy steps, about 11 minutes. Free, with a printable worksheet.
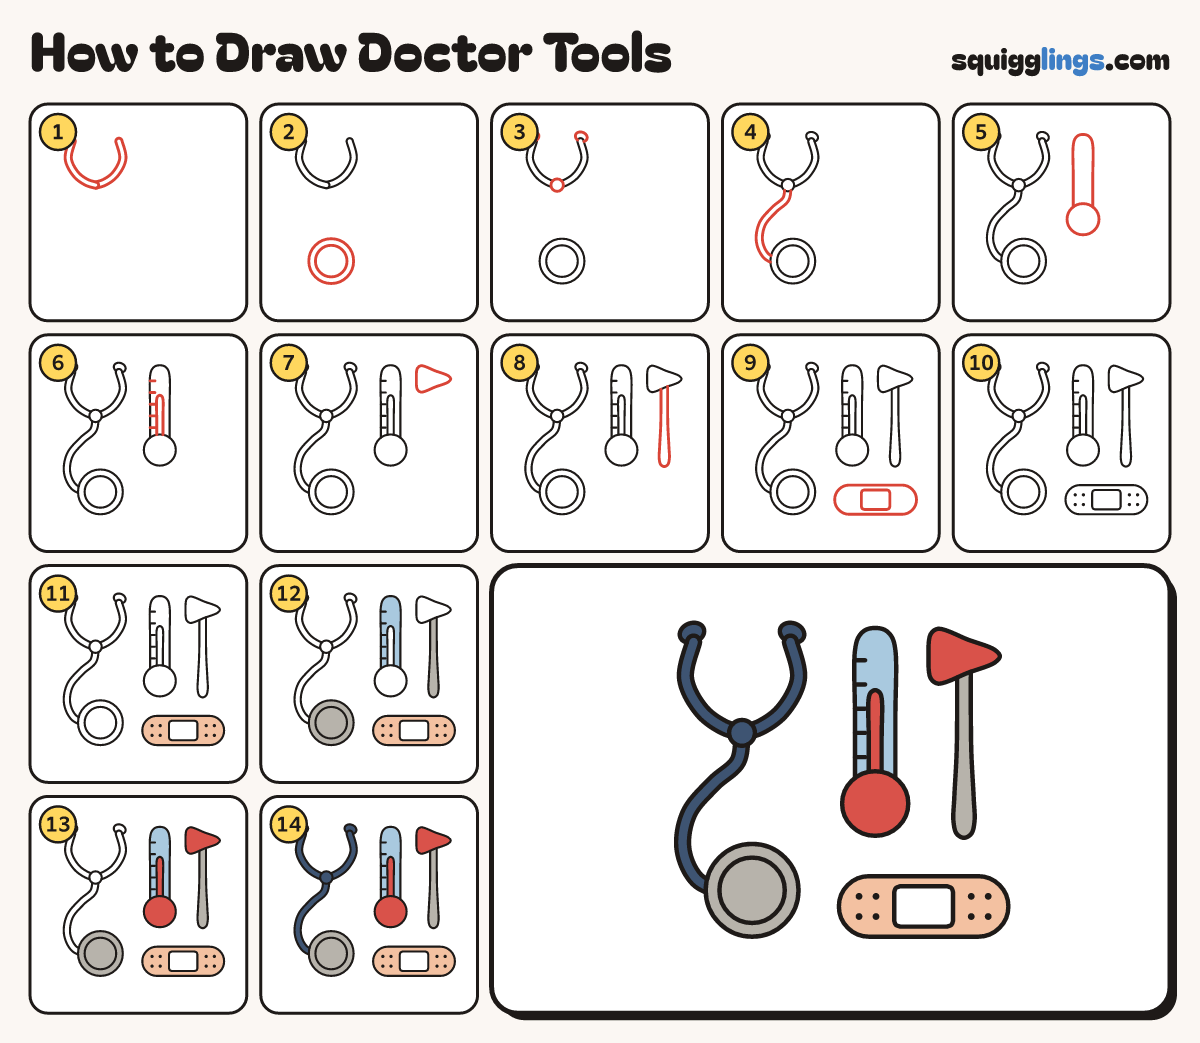
Each picture adds one red line. Draw that line, then scroll to the next picture. Rub out any dashed helper lines at the end. First up: two ear tubes.
Step 1: Two ear tubes
On the left, start 2 tubes near the top. Curve them in to meet in the middle, like a U.
Tip Keep the stethoscope on the left half of your paper.
Step 2: The chest piece
Lower down, under the U, draw a big circle with a ring inside it.
Step 3: Ear tips and join
Draw a small tilted oval on top of each tube, and a small circle where the tubes meet.
Step 4: The long tube
Start at the join. Draw 1 thick tube looping down to the left and stop at the chest piece.
Step 5: Thermometer
Draw a round bulb on the right. Start on it, draw a tall tube up and over, stop on it.
Step 6: Column and ticks
Start on the bulb, draw a thin column up inside the tube, and stop on the bulb. Add 5 ticks.
Step 7: Hammer head
Beside the thermometer draw a triangle on its side with soft corners, pointing right.
Tip This little hammer gently taps your knee.
Step 8: Hammer handle
Start under the head. Draw a long handle down, round the bottom, and stop under the head again.
Step 9: A plaster
Under them draw a long strip with round ends. Draw a square pad in its middle.
Step 10: Tiny holes
On each end of the plaster draw 4 tiny dots in 2 neat rows.
Step 11: Peach plaster
Colour the plaster strip peach, going around the pad. Leave the pad white.
Step 12: Sky glass, grey metal
Colour the glass tube sky blue, around the column. Colour the chest piece and hammer handle grey.
Step 13: Red parts
Colour the thermometer bulb and column red. Colour the hammer head red too.
Step 14: Navy tubes
Last, colour the tubes, ear tips and join navy blue. Your doctor tools are ready!
Your finished drawing
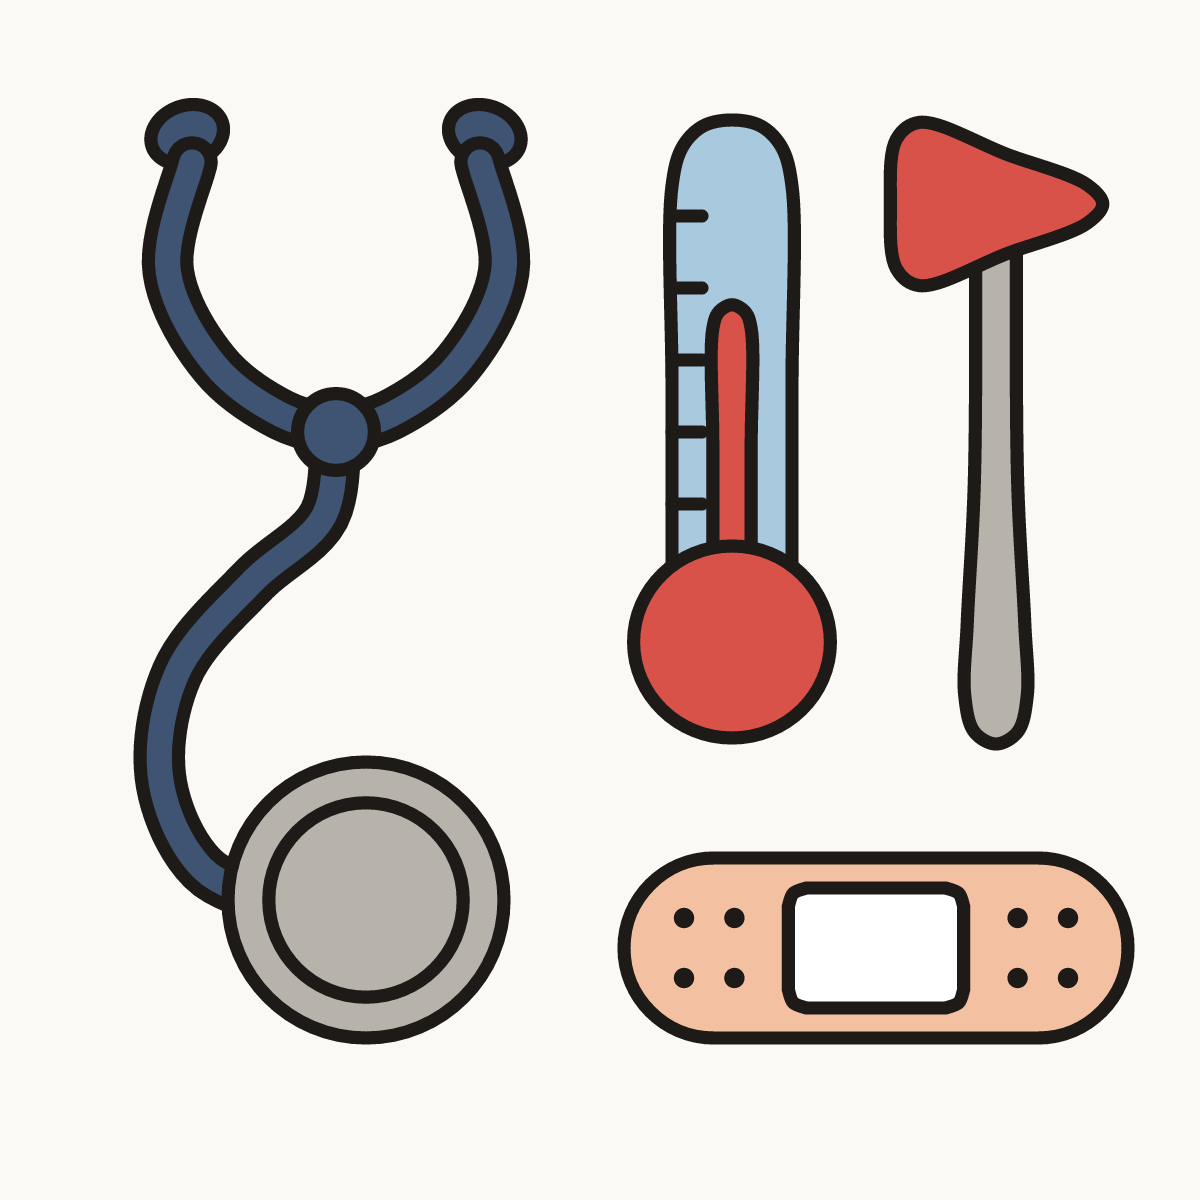
Follow the steps above and this is where you end up: doctor tools, drawn by you.
Every step in one picture