Watch it draw itself · tap to replay
How to Draw a Subway Entrance
Draw a subway entrance in 13 easy steps, about 10 minutes. Free, with a printable worksheet.
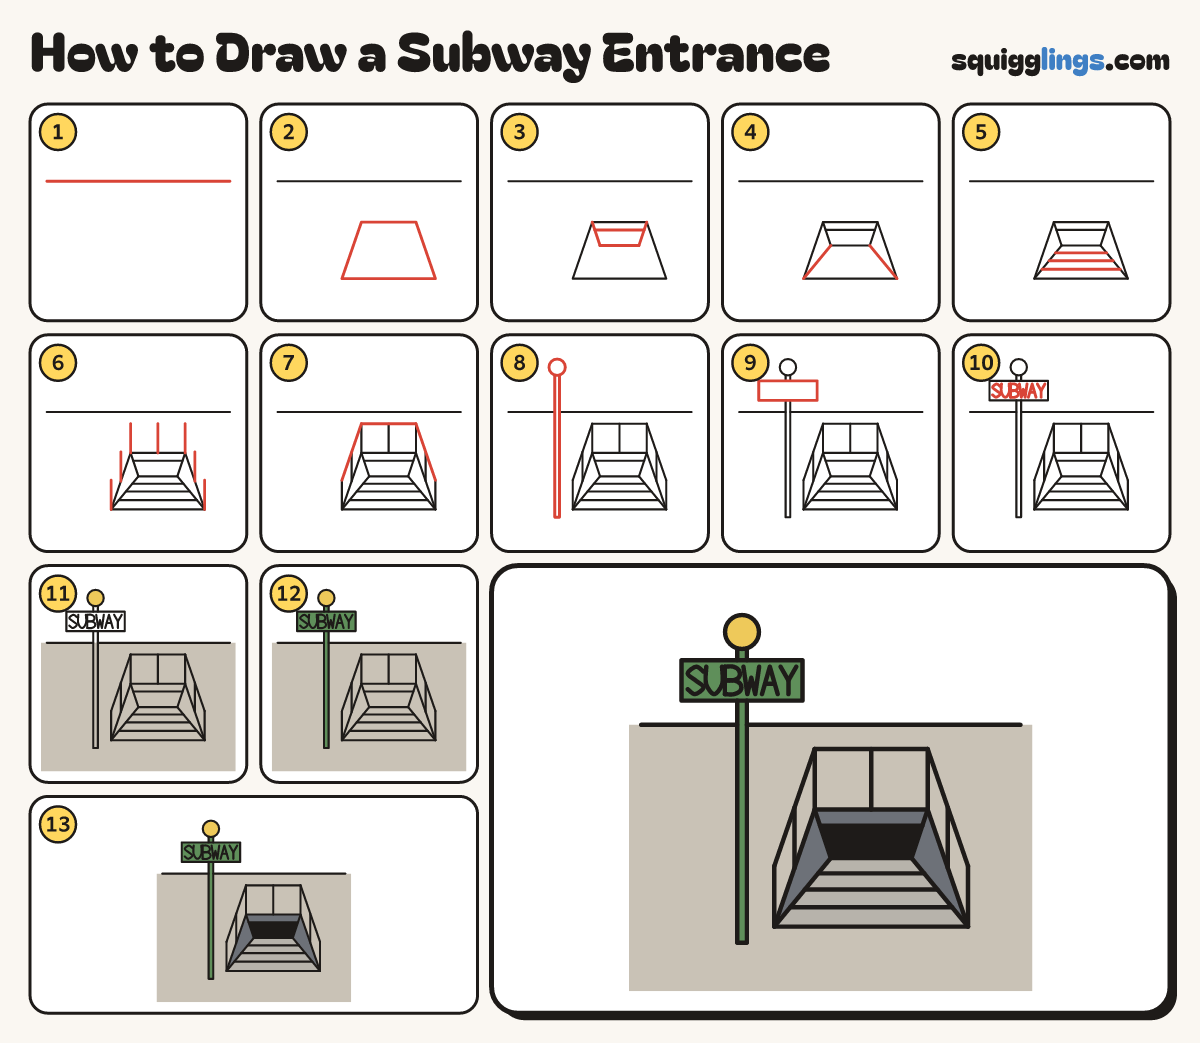
Each picture adds one red line. Draw that line, then scroll to the next picture. Rub out any dashed helper lines at the end. First up: the pavement.
Step 1: The pavement
A third of the way down, start at the left edge and draw a line across to the right edge.
Step 2: The opening
In the pavement draw the hole: a long flat front, 2 sides leaning in, and a shorter back.
Tip The hole is flat on the ground, so the back edge looks shorter than the front.
Step 3: The tunnel
From each back corner draw a short line down. Join them at the bottom and again near the top.
Step 4: The side walls
From each bottom corner of the tunnel, draw a slanted line down to the front corner of the hole.
Step 5: The steps
Between the slanted lines draw 3 lines across, getting shorter and closer together toward the back.
Step 6: Posts
From the hole's edge draw short posts up to the same length: 3 each side and 1 at the back.
Step 7: Rails
Start at the front posts and join the post tops with a rail along each side and across the back.
Step 8: The lamp post
In front of the hole on the left, draw a tall thin post with a round globe on top.
Step 9: The sign
Just under the globe draw a wide box across the post for the sign.
Step 10: SUBWAY
Write SUBWAY inside the sign in big block letters.
Step 11: Yellow globe, grey pavement
Colour the globe yellow. Colour the pavement light grey, going around the hole and the post.
Step 12: Green sign and post
Colour the sign and the post green, leaving the letters clear.
Step 13: Dark stairs
Colour the steps grey, the walls dark grey and the tunnel black. Go over your lines. Done!
Your finished drawing
Follow the steps above and this is where you end up: a subway entrance, drawn by you.
Every step in one picture