Watch it draw itself · tap to replay
How to Draw a Striped Hyena
Draw a striped hyena in 11 easy steps, about 8 minutes. Free, with a printable worksheet.
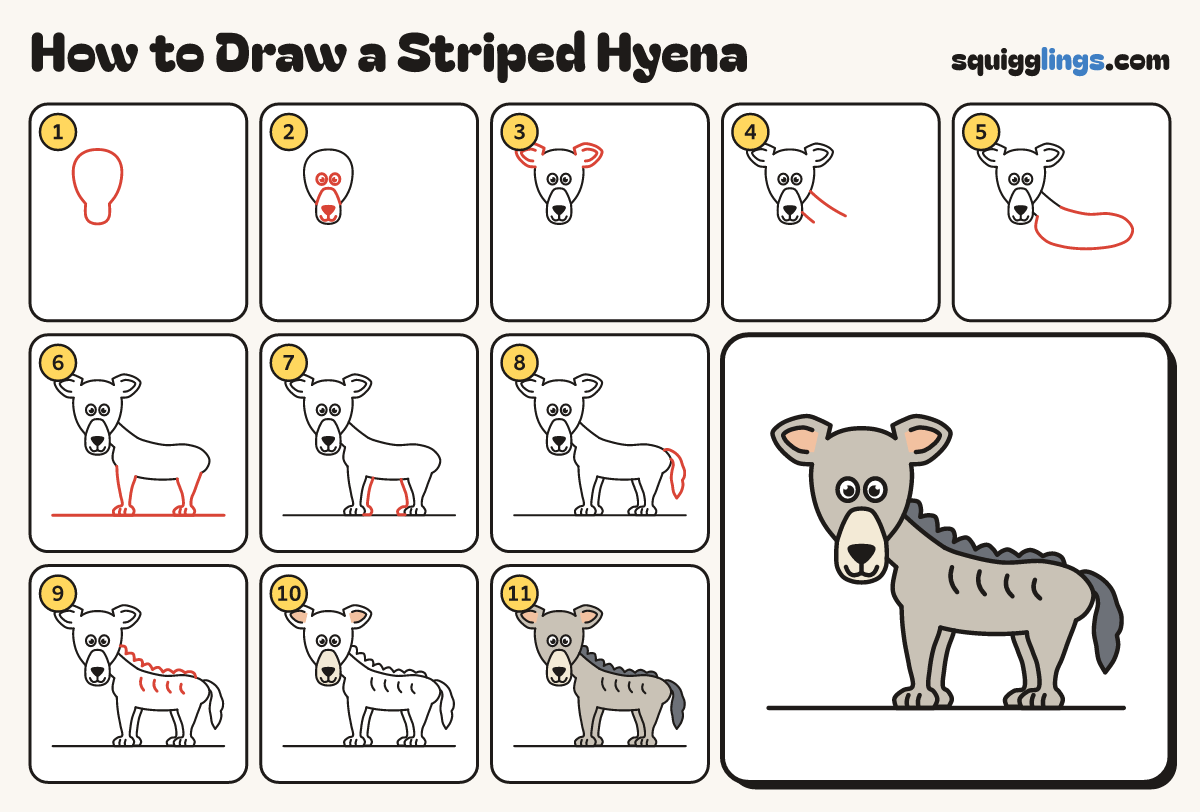
Each picture adds one red line. Draw that line, then scroll to the next picture. Rub out any dashed helper lines at the end. First up: the head.
Step 1: The head
Near the top left draw a big head that narrows into a long snout.
Tip A big head is what makes it cute.
Step 2: Eyes and snout
Draw 2 big eyes. From one snout corner draw an arch across to the other. Add a nose and smile.
Tip Give the eyes black dots with white shines.
Step 3: The ears
On each top corner of the head draw a soft triangle ear leaning out, with a smaller triangle inside.
Step 4: The neck
Start behind the head, draw the neck down, stop at the back. Start under the chin, draw to the chest.
Step 5: The body
From the neck draw a big soft bean body: a long back, a round bottom, a tummy, up the chest.
Step 6: 2 legs
Draw a long ground line. Draw a front leg from the chest to a paw, and a bent back leg.
Tip Legs are wide at the top and narrow at the ankle.
Step 7: The far legs
Just behind the front leg draw another leg peeking out. Do the same in front of the back leg.
Step 8: The tail
From the top corner of the bottom, draw a bushy tufty tail down to a point and back.
Step 9: Stripes and crest
Draw 4 stripes down the side. From behind the head, draw a bumpy crest along the back to the tail.
Step 10: Colour the snout
Go over your lines. Colour the snout cream and the ear insides peach. Leave the eyes white.
Step 11: Colour the fur
Colour the hyena stone grey around the snout and ears, then the crest and tail slate grey.
Your finished drawing
Follow the steps above and this is where you end up: a striped hyena, drawn by you.
Every step in one picture