Watch it draw itself · tap to replay
How to Draw a Street Sign
Draw a street sign in 10 easy steps, about 8 minutes. Free, with a printable worksheet.
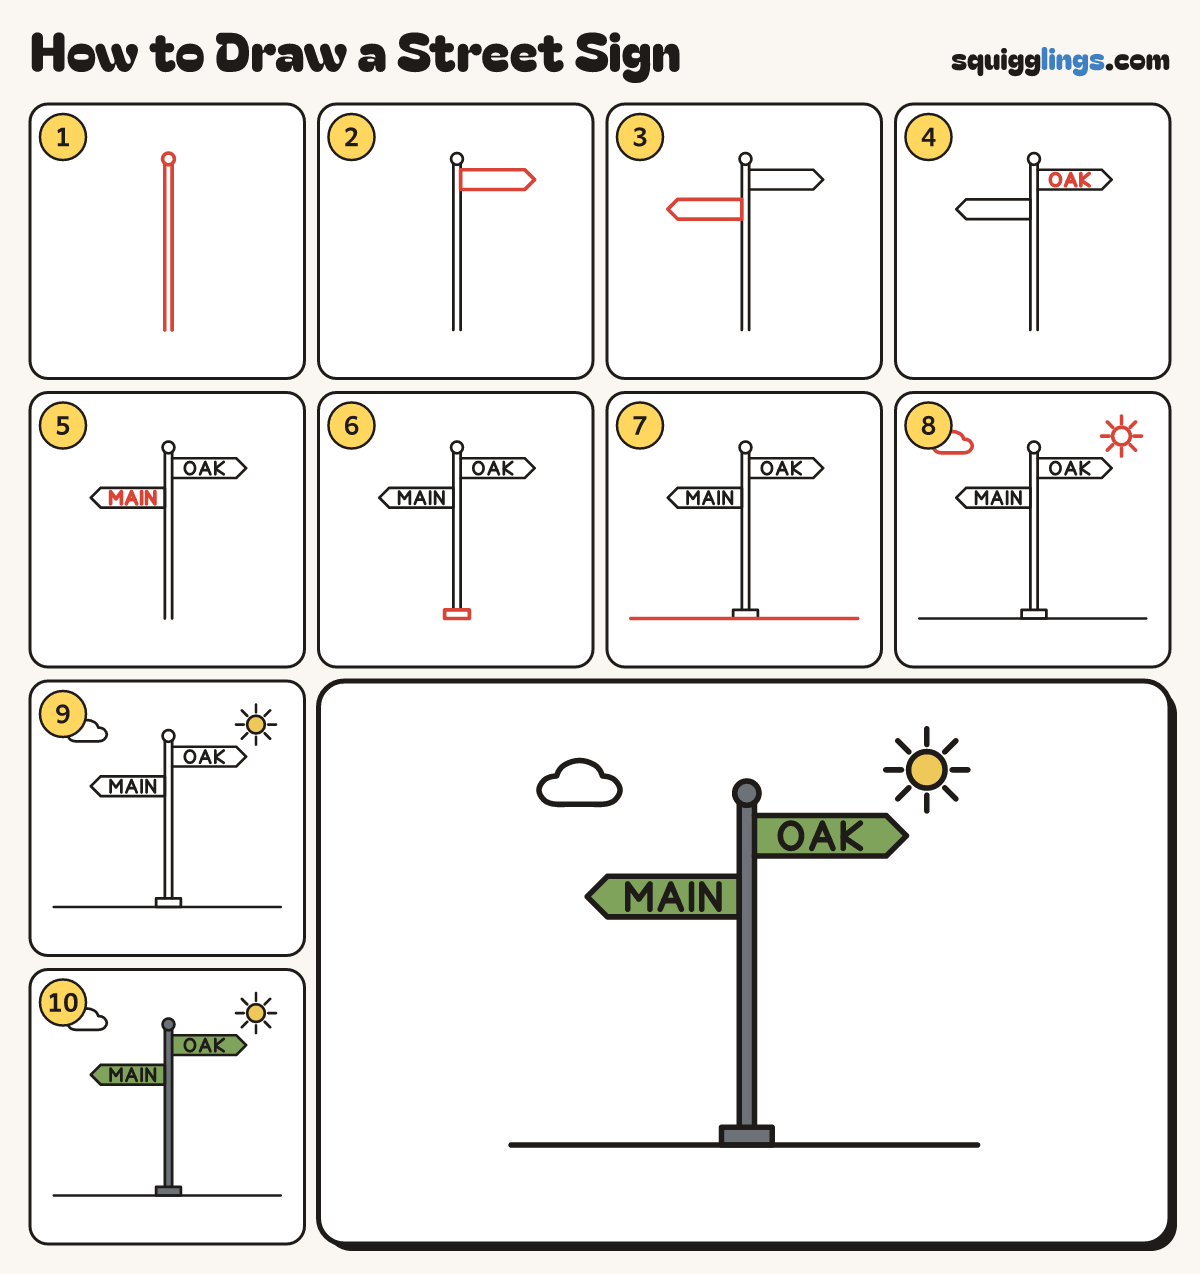
Each picture adds one red line. Draw that line, then scroll to the next picture. Rub out any dashed helper lines at the end. First up: tall pole.
Step 1: Tall pole
Draw a skinny pole from low down up to near the top. Add a round knob on top.
Tip As wide as your finger and taller than everything else.
Step 2: Top blade
Just under the knob draw a long flat blade pointing right from the pole, like a wide arrow.
Step 3: Bottom blade
A little lower draw a second blade the same size, pointing left from the pole, like a wide arrow.
Tip Street signs have one blade for each road, pointing different ways.
Step 4: OAK on top
On the top blade write OAK with space all round: a round O, a pointy A, a kicking K.
Step 5: MAIN on bottom
On the bottom blade write MAIN with space all round: M, A, I and N, clear of the pole.
Step 6: The base
Over the bottom end of the pole, draw a low wide box for the base.
Step 7: Ground line
Draw a long flat ground line under the base, from near the left edge to near the right edge.
Step 8: Cloud and sun
Draw a small puffy cloud top left and a small sun with 8 short rays top right.
Step 9: Yellow sun
Go over your lines. Colour the sun yellow and leave the cloud white.
Step 10: Green blades, slate pole
Colour the blades green around the letters, then the pole, knob and base slate grey, and you are done!
Your finished drawing
Follow the steps above and this is where you end up: a street sign, drawn by you.
Every step in one picture