Watch it draw itself · tap to replay
How to Draw a Staghorn Fern
Draw a staghorn fern in 10 easy steps, about 8 minutes. Free, with a printable worksheet.
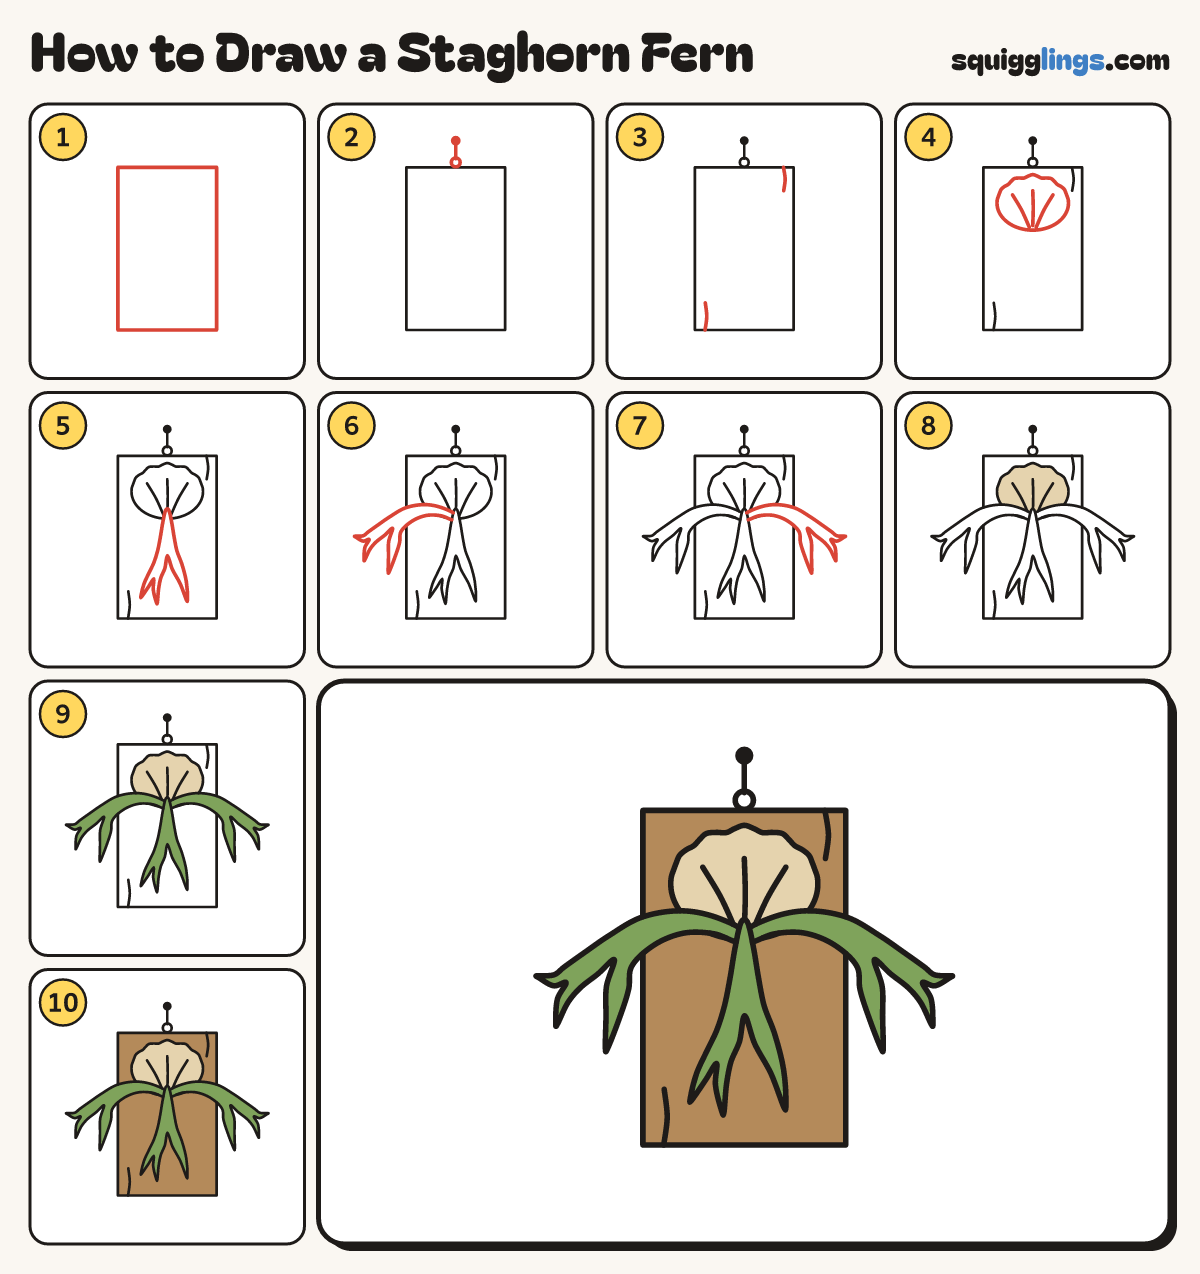
Each picture adds one red line. Draw that line, then scroll to the next picture. Rub out any dashed helper lines at the end. First up: the board.
Step 1: The board
In the middle of your paper draw a tall wooden board standing up, taller than it is wide.
Tip A staghorn fern grows on a board; its fronds fork like a stag's antlers.
Step 2: Hook and nail
On top of the board draw a tiny hook, then a short string up to a black nail dot.
Step 3: Wood grain
Draw 2 short wavy grain lines, one down from the top right and one up from the bottom left.
Step 4: The shield
High on the board draw a wide oval shield leaf with a wavy top, and 3 veins fanning up.
Step 5: The middle antler
From low in the middle of the shield draw a frond hanging down, widening and splitting into 3 antler tips.
Step 6: Left antler
From the same spot draw a frond arching out left past the board, drooping and splitting into 3 tips.
Step 7: Right antler
From the same spot draw a frond arching out right past the board, drooping and splitting into 3 tips.
Step 8: Pale shield
Go over your lines, then colour the shield leaf a pale sand colour, going around the fronds.
Step 9: Green fronds
Colour the 3 antler fronds green.
Step 10: Wooden board
Colour the board wood brown, going around the fern, and your staghorn fern is done!
Your finished drawing
Follow the steps above and this is where you end up: a staghorn fern, drawn by you.
Every step in one picture