Watch it draw itself · tap to replay
How to Draw a Flower Bed
Draw a flower bed in 12 easy steps, about 9 minutes. Free, with a printable worksheet.
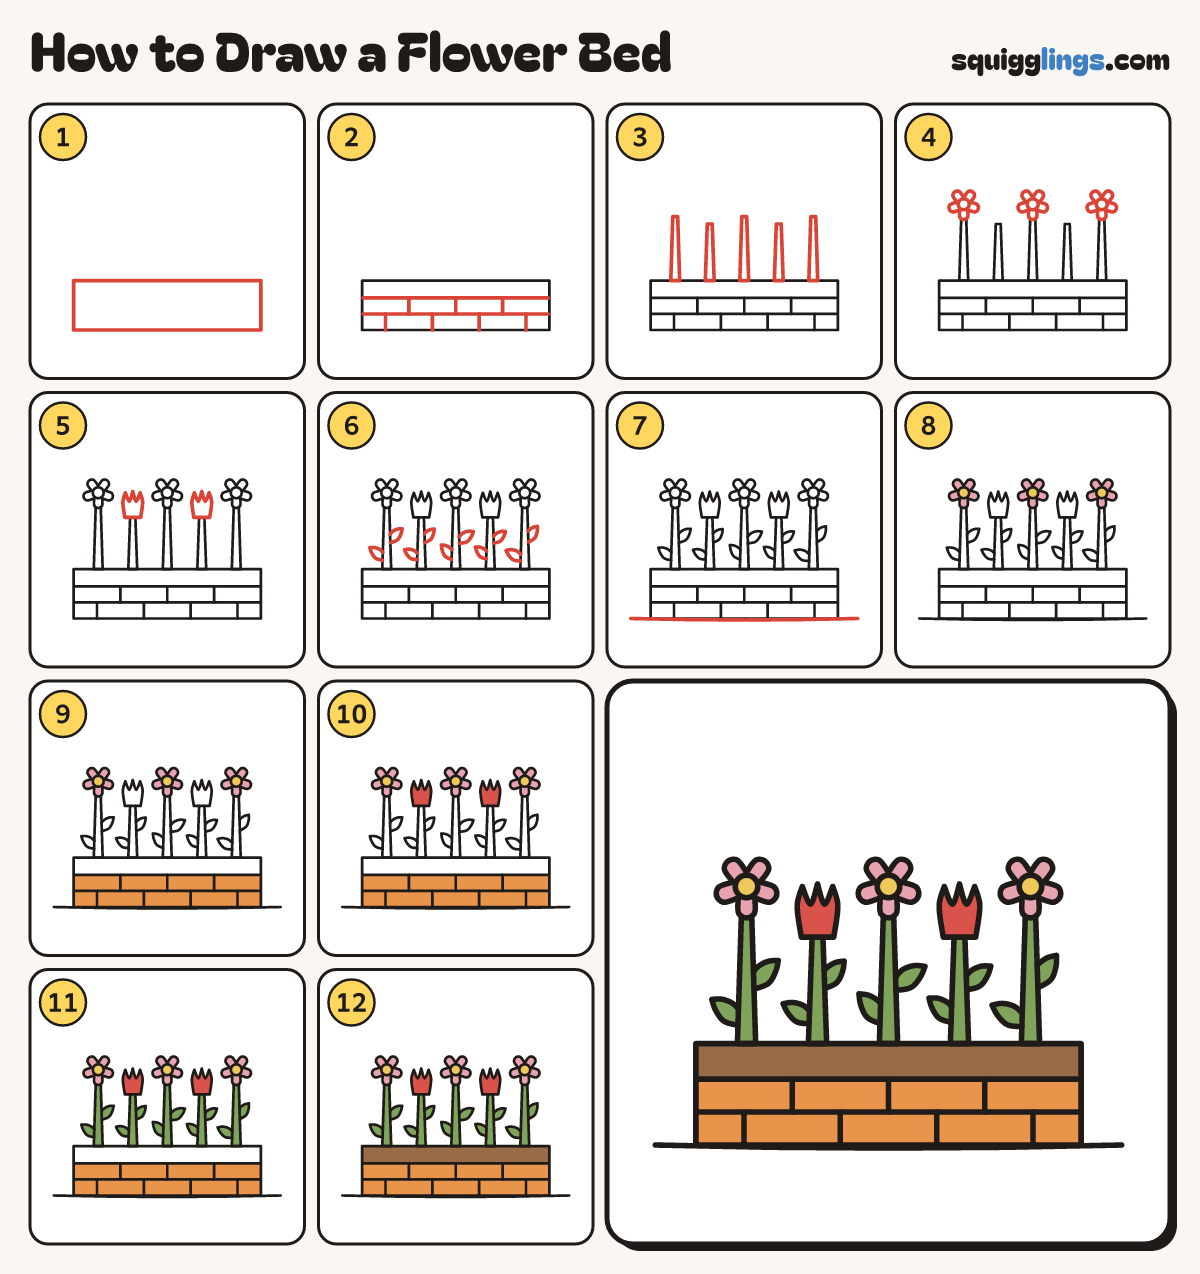
Each picture adds one red line. Draw that line, then scroll to the next picture. Rub out any dashed helper lines at the end. First up: the bed.
Step 1: The bed
Low on your paper draw a long low box right across the page.
Tip A flower bed is a strip of soil with flowers in a row.
Step 2: Soil and bricks
Near the top draw a soil line side to side. Below it draw 2 rows of bricks, like a wall.
Tip Put the short lines of the bottom row between the ones above.
Step 3: Five stems
From the soil draw 5 stems up, thinner at the top. Make the 1st, 3rd and 5th taller.
Step 4: Three round flowers
On top of the 1st, 3rd and 5th stems draw a ring of 5 round petals round a little circle.
Step 5: Two tulips
On top of the 2nd and 4th stems draw a tulip cup: a U with 3 points on top.
Step 6: Leaves
On each stem draw a pointed leaf low on the left and another higher up on the right.
Tip Start each leaf thin at the stem, fat in the middle and pointy at the end.
Step 7: The ground
Start near the left edge. Draw a soft ground line under the bed, stopping near the right edge.
Step 8: Pink flowers
Colour the 3 round flowers pink and their middles yellow.
Step 9: Orange bricks
Colour the bricks orange.
Step 10: Red tulips
Colour both tulips red.
Step 11: Green stems and leaves
Colour all the stems and leaves leaf green.
Step 12: Brown soil
Colour the soil strip brown. Go over your lines and your flower bed is done!
Your finished drawing
Follow the steps above and this is where you end up: a flower bed, drawn by you.
Every step in one picture