Watch it draw itself · tap to replay
How to Draw the Space Needle
Draw the Space Needle in 11 easy steps, about 8 minutes. Free, with a printable worksheet.
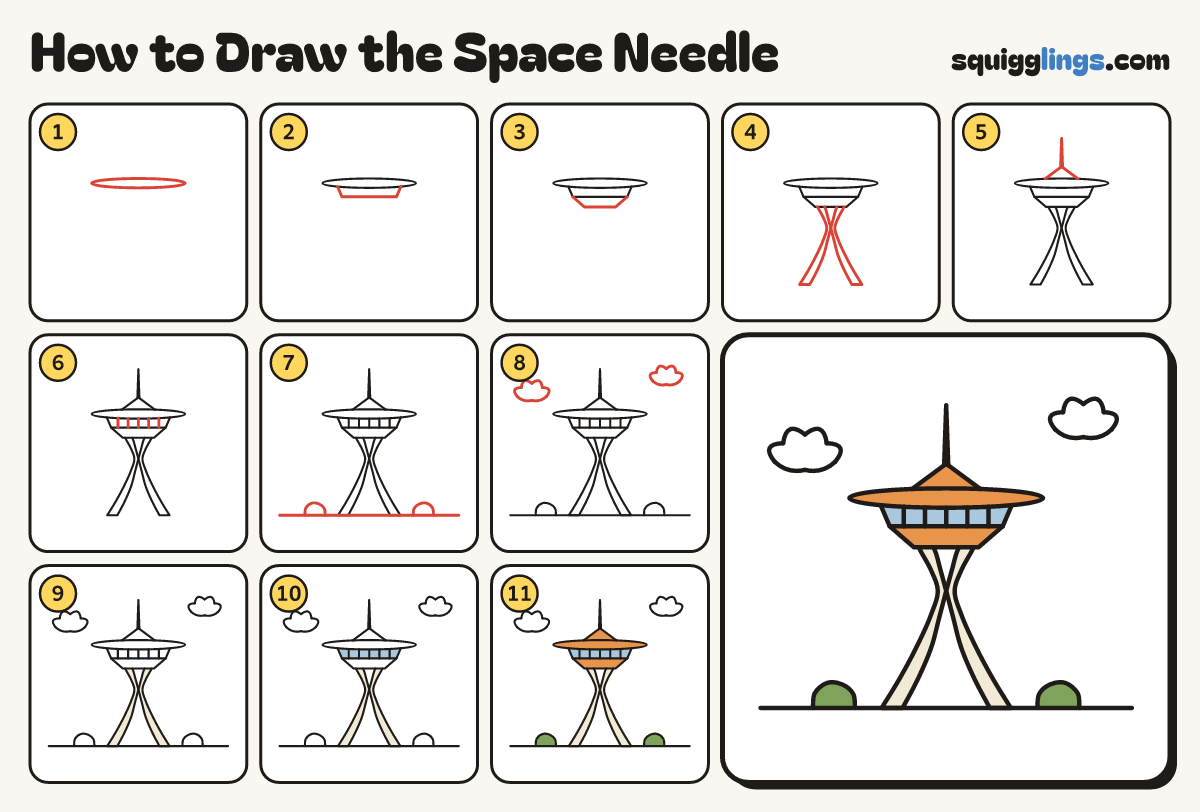
Each picture adds one red line. Draw that line, then scroll to the next picture. Rub out any dashed helper lines at the end. First up: the saucer.
Step 1: The saucer
Near the top of the page, draw a long flat oval, like a plate seen from the side.
Step 2: Window band
Start on the saucer's bottom. Draw a short band down, across and back up to it, narrower at the bottom.
Step 3: The skirt
From the band's bottom corners, slope 2 lines in and down, then join them with a short flat line.
Step 4: Hourglass legs
From under the skirt, draw 2 thin legs, pinched together high up and spreading wide to the ground.
Step 5: Roof and spire
From the saucer, draw a low pointed roof, back down to it. Add a tall thin spire on top.
Step 6: Windows
Draw 5 short lines down the band, from the saucer to the skirt, for the windows.
Step 7: The ground
Draw the ground line across under the legs. Add a bush each side, starting and stopping on the ground.
Step 8: Clouds
Draw a puffy cloud each side of the tower: low on the left, high on the right.
Step 9: Cream legs
Colour both legs cream. Leave the clouds white.
Step 10: Sky windows
Colour the window band sky blue.
Step 11: Orange top, green bushes
Colour the saucer, roof and skirt orange and the bushes green. Go over your lines and you're done!
Your finished drawing
Follow the steps above and this is where you end up: the Space Needle, drawn by you.
Every step in one picture