Watch it draw itself · tap to replay
How to Draw an Emerald City
Draw an emerald city in 13 easy steps, about 10 minutes. Free, with a printable worksheet.
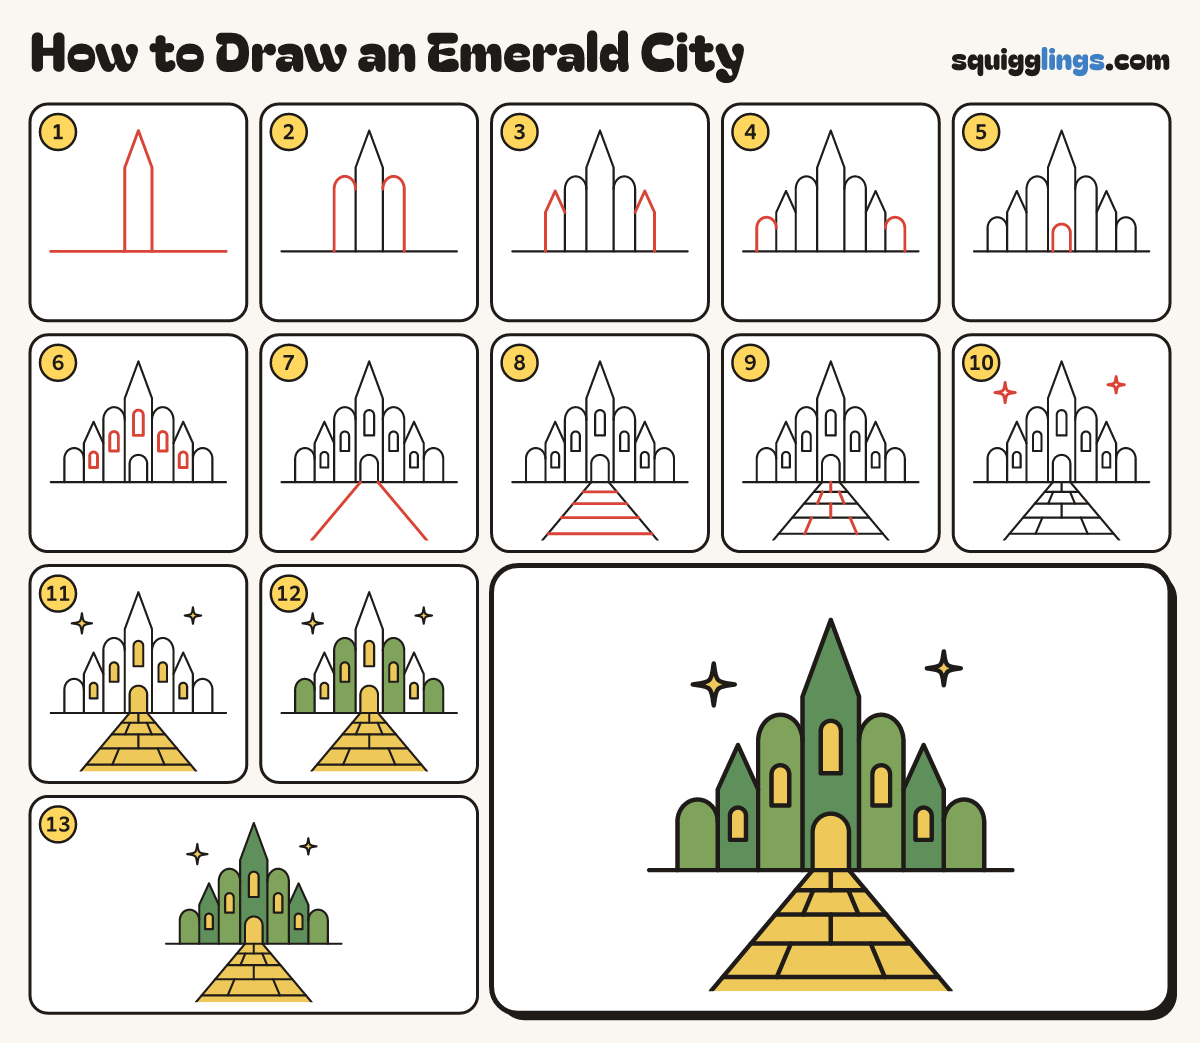
Each picture adds one red line. Draw that line, then scroll to the next picture. Rub out any dashed helper lines at the end. First up: the tallest tower.
Step 1: The tallest tower
Draw a ground line. Start on it, draw a tall thin tower with a pointed top, and stop on it.
Tip Put the tower in the middle, and leave room below the line for the road.
Step 2: Round-topped towers
Each side, start on the ground. Draw a shorter tower with a round top, stopping on the tall tower.
Tip A round top is an upside-down U.
Step 3: Pointed towers
Each side, start on the ground. Draw a shorter tower with a pointed top, stopping on the tower beside it.
Step 4: Smallest towers
Each side, start on the ground. Draw the smallest tower with a round top, stopping on the tower beside it.
Tip The towers step down like stairs from the middle.
Step 5: The gate
At the foot of the tallest tower, start on the ground. Draw an arched gate and stop on the ground.
Step 6: Tall windows
Draw 5 windows with round tops: one above the gate and one in each of the 4 nearest towers.
Tip Keep each window in the middle of its tower.
Step 7: The road
Start at each foot of the gate. Draw a straight line slanting out, stopping at the bottom of your page.
Tip The road gets wider as it comes towards you.
Step 8: Brick rows
Draw 4 lines across the road, starting and stopping on its edges. Space them wider lower down.
Step 9: Brick ends
Between the rows draw short brick ends, starting and stopping on the rows: 1, then 2, then 1, then 2.
Tip Bricks never line up with the ones in the next row.
Step 10: Sparkles
In the sky draw 2 sparkles with 4 points each, a bigger one on the left.
Step 11: Yellow brick road
Colour the road, the gate, the 5 windows and the 2 sparkles yellow.
Step 12: Light green towers
Colour the 2 big round-topped towers and the 2 smallest towers light green, around the windows.
Step 13: Emerald green towers
Colour the 3 pointed towers dark green around the gate and windows. Go over your lines and you're done!
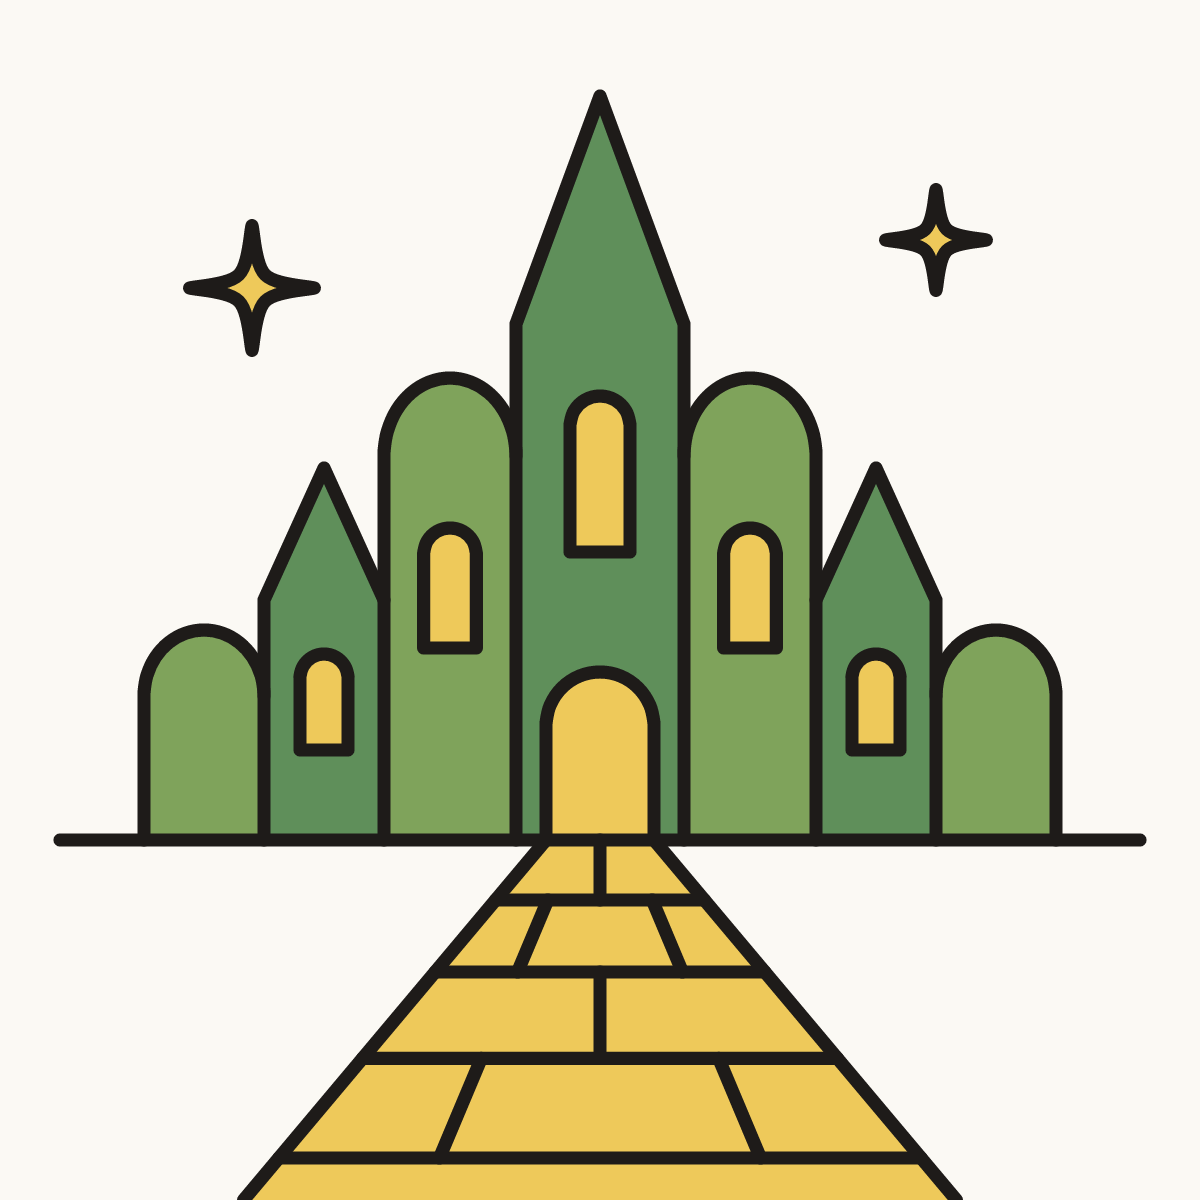
Your finished drawing
Follow the steps above and this is where you end up: an emerald city, drawn by you.
Every step in one picture