Watch it draw itself · tap to replay
How to Draw a Snow Day
Draw a snow day in 13 steps, about 10 minutes. Free, with a printable worksheet.
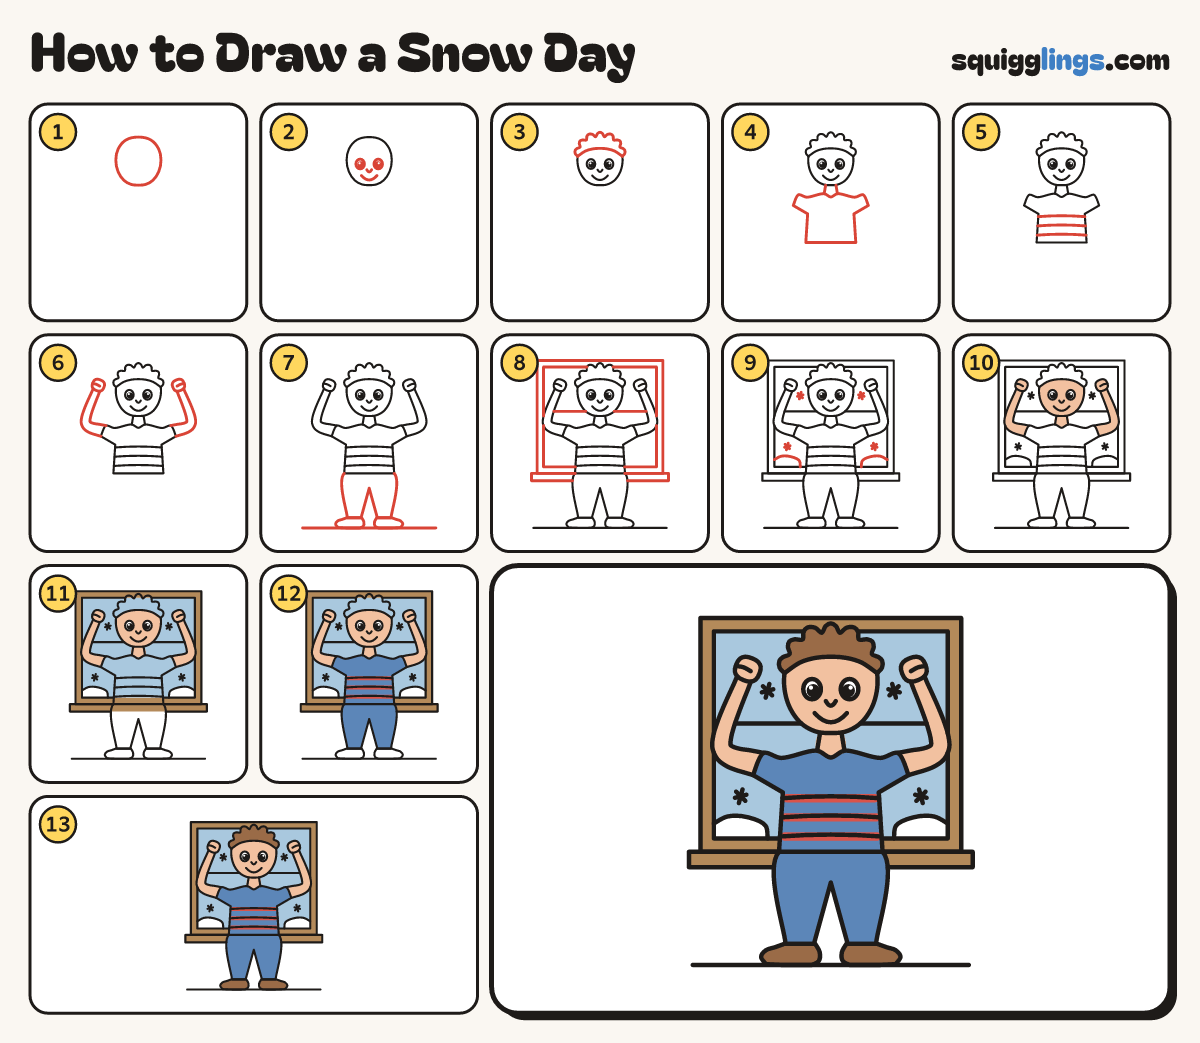
Each picture adds one red line. Draw that line, then scroll to the next picture. Rub out any dashed helper lines at the end. First up: the head.
Step 1: The head
Near the top, in the middle, draw an egg for the head, a little narrower at the chin.
Tip Leave room on both sides for the window and the raised arms.
Step 2: The face
Draw 2 small oval eyes with a dot and shine in each. Add a tiny nose and a big smile.
Step 3: Soft hair
Start on the left side. Draw soft tufts over the head and stop on the right. Add a curved hairline.
Step 4: Pyjama top
Add 2 neck lines. From the left one, draw the pyjama top with sleeves up, ending at the right one.
Step 5: Stripes
Draw 3 stripes across the pyjama top, each from the left side to the right side.
Step 6: Arms up with fists
From each sleeve, draw the arm out, then bend it straight up beside the head. End in a round fist.
Step 7: Trousers and slippers
Under the top, draw long trousers down to 2 slippers, toes pointing out. Draw a floor line under them.
Step 8: The window
Draw a big window behind the kid, from near the top down to the hips. Add a cross and sill.
Step 9: Snow outside
Through the glass, draw a soft snow drift in each bottom corner. Add 4 little star snowflakes around the kid.
Step 10: Peach skin
Colour the face, neck, arms and fists peach. Leave the eyes white.
Step 11: Wood window, sky glass
Colour the frame and sill wood brown, and the glass sky blue, going round the snow to keep it white.
Step 12: Red stripes, blue pyjamas
Colour the stripes red and the rest of the top and trousers blue.
Step 13: Brown hair and slippers
Colour the hair and the slippers brown. Your snow day is done!
Your finished drawing
Follow the steps above and this is where you end up: a snow day, drawn by you.
Every step in one picture