Watch it draw itself · tap to replay
How to Draw a Snapping Turtle
Draw a snapping turtle in 13 easy steps, about 10 minutes. Free, with a printable worksheet.
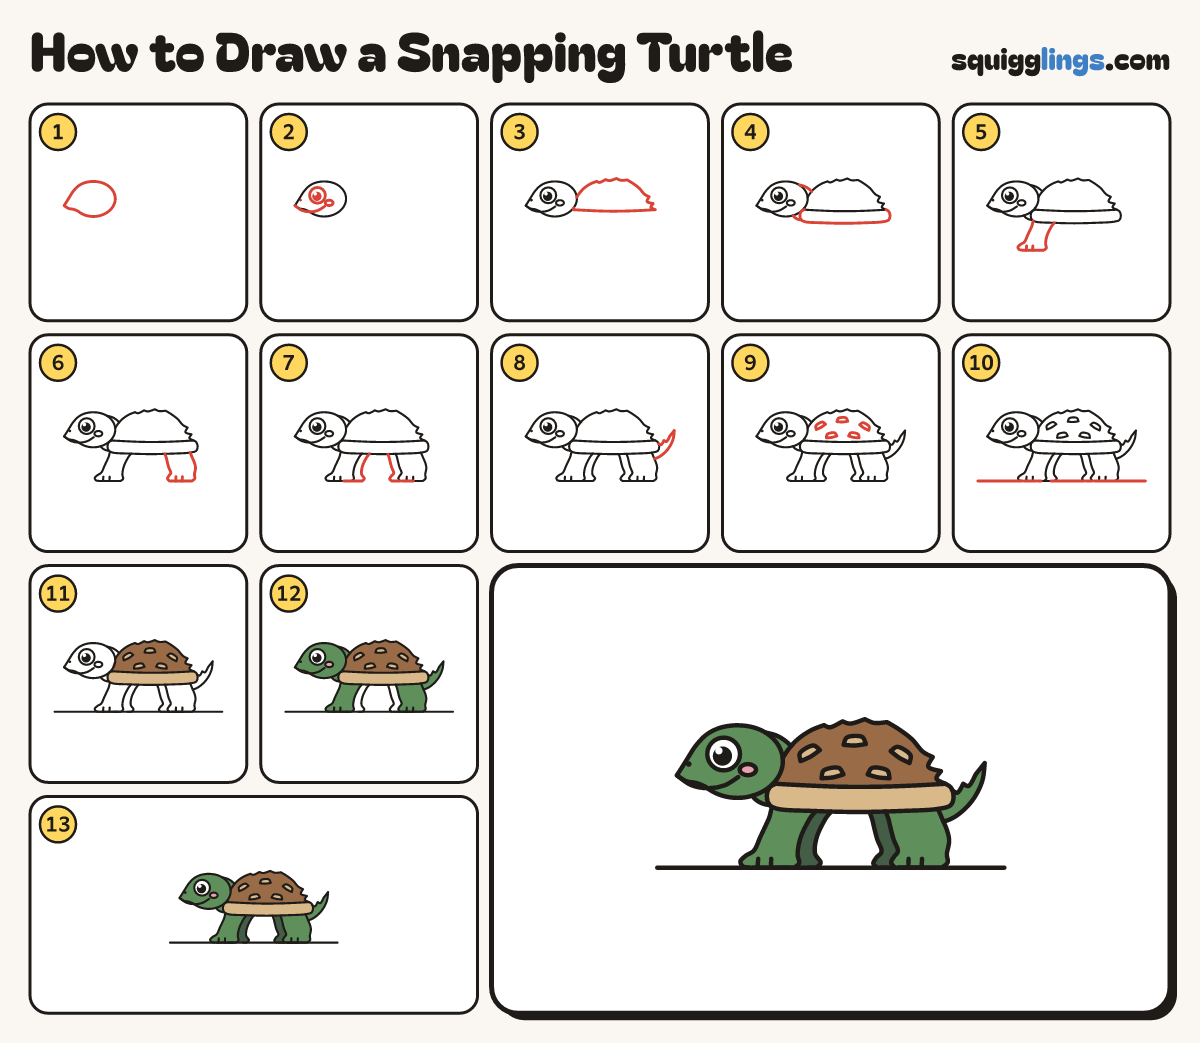
Each picture adds one red line. Draw that line, then scroll to the next picture. Rub out any dashed helper lines at the end. First up: the head.
Step 1: The head
On the left, draw an egg on its side for the head, with a hooked beak at the front.
Tip The hooked beak is the snapping turtle's trademark.
Step 2: The face
Draw a big shiny eye and a cheek. Add a nostril and a smile from the beak to under the cheek.
Step 3: The shell
Behind the head, draw a low long shell with 4 soft bumps on top and a jagged back edge.
Step 4: Rim and neck
From the shell's front corner, draw a sagging rim band underneath, stopping at the back. Add 2 short neck lines.
Step 5: Front leg
Under the front of the shell, draw a thick leg leaning forward, down to a plump mitten foot with toes.
Step 6: Back leg
Under the back of the shell, draw the same thick leg leaning back, down to a mitten foot with toes.
Step 7: Far legs
Just behind each near leg, draw a thin far leg peeking out, from the rim down to a small foot.
Step 8: The tail
Behind the back leg, draw a long tail sweeping back and up to a point, with 3 ridges on top.
Step 9: Ridge bumps
On the shell, draw a row of 3 low round bumps along the top, and 2 more bumps below.
Step 10: The ground
Draw one long straight ground line under all the feet, from the head to behind the tail.
Step 11: Brown shell, tan rim
Go over all your lines. Colour the rim and the ridge bumps tan, then the shell brown around them.
Step 12: Olive skin
Colour the cheek pink, then the head, neck, near legs and tail olive green around it. Leave the eye white.
Step 13: Dark far legs
Colour the 2 far leg strips darker green, so they look further away.
Your finished drawing
Follow the steps above and this is where you end up: a snapping turtle, drawn by you.
Every step in one picture