Watch it draw itself · tap to replay
How to Draw a Sled
Draw a sled in 10 easy steps, about 8 minutes. Free, with a printable worksheet.
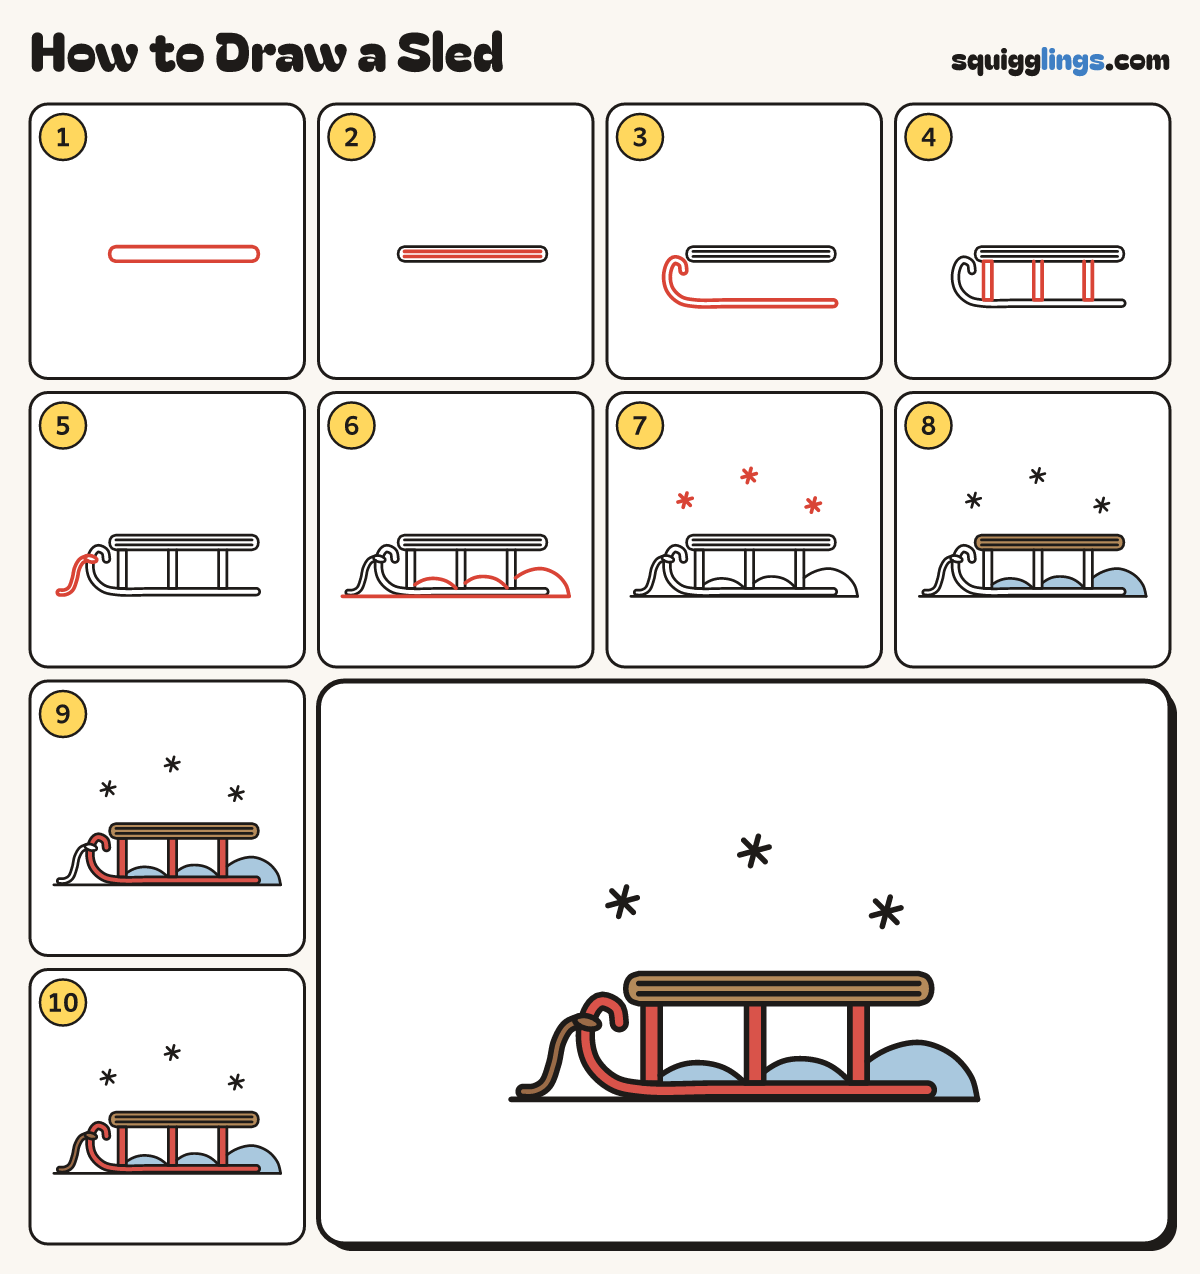
Each picture adds one red line. Draw that line, then scroll to the next picture. Rub out any dashed helper lines at the end. First up: the plank.
Step 1: The plank
A little below the middle, draw a long thin plank lying down, like a ruler with round ends.
Tip Keep the two long lines level and a finger apart.
Step 2: Wood lines
Inside the plank, draw 2 long lines from end to end, stopping just before the round ends.
Step 3: The runner
Start under the back of the plank, a hand below. Draw a thick rail forward, curling up at the front.
Tip The curl is one smooth spiral, like a snail.
Step 4: Three posts
Draw 3 short posts from the plank down to the runner: front, middle and back.
Step 5: The rope
Draw a loop round the curl's front. Let a rope droop down from it and lie forward along the bottom.
Step 6: Snow mounds
Draw a ground line under the runner, across the paper. Add 3 soft snow hills peeking up behind the runner.
Step 7: Snowflakes
Draw 3 little snowflakes in the air. Each is 3 short lines crossing in the middle.
Step 8: Blue snow, wood plank
Colour the snow hills sky blue. Colour the plank wood brown, leaving the slat lines showing.
Step 9: Red runner and posts
Colour the runner and the 3 posts red, around the rope loop.
Step 10: Brown rope
Colour the rope and its loop brown. Go over your lines. Your sled is done!
Your finished drawing
Follow the steps above and this is where you end up: a sled, drawn by you.
Every step in one picture