Watch it draw itself · tap to replay
How to Draw a Sitar
Draw a sitar in 13 easy steps, about 10 minutes. Free, with a printable worksheet.
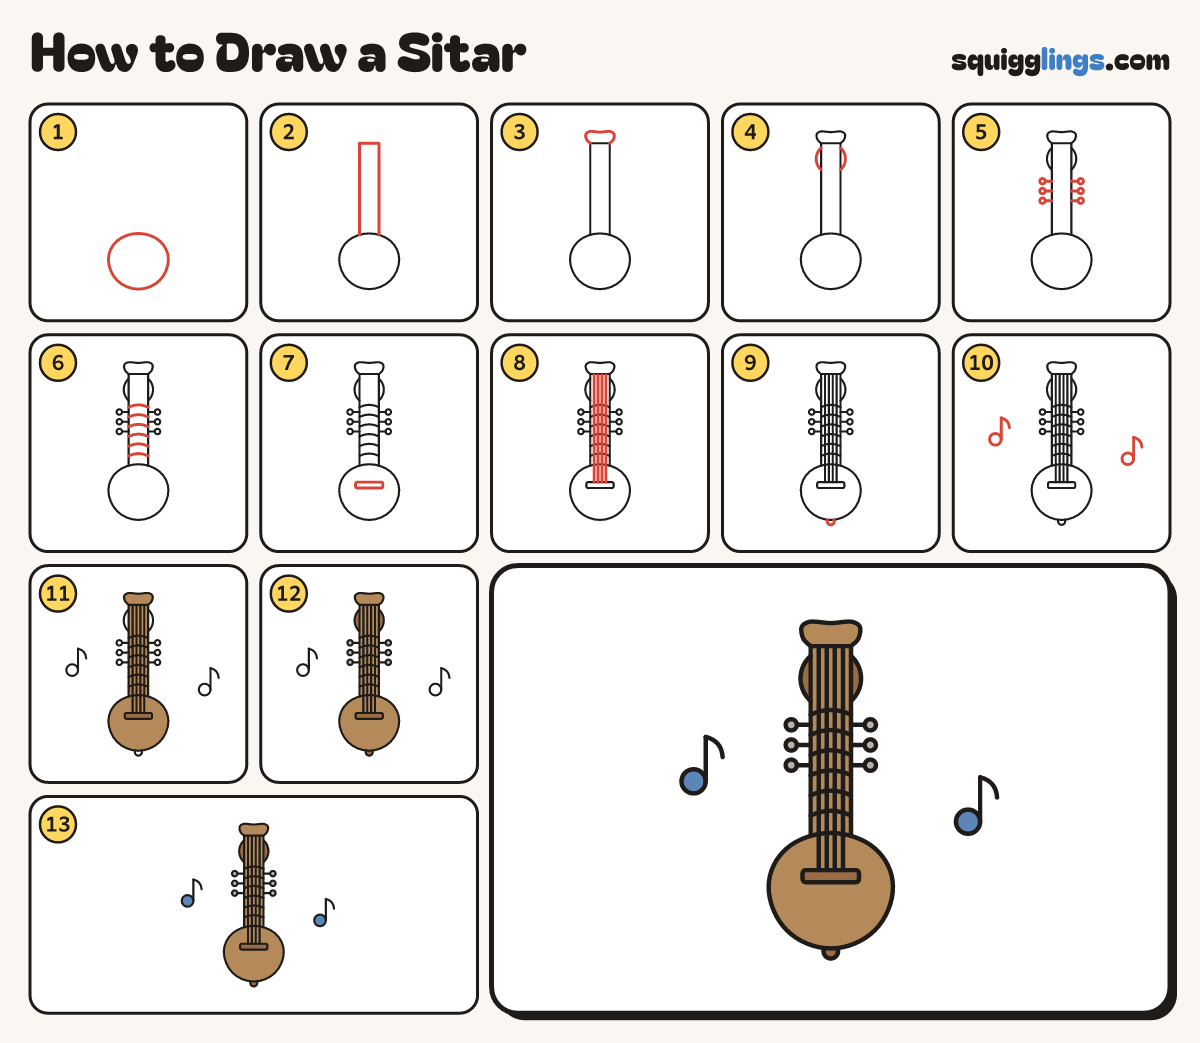
Each picture adds one red line. Draw that line, then scroll to the next picture. Rub out any dashed helper lines at the end. First up: gourd body.
Step 1: Gourd body
Low in the middle draw a big round gourd for the body, a little flatter on top.
Tip A sitar has a round gourd body, not a figure 8 like a guitar.
Step 2: Long wide neck
From the body's top draw 2 lines straight up, a thumb apart, stopping near the top of the paper.
Tip Wider than a guitar neck.
Step 3: Peg head
Start at the left neck line's top. Bulge the head out and over, down to the right neck line.
Step 4: Little gourd
Behind the top of the neck, just under the head, draw a small round gourd peeking out on both sides.
Tip Many sitars have a second small gourd up here.
Step 5: Tuning pegs
Below the little gourd, draw 3 little round pegs on short lines down each side of the neck.
Step 6: Curved frets
From under the little gourd to near the body, draw 6 little rainbows across the neck, evenly spaced.
Tip Sitar frets are curved bars, not straight lines.
Step 7: The bridge
On the body below the neck draw a short flat box across, wider than the neck, for the bridge.
Step 8: The strings
Draw 4 long straight strings down the neck, from the head down to the bridge, close together and evenly spaced.
Step 9: Bottom knob
At the very bottom of the body draw a tiny round knob, peeking out underneath.
Step 10: Music notes
Draw a music note on each side: a dot with a stem up on the right and a little flag.
Step 11: Wooden sitar
Go over your lines, then colour the body, neck and head light brown, and the bridge dark brown.
Step 12: Brown gourd, grey pegs
Colour the little gourd and the knob dark brown, and the pegs grey.
Step 13: Blue notes
Colour the music notes blue. Your sitar is ready for a raga!
Your finished drawing
Follow the steps above and this is where you end up: a sitar, drawn by you.
Every step in one picture