Watch it draw itself · tap to replay
How to Draw Simple Machines
Draw simple machines in 14 easy steps, about 11 minutes. Free, with a printable worksheet.
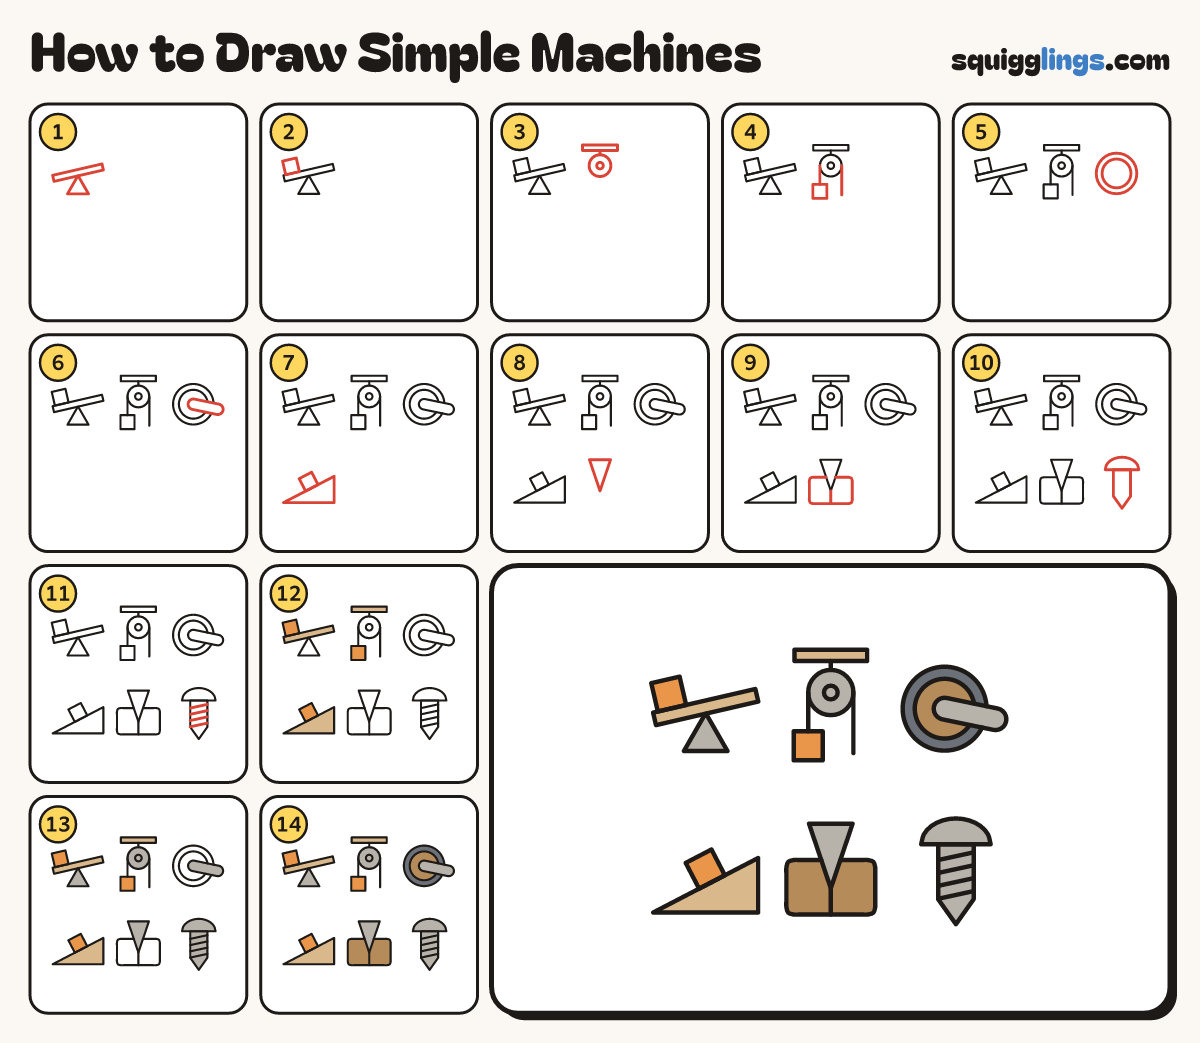
Each picture adds one red line. Draw that line, then scroll to the next picture. Rub out any dashed helper lines at the end. First up: the lever.
Step 1: The lever
In the top left draw a small triangle. Balance a long thin plank on its point, left end low.
Tip This page holds 6 small pictures: 3 on top and 3 below.
Step 2: Lever load
Draw a square box sitting on the low end of the plank.
Step 3: Pulley wheel
Top middle: draw a thin beam. Hang a wheel under it on a short line. Add a small circle inside.
Step 4: Ropes and load
From each side of the wheel draw a rope straight down. Stop the left rope at a square box.
Step 5: Big wheel
In the top right draw a big circle. Draw a smaller circle inside it to make a tyre.
Step 6: The axle
Draw a fat rod from the wheel's middle out to the right. Rub out the wheel lines inside it.
Step 7: Ramp and box
Bottom left: draw a ramp, a triangle that is tall on the right. Sit a box on its slope.
Step 8: The wedge
In the bottom middle draw a thin triangle pointing down, with a flat top.
Step 9: Block and crack
From the wedge's left side draw a block round its point. Stop on its right side. Add a crack below.
Step 10: The screw
Bottom right: draw a round screw head with a flat bottom. Under it draw a shaft with a point.
Step 11: Screw threads
Across the shaft draw 4 slanted lines, from one side to the other, evenly spaced.
Step 12: Light brown and orange
Go over your lines. Colour the plank, the beam and the ramp light brown. Colour the 3 boxes orange.
Step 13: Grey metal
Colour the lever's triangle, the pulley wheel, the fat rod, the wedge and the screw grey.
Step 14: Brown and dark grey
Colour the block and the middle of the big wheel brown. Colour its tyre dark grey.
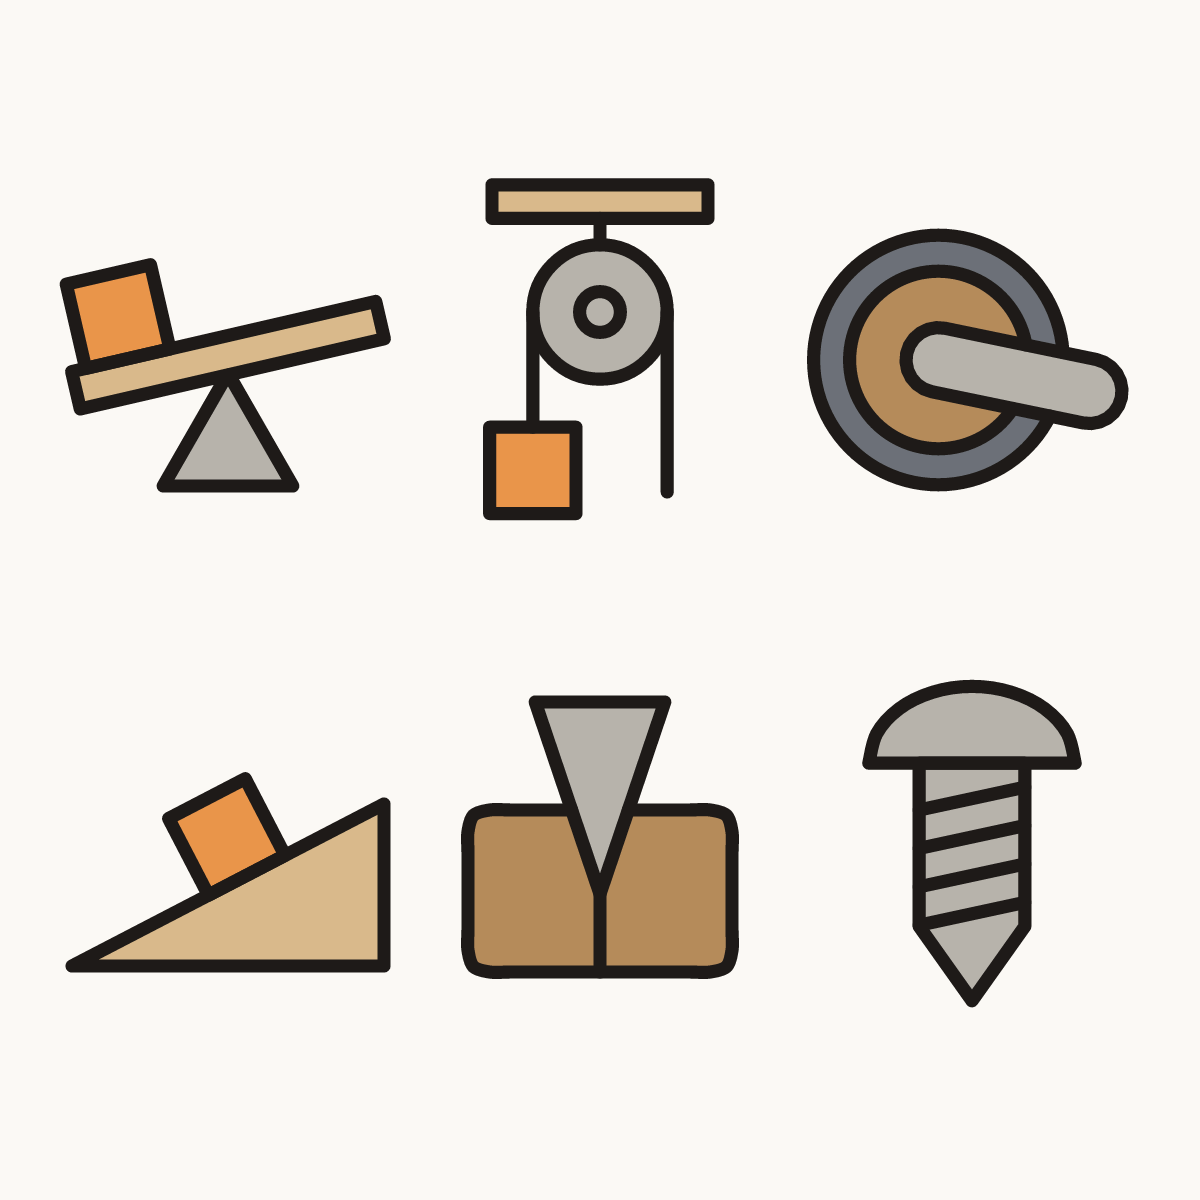
Your finished drawing
Follow the steps above and this is where you end up: simple machines, drawn by you.
Every step in one picture