Watch it draw itself · tap to replay
How to Draw a Shield Volcano
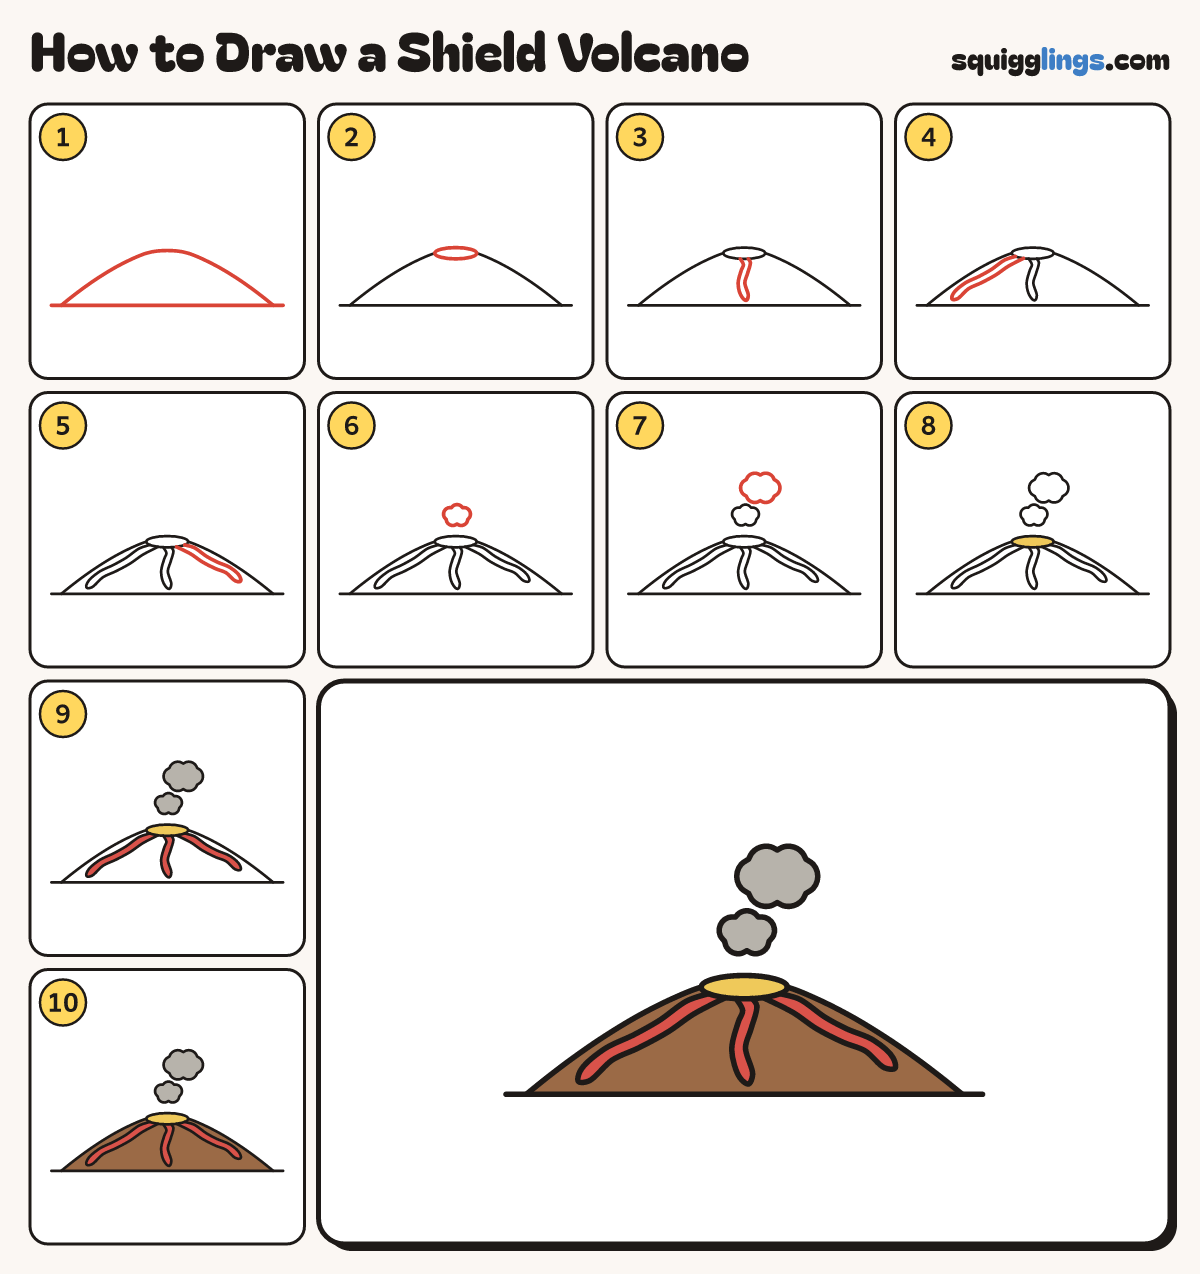
Draw a shield volcano in 10 easy steps, about 8 minutes. Free, with a printable worksheet.
Each picture adds one red line. Draw that line, then scroll to the next picture. Rub out any dashed helper lines at the end. First up: wide low hill.
Step 1: Wide low hill
Draw a long ground line. From its left end, draw a wide, low hill across to its right end.
Tip Keep it low and wide, like a shield lying flat. That is how it got its name.
Step 2: The crater
On the flat top, draw a thin oval lying on its side. This is the crater.
Step 3: Middle lava stream
Start at the crater's front. Draw a thin wiggly stream far down the middle, and stop back at the crater.
Tip Runny lava flows a long way, like a river.
Step 4: Left lava stream
Start at the crater's left. Draw a long thin stream down the left side, and stop back at the crater.
Step 5: Right lava stream
Start at the crater's right. Draw a long thin stream down the right side, and stop back at the crater.
Tip Give each stream a round end, like a fingertip.
Step 6: Steam puff
Just above the crater, draw a small puffy cloud of 5 round bumps.
Step 7: Bigger puff
Higher up, a little to the right, draw a bigger puffy cloud of 6 bumps.
Tip Steam spreads out as it rises, so the top puff is the biggest.
Step 8: Yellow crater
Colour the inside of the crater yellow. It is a pool of glowing hot lava.
Step 9: Grey steam, red lava
Colour the 2 puffs light grey. Then colour the 3 lava streams red.
Step 10: Brown volcano
Colour the volcano brown, going around the lava. Go over your lines. Your shield volcano is done!
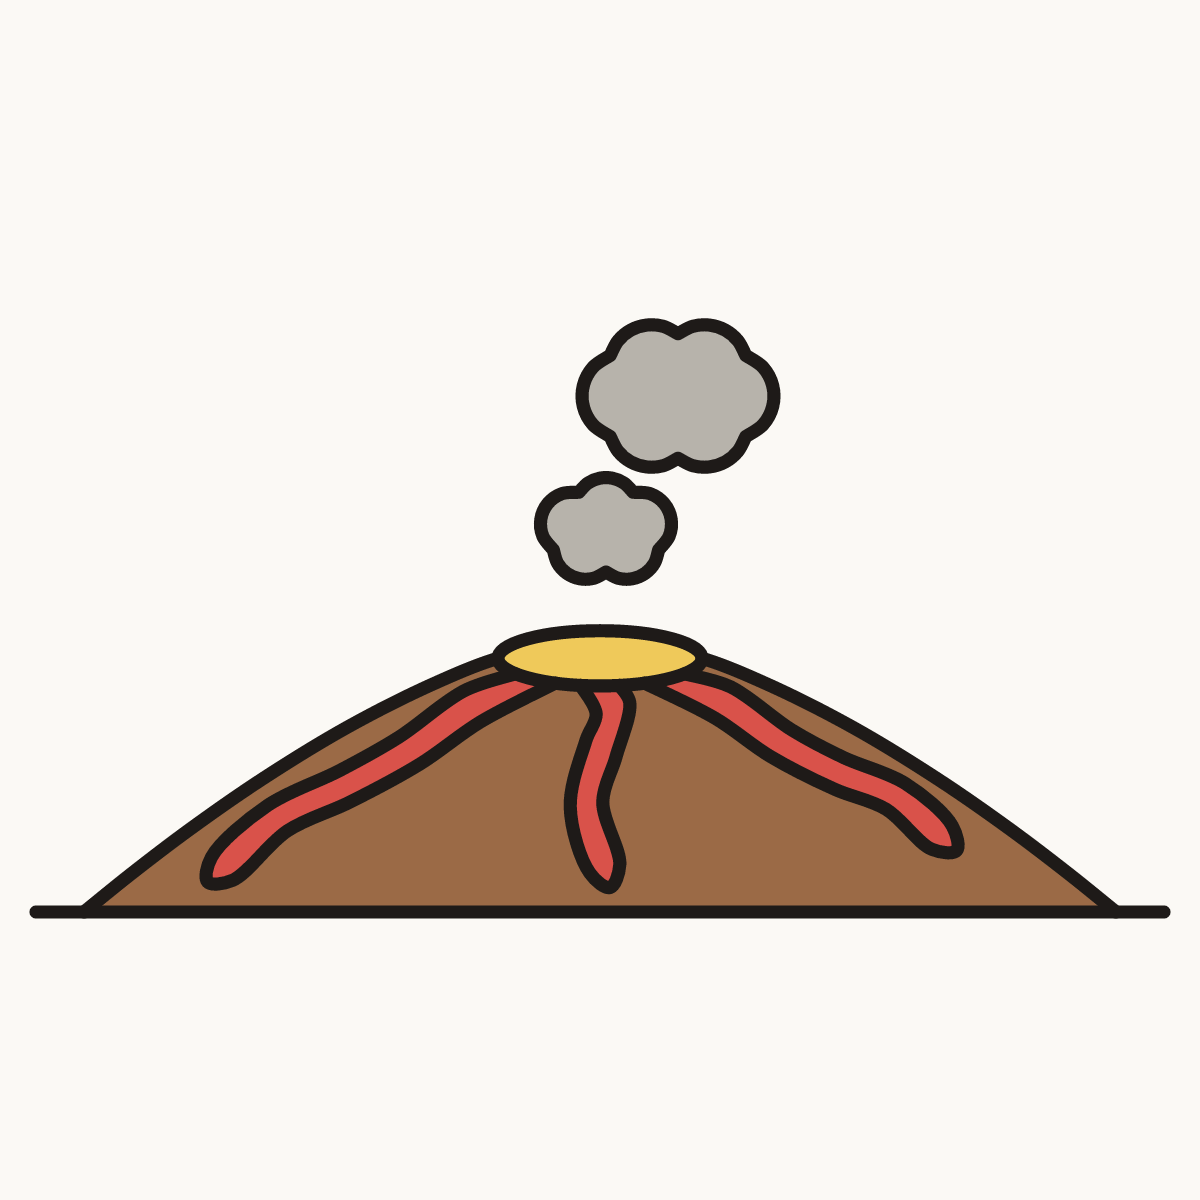
Your finished drawing
Follow the steps above and this is where you end up: a shield volcano, drawn by you.
Every step in one picture