Watch it draw itself · tap to replay
How to Draw Mammatus Clouds
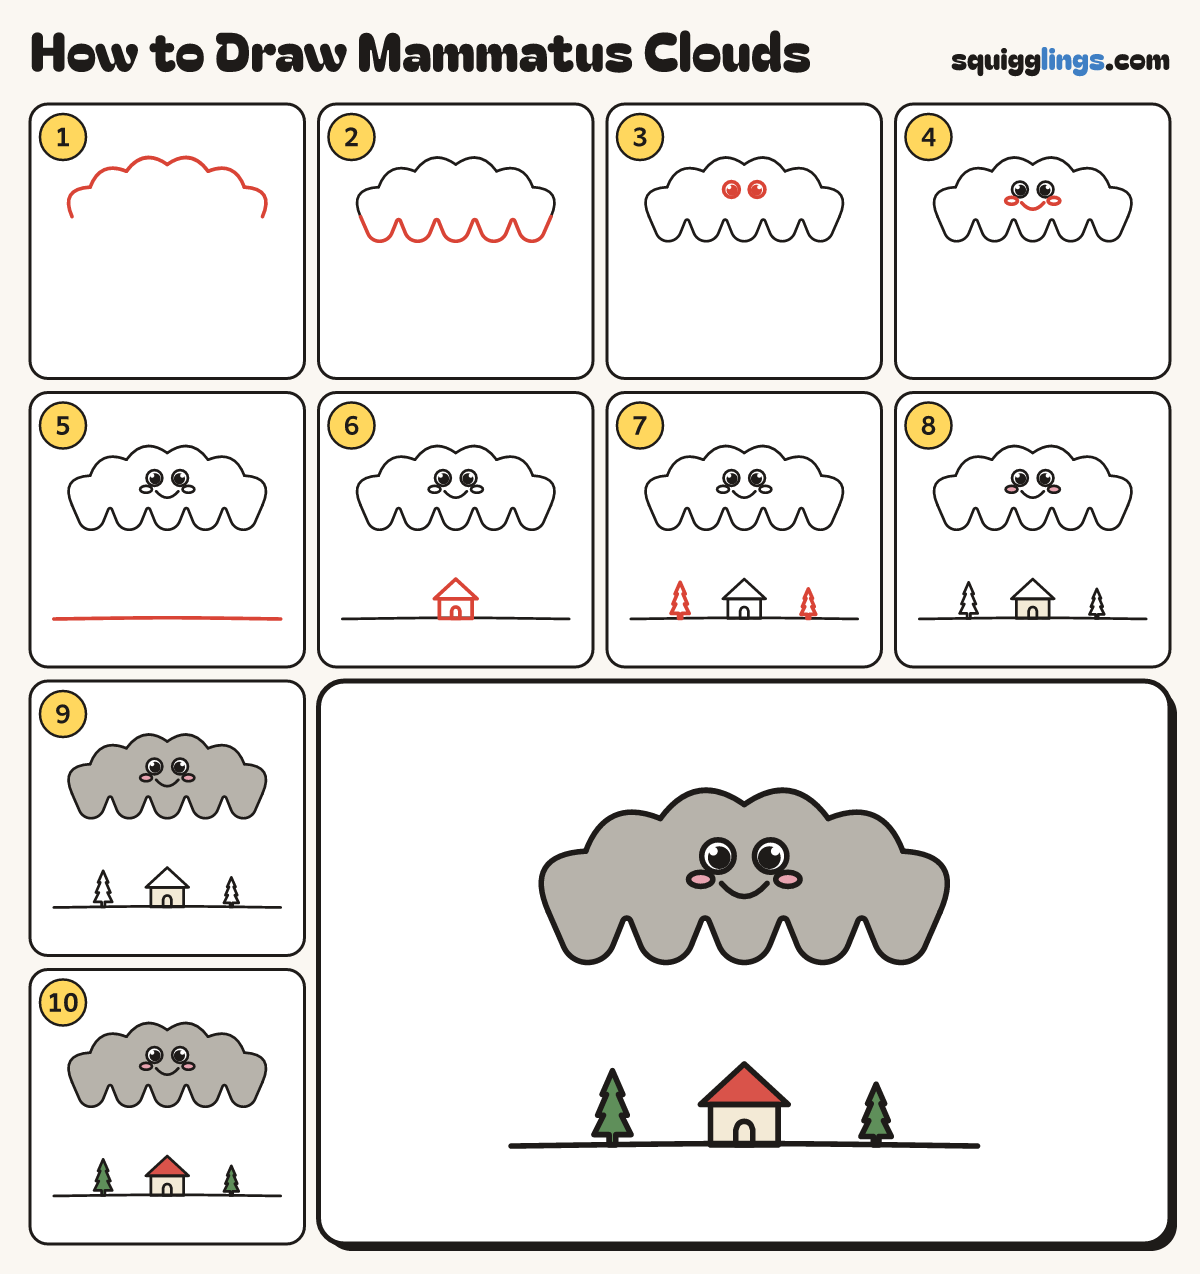
Draw mammatus clouds in 10 easy steps, about 8 minutes. Free, with a printable worksheet.
Each picture adds one red line. Draw that line, then scroll to the next picture. Rub out any dashed helper lines at the end. First up: the cloud top.
Step 1: The cloud top
Start low on the left. Draw 6 puffy bumps rising up and over, and end low on the right.
Step 2: The hanging pouches
Start at the right end. Draw 5 deep round pouches bulging down, and stop at the left end.
Tip Mammatus clouds hang in bulging pouches, like a quilt of bubbles.
Step 3: 2 big eyes
In the middle of the cloud draw 2 big round eyes, a little apart, with a shiny dot in each.
Step 4: A big smile
Under the eyes draw a wide happy smile, well above the pouches. Add a little oval cheek at each side.
Step 5: The ground
Draw the ground line across the bottom of the page.
Step 6: A little house
On the ground in the middle draw a little house: a box, a pointed roof, and an arched door.
Step 7: 2 pine trees
Draw a pine tree on each side of the house: a stack of pointed triangles on a short trunk.
Step 8: Cream house, pink cheeks
Colour the house walls cream and the cheeks pink.
Step 9: Grey cloud
Colour the whole cloud and its pouches grey, around the eyes and cheeks. Leave the eyes white.
Step 10: Red roof, green pines
Colour the roof red and the pine trees green. Your mammatus clouds are done!
Your finished drawing
Follow the steps above and this is where you end up: mammatus clouds, drawn by you.
Every step in one picture