Watch it draw itself · tap to replay
How to Draw a Shed
Draw a shed in 12 easy steps, about 9 minutes. Free, with a printable worksheet.
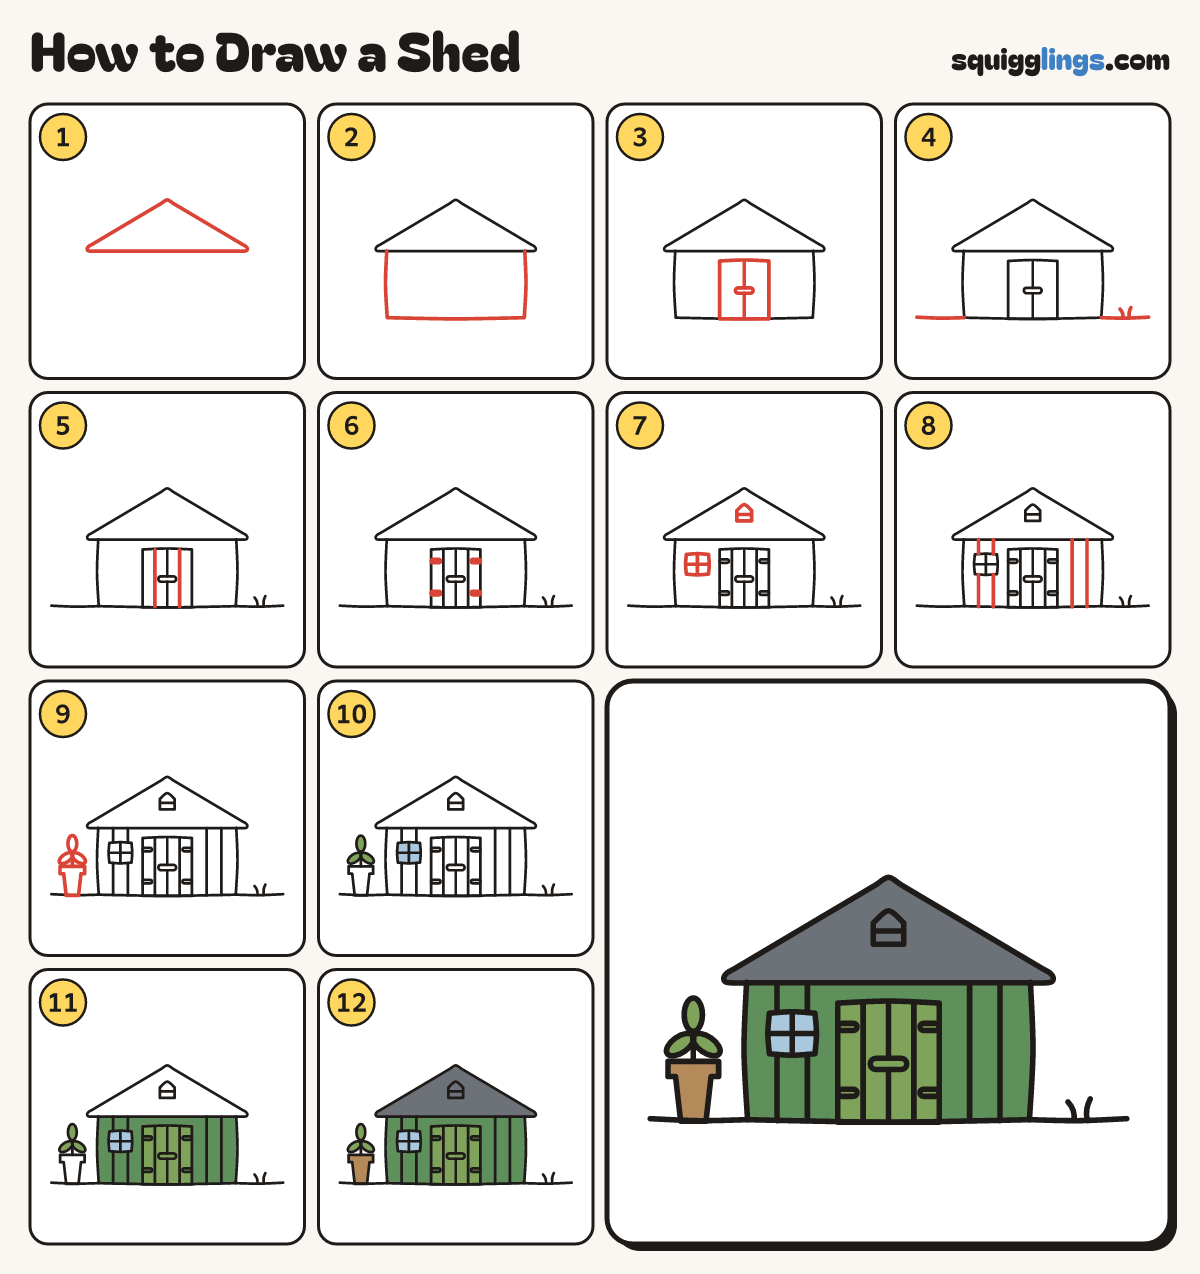
Each picture adds one red line. Draw that line, then scroll to the next picture. Rub out any dashed helper lines at the end. First up: the low roof.
Step 1: The low roof
Above the middle draw a low wide triangle roof with straight sides, a soft point and round ends.
Tip Keep the sides straight. Curvy sides make it look like a hat.
Step 2: The walls
Start under the brim's left end. Draw a wall down, across the bottom and up to the brim again.
Step 3: Double doors
Draw a tall wide door in the middle of the wall. Split it down the middle, with a bar across.
Step 4: The ground
Draw a ground line from each bottom corner out to the paper's edge. Add a grass tuft on the right.
Step 5: Door planks
Draw a line down the middle of each door, from the top to the ground, for planks.
Step 6: Strap hinges
On each door's outer edge draw 2 short flat bars for hinges, one high and one low.
Step 7: Window and vent
Left of the doors draw a square window with a plus inside. Add a tiny house-shaped vent in the roof.
Step 8: Wall boards
Draw 2 lines down each side wall, from the brim to the ground. Jump over the window.
Step 9: A flower pot
Left of the shed, not touching, draw a pot from the ground up to a wide rim. Add 3 leaves.
Step 10: Sky window, leafy sprouts
Go over your lines, then colour the window sky blue and the leaves light green.
Step 11: Green shed
Colour the doors light green, and the walls green around the window and the doors.
Step 12: Grey roof, brown pot
Colour the roof and vent slate grey, and the pot wood brown. Your shed is done!
Your finished drawing
Follow the steps above and this is where you end up: a shed, drawn by you.
Every step in one picture