Watch it draw itself · tap to replay
How to Draw a Market Stall
Draw a market stall in 13 easy steps, about 10 minutes. Free, with a printable worksheet.
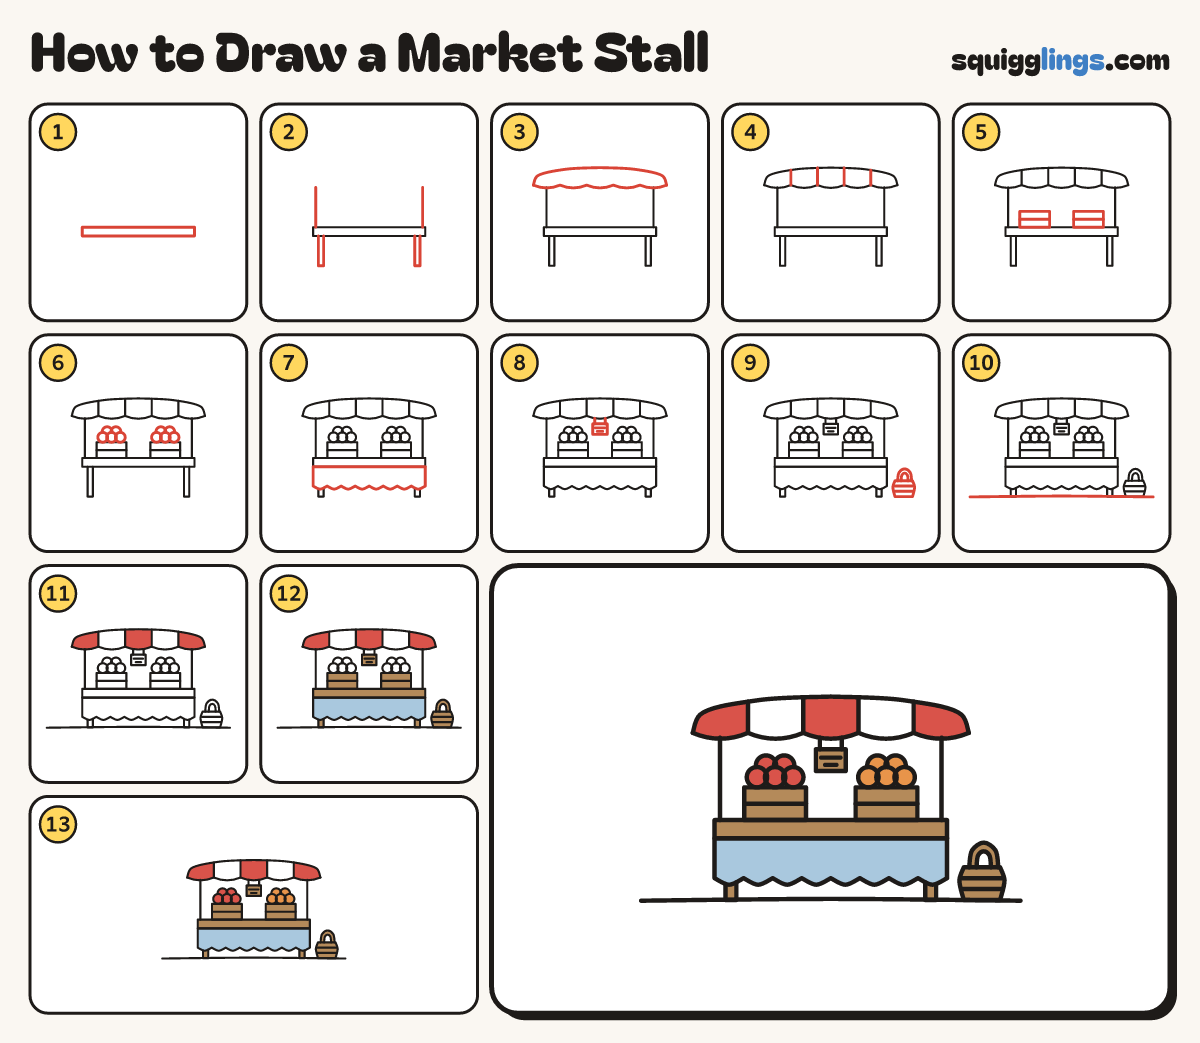
Each picture adds one red line. Draw that line, then scroll to the next picture. Rub out any dashed helper lines at the end. First up: the table.
Step 1: The table
A little below the middle, draw a long flat box for the table top.
Step 2: Poles and legs
Start on each table end. Draw a pole straight up and stop high above. Add a leg under each end.
Step 3: The awning
Start on the left pole top. Draw a gentle hill and stop on the right pole. Add 5 bumps underneath.
Step 4: Stripes
Draw 4 lines straight down the awning, from the top curve to the bumps, to make wide stripes.
Step 5: Two crates
On the table, draw 2 boxes for fruit crates, left and right, each with a line across the middle.
Step 6: Fruit
Fill each crate with fruit: 3 circles in a row on top, and 2 more sitting in the dips.
Step 7: Tablecloth
Start under the left of the table. Draw a cloth hanging down with a bumpy hem. Stop at the right.
Step 8: The sign
Start on the bumpy edge under the middle. Draw 2 short strings down to a wide sign box.
Step 9: A basket
Draw a round tub on the right. Start on its rim, arch a handle over, and stop on the rim.
Step 10: The ground
Draw the ground line right across the paper under the legs.
Step 11: Red stripes
Colour every other stripe of the awning red: the 2 on the ends and the 1 in the middle.
Step 12: Wood table and crates
Colour the table, legs, crates, sign and basket wood brown. Colour the cloth sky blue.
Step 13: Red apples, oranges
Colour the left crate's fruit red and the right crate's fruit orange. Go over your lines and you are done!
Your finished drawing
Follow the steps above and this is where you end up: a market stall, drawn by you.
Every step in one picture