Watch it draw itself · tap to replay
How to Draw a Saxophone
Draw a saxophone in 11 easy steps, about 8 minutes. Free, with a printable worksheet.
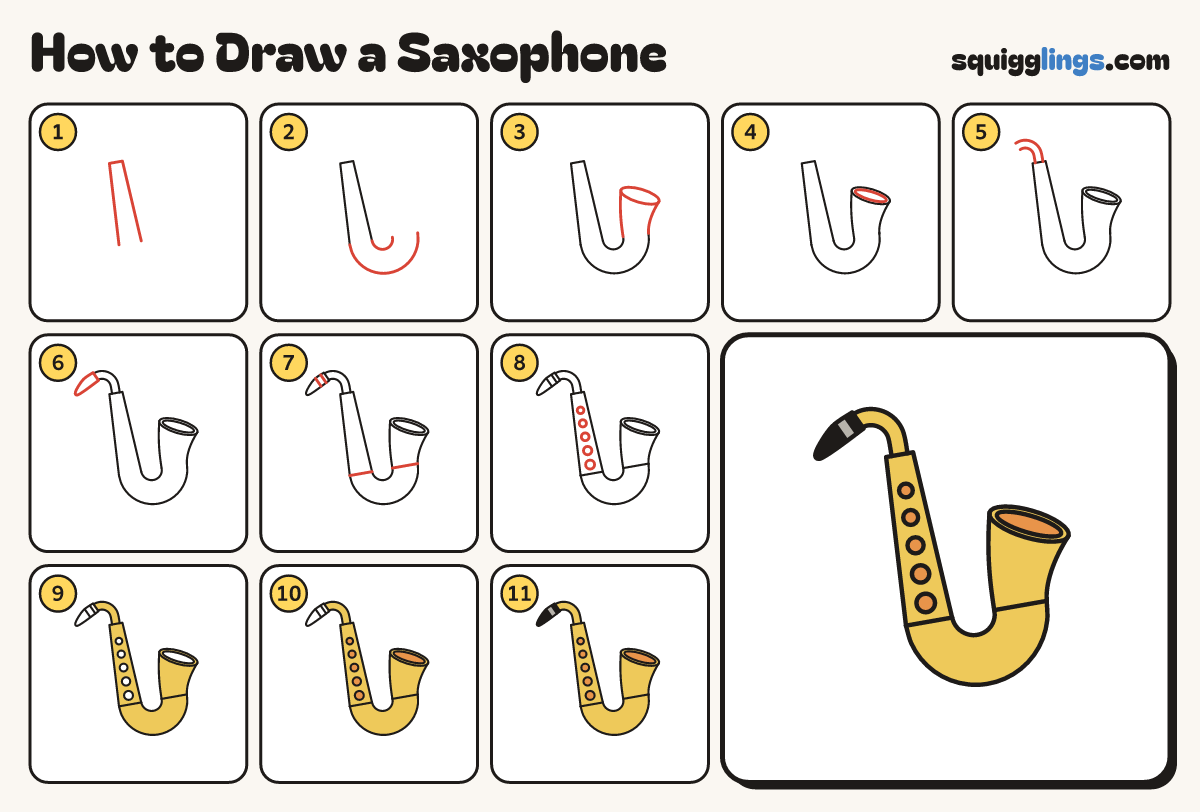
Each picture adds one red line. Draw that line, then scroll to the next picture. Rub out any dashed helper lines at the end. First up: the long tube.
Step 1: The long tube
Start low on the left. Draw a tall upside-down U, thin at the top. Stop low on the right.
Step 2: The bottom bend
Start at the bottom of each line. Draw 2 U curves to the right, one inside the other. Stop level.
Step 3: The bell
Start at the U's ends. Draw 2 lines up, spreading apart. Stop and add a flat oval on top.
Step 4: Inside the bell
Draw a smaller flat oval inside the first oval. This is the dark inside of the bell.
Step 5: The neck
Start on the tube's flat top. Draw 2 lines curving up and over to the left. Stop side by side.
Step 6: The mouthpiece
On the end of the neck draw a long beak. Make it fat at the neck, thin at the tip.
Step 7: Bands
Draw 2 lines across the mouthpiece and 1 across each tube above the bend. Start and stop on the edges.
Step 8: Round keys
Draw 5 round keys in a row down the long tube. Make them a little bigger as you go down.
Step 9: Shiny yellow brass
Colour the tubes, the bell and the neck yellow. Go around the keys and leave the inside oval.
Step 10: Orange keys
Colour the 5 round keys orange. Colour the inside oval of the bell orange too.
Step 11: Dark mouthpiece
Colour the band on the mouthpiece grey and the rest of it black. Go over your lines. Time to play!
Your finished drawing
Follow the steps above and this is where you end up: a saxophone, drawn by you.
Every step in one picture