Watch it draw itself · tap to replay
How to Draw Sashimi
Draw sashimi in 12 easy steps, about 9 minutes. Free, with a printable worksheet.
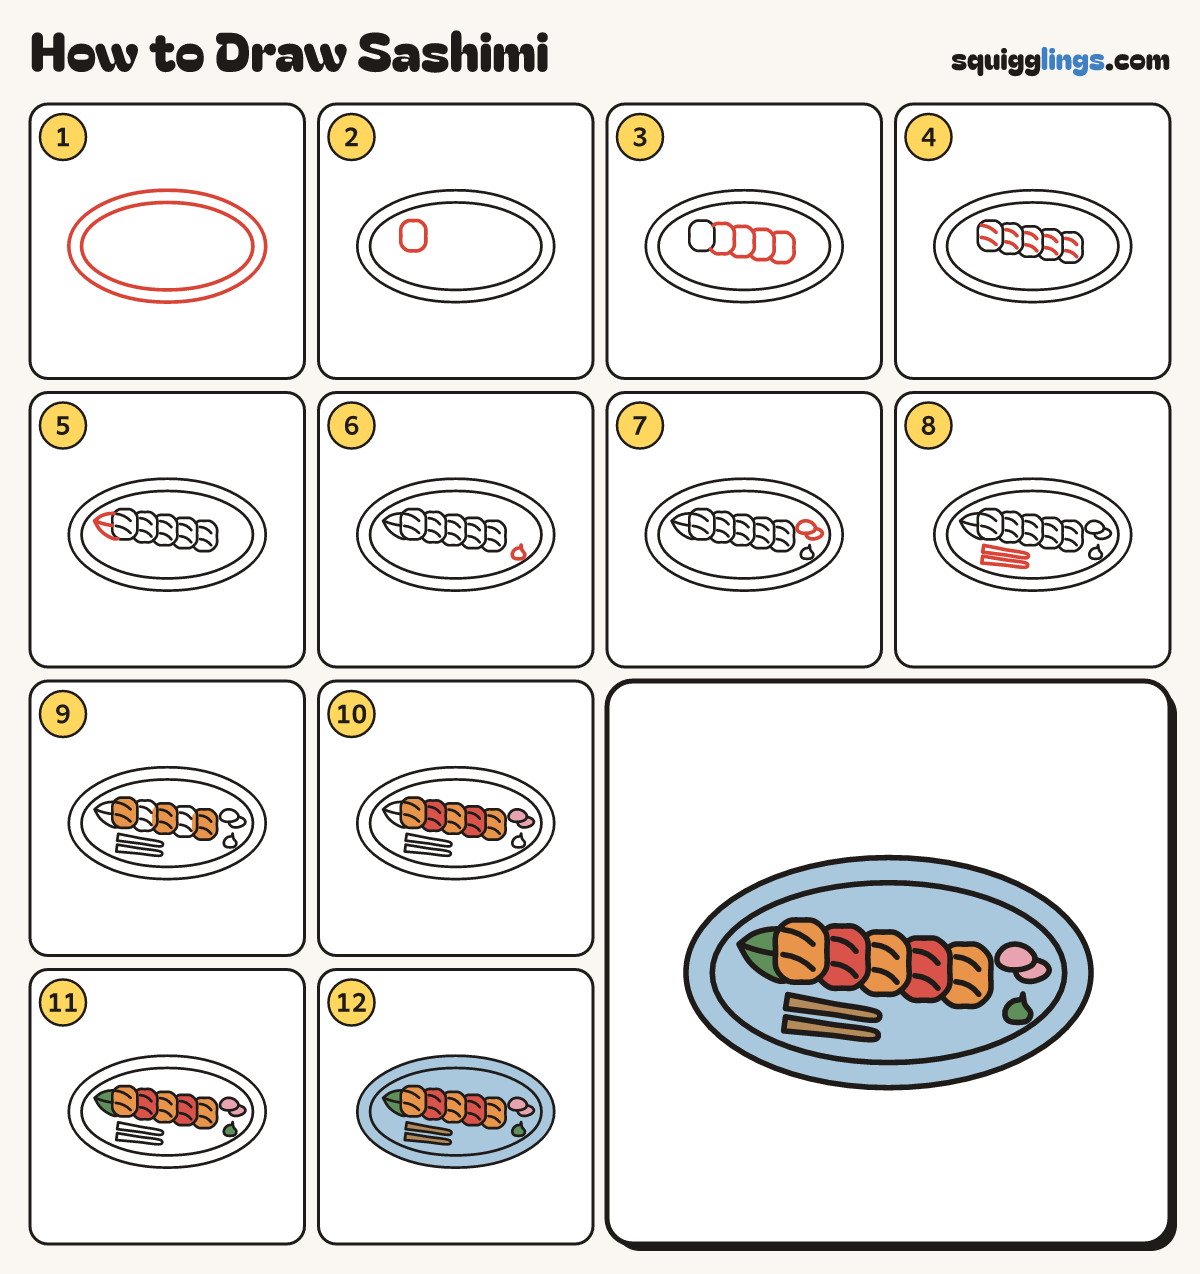
Each picture adds one red line. Draw that line, then scroll to the next picture. Rub out any dashed helper lines at the end. First up: a plate.
Step 1: A plate
In the middle draw a big oval plate as wide as your hand. Add a second oval for the rim.
Step 2: The first slice
On the left of the plate draw a rounded slab a little taller than wide, like a domino standing up.
Tip Sashimi is thin slices of fish with no rice.
Step 3: 4 more slices
To the right draw 4 more slabs the same size, each a little lower and tucked behind the one before.
Tip They fan out like fallen dominoes.
Step 4: Fat lines
On each slice draw 2 short curved lines slanting down, one above the other, for stripes of fat.
Step 5: A leaf
Under the first slice draw a pointed leaf poking out to the left, with a line down its middle.
Step 6: Wasabi
Below and to the right of the last slice draw a small round blob with a soft peak.
Step 7: Pickled ginger
To the right of the last slice draw 2 small soft ovals, one tucked behind the other.
Step 8: Chopsticks
At the front left of the plate draw 2 slim sticks, thinner at the right end, with a gap between.
Step 9: Orange salmon
Go over your lines, then colour the first, third and fifth slices orange.
Step 10: Red tuna, pink ginger
Colour the second and fourth slices red, and the ginger pink.
Step 11: Green leaf and wasabi
Colour the leaf and the wasabi green.
Step 12: Sky plate, wood chopsticks
Colour the plate sky blue around the food and chopsticks, then colour the chopsticks wood brown. Your sashimi is done!
Your finished drawing
Follow the steps above and this is where you end up: sashimi, drawn by you.
Every step in one picture