Watch it draw itself · tap to replay
How to Draw a Safety Pin
Draw a safety pin in 10 easy steps, about 8 minutes. Free, with a printable worksheet.
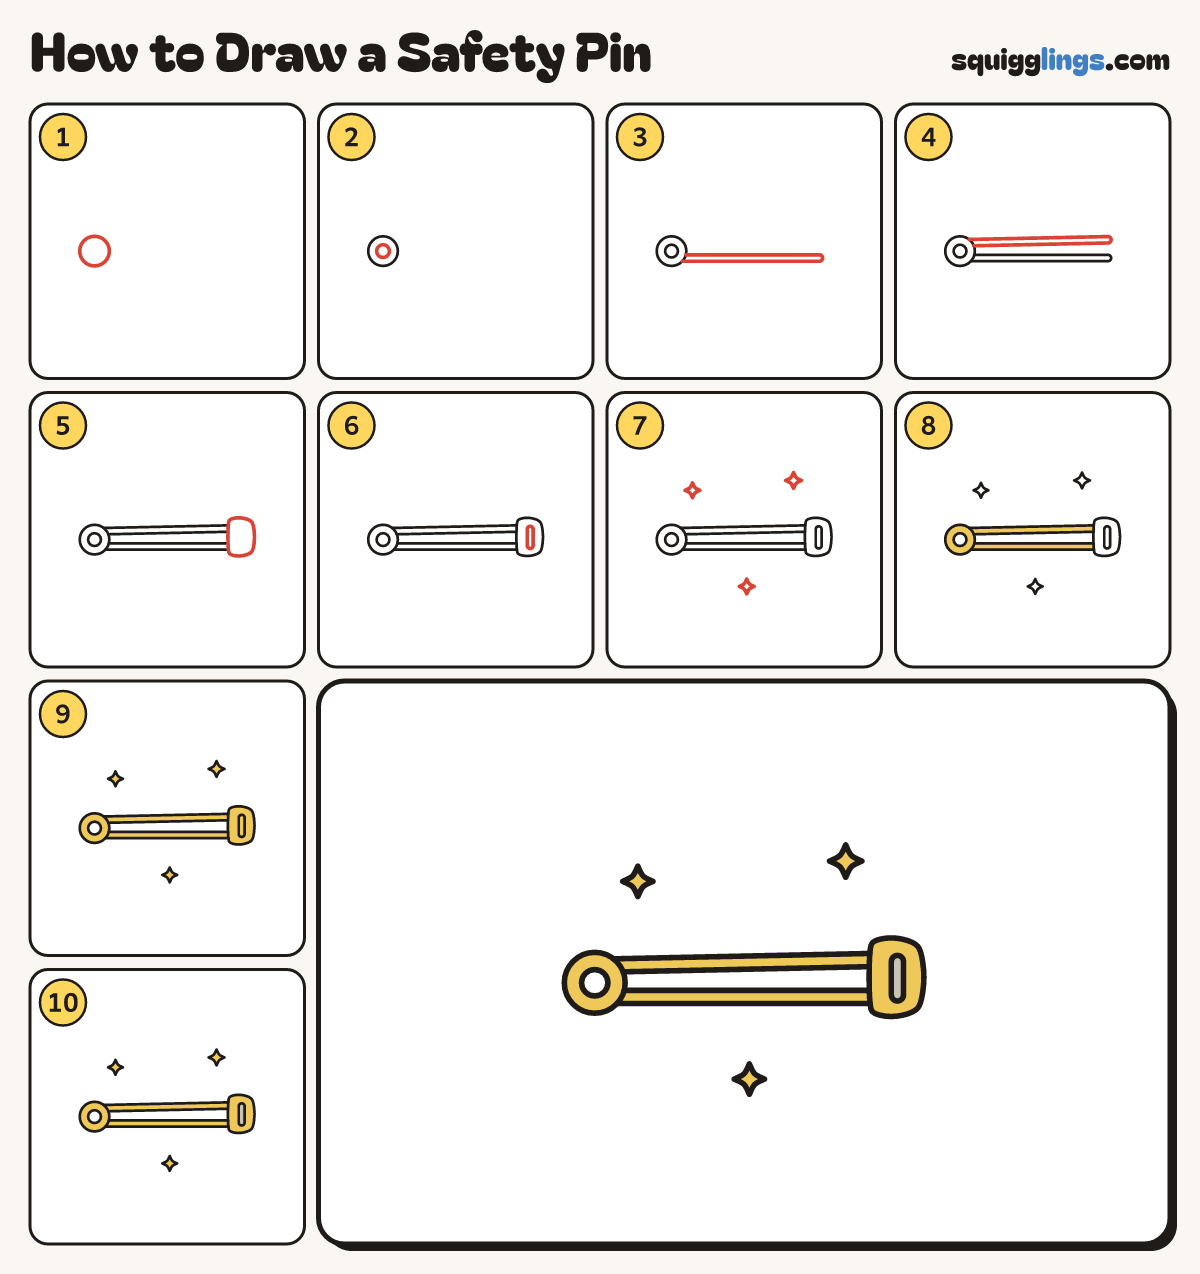
Each picture adds one red line. Draw that line, then scroll to the next picture. Rub out any dashed helper lines at the end. First up: the coil.
Step 1: The coil
On the left, a little below the middle, draw a circle as big as a coin. This is the coil.
Tip Go round twice lightly, then once firmly.
Step 2: The coil hole
Inside the coil draw a smaller circle in the middle, so it looks like a ring.
Step 3: The bottom bar
From the bottom right of the coil draw a long thin bar across to the right, almost to the edge.
Step 4: The pin arm
From the top of the coil draw a second long bar just above the first. Stop where it stops.
Tip Let the two bars spread apart just a tiny bit towards the right.
Step 5: The clasp
At the right end draw a small rounded cap over the ends of both bars. That is the clasp.
Step 6: The clasp groove
Inside the clasp draw a small tall slot with round ends, for the groove.
Step 7: Sparkles
Add 3 sparkle stars in the air around the safety pin: 2 above and 1 below.
Step 8: Gold wire
Go over your lines, then colour the bar, the pin arm and the coil yellow, leaving the coil hole white.
Step 9: Gold clasp
Colour the clasp and the 3 sparkles yellow, leaving the groove white.
Step 10: Grey groove
Colour the groove light grey. Your safety pin is ready to hold things together!
Your finished drawing
Follow the steps above and this is where you end up: a safety pin, drawn by you.
Every step in one picture