Watch it draw itself · tap to replay
How to Draw a Saddle
Draw a saddle in 10 easy steps, about 8 minutes. Free, with a printable worksheet.
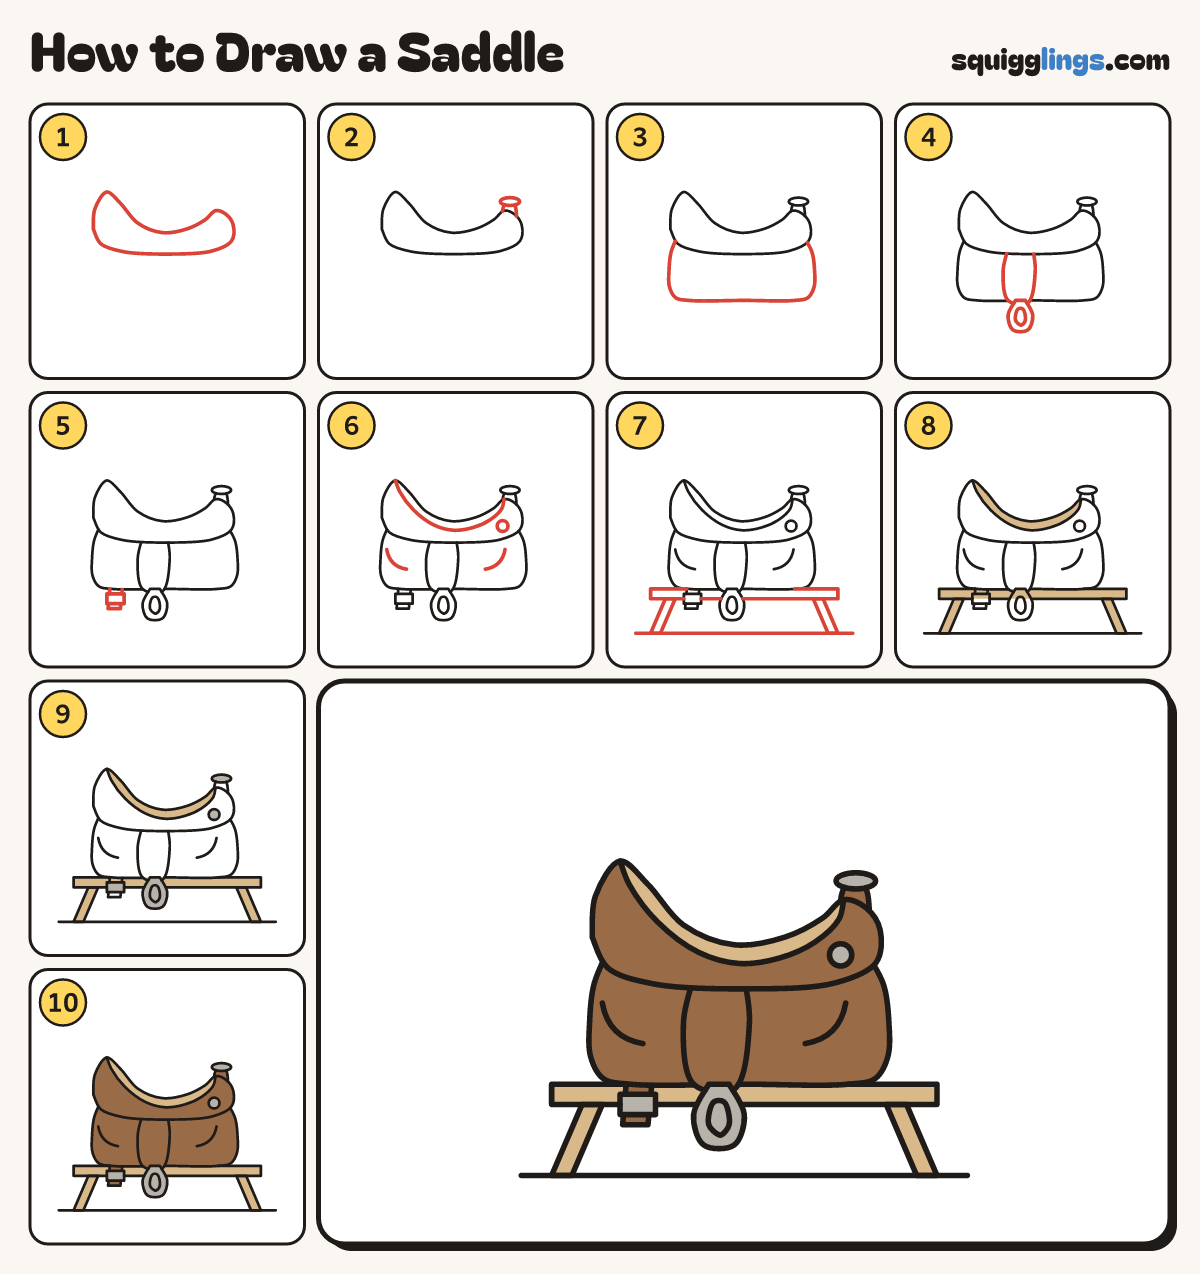
Each picture adds one red line. Draw that line, then scroll to the next picture. Rub out any dashed helper lines at the end. First up: the seat.
Step 1: The seat
In the middle draw the seat: a tall rounded back on the left, a smooth scoop, a lower front bump.
Tip A saddle is a scoop: low in the middle where the rider sits.
Step 2: The horn
On the front bump draw a short, thick stalk with a flat oval knob on top, like a mushroom.
Step 3: The skirt
Under the seat draw a big flap with rounded bottom corners, hanging straight down, a little wider than the seat.
Step 4: Strap and stirrup
Down the middle of the skirt draw a long strap hanging past the flap, with a rounded loop stirrup.
Step 5: Cinch and buckle
From the left of the skirt draw a short strap hanging down with a square buckle on it.
Step 6: Pretty details
Draw a line under the seat's top, back to front. Add 2 skirt curves and a button on the bump.
Step 7: The stand
Under the saddle draw a long flat rail, with a slanted leg at each end down to a ground line.
Step 8: Tan seat and stand
Go over your lines. Colour the seat's top strip and the stand's rail and legs tan.
Step 9: Grey metal
Colour the stirrup, the buckle, the button and the top of the horn grey.
Step 10: Brown leather
Colour the seat, horn, skirt, strap and cinch brown, around the tan and grey parts. Your saddle is ready!
Your finished drawing
Follow the steps above and this is where you end up: a saddle, drawn by you.
Every step in one picture