Watch it draw itself · tap to replay
How to Draw a Runway
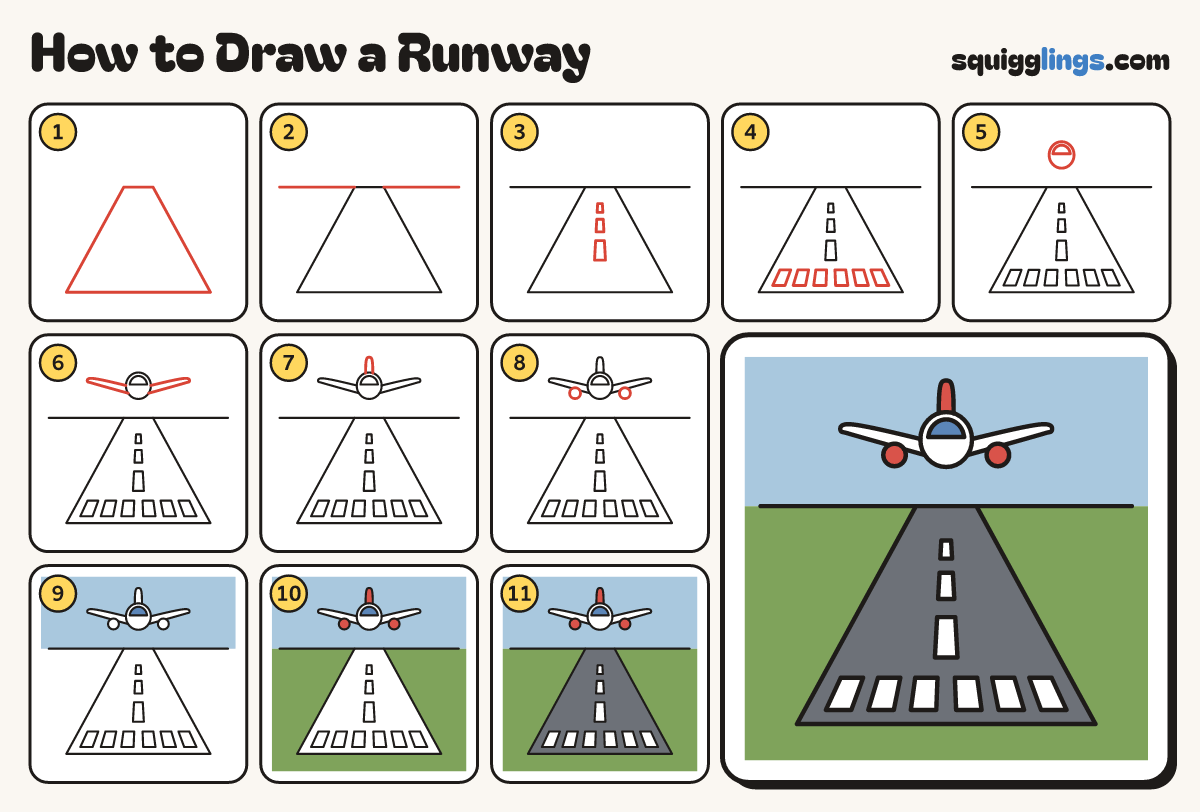
Draw a runway in 11 easy steps, about 8 minutes. Free, with a printable worksheet.
Each picture adds one red line. Draw that line, then scroll to the next picture. Rub out any dashed helper lines at the end. First up: the runway.
Step 1: The runway
Draw a tall shape with a wide flat bottom and a narrow flat top, like a road going far away.
Tip The sides lean in towards each other. Use a ruler if you like.
Step 2: The horizon
Start at the left edge. Draw a flat line and stop at the runway's top corner. Repeat on the right.
Tip This is where the ground meets the sky.
Step 3: Centre dashes
Up the middle of the runway draw 3 dashes. Make each one smaller as they go further away.
Tip Smaller dashes make the runway look very long.
Step 4: End stripes
Near the bottom of the runway draw a row of 6 long stripes, 3 on each side of the middle.
Tip Pilots call these the piano keys. They show where the runway begins.
Step 5: The plane body
High above the runway draw a round body for the plane. Add a half-moon window near the top.
Tip The plane is flying straight towards you.
Step 6: Two wings
Draw a long thin wing out from each side of the body. Tilt the tips up a little.
Tip Make both wings the same length.
Step 7: Tail fin
On top of the body draw a tall thin fin with a rounded tip, standing straight up.
Step 8: Two engines
Under each wing draw a round engine, about halfway along, tucked up against the wing.
Step 9: Blue sky
Colour the sky light blue, around the plane. Colour the window dark blue. Leave the plane white.
Step 10: Red and green
Colour the tail fin and the 2 engines red. Colour the grass green all around the runway.
Step 11: Grey runway
Colour the runway dark grey, around the stripes and dashes. Leave them white. Your runway is done!
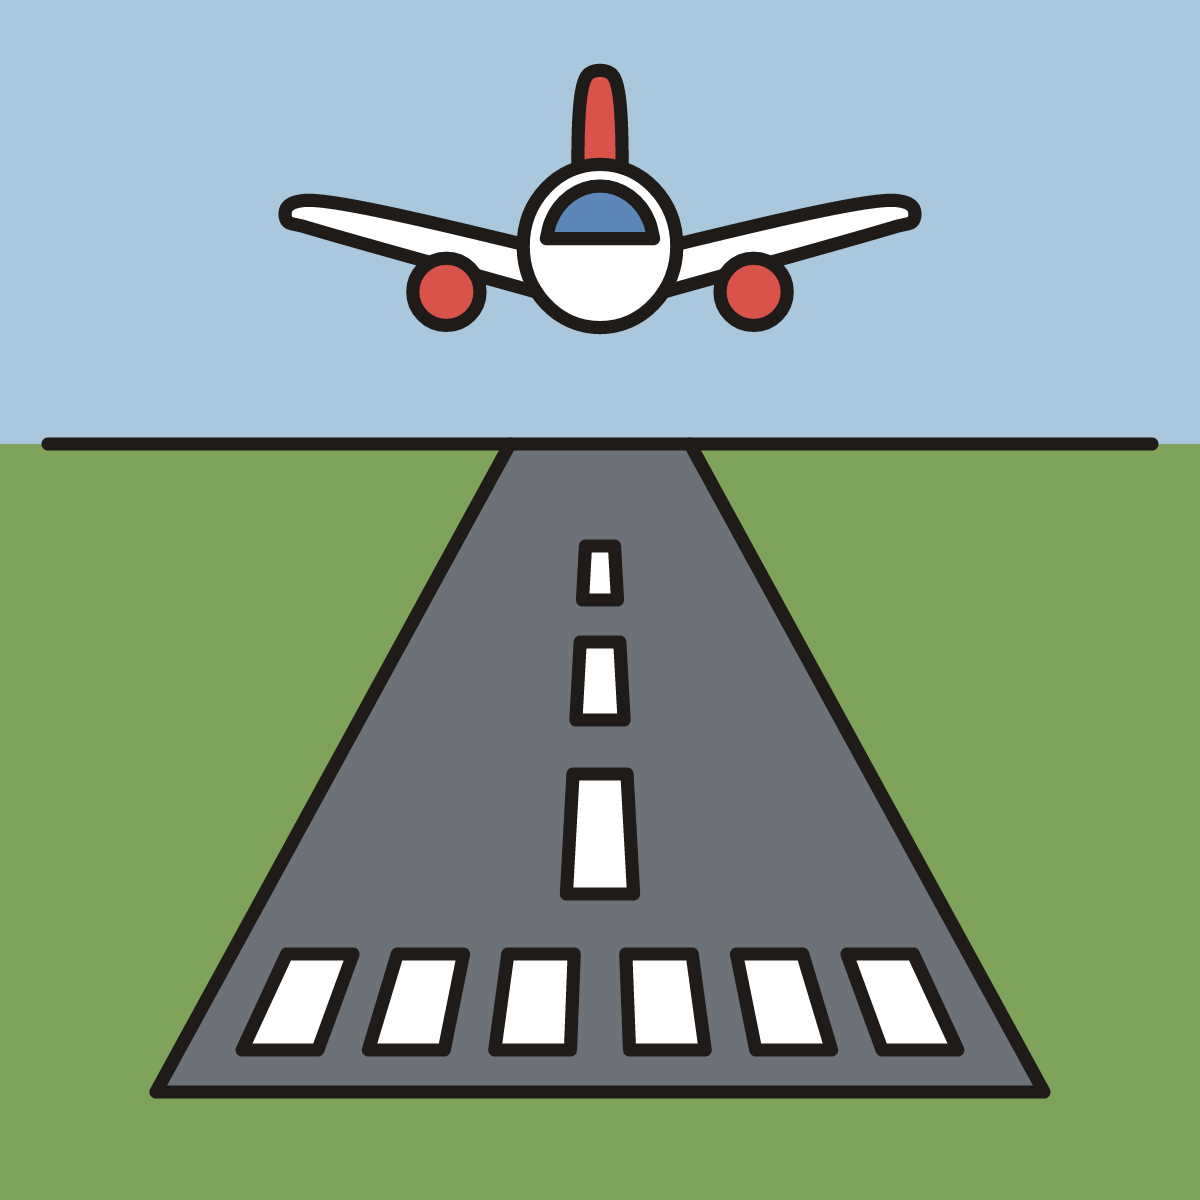
Your finished drawing
Follow the steps above and this is where you end up: a runway, drawn by you.
Every step in one picture