Watch it draw itself · tap to replay
How to Draw Rugby Posts
Draw rugby posts in 11 easy steps, about 8 minutes. Free, with a printable worksheet.
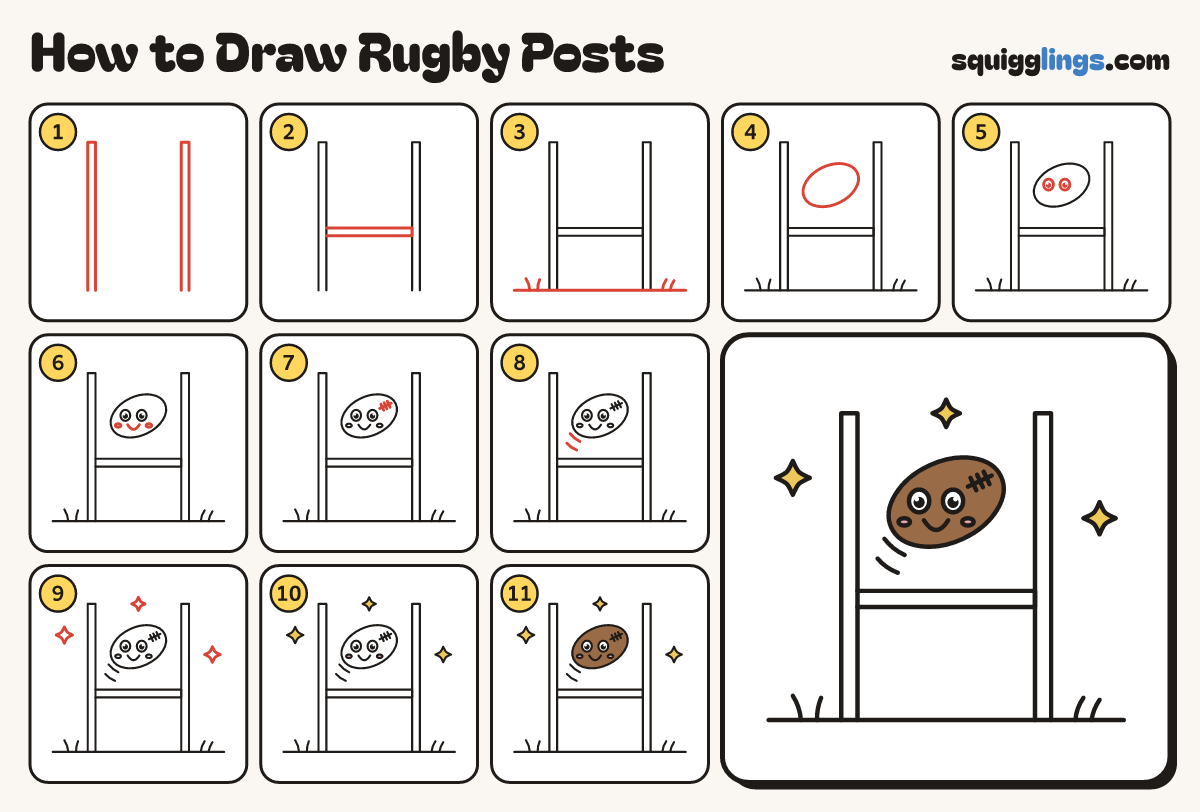
Each picture adds one red line. Draw that line, then scroll to the next picture. Rub out any dashed helper lines at the end. First up: two tall posts.
Step 1: Two tall posts
Start low by each side. Draw a tall thin post up, over a flat top, and down to the bottom.
Step 2: The crossbar
Start on the left post below the middle. Draw a flat bar straight across to the right post.
Step 3: Ground and grass
Start near the left edge. Draw a ground line under the posts, stopping near the right edge. Add grass.
Step 4: The ball
Above the crossbar, between the posts, draw a pointy oval ball tilted up to the right, like a flying lemon.
Step 5: Two big eyes
On the left half of the ball draw 2 big egg eyes. Colour a big black dot in each.
Step 6: Smile and cheeks
Under the eyes draw a wide U smile from eye to eye, and a small flat cheek beside each eye.
Step 7: The lacing
Near the pointy top of the ball draw a short lace line along it, with 3 tiny dashes across.
Step 8: Whoosh marks
Under the ball, to the left, draw 2 short curved dashes to show it flying up.
Step 9: Sparkles
Draw 3 little 4-point sparkles in the sky around the ball and posts, not touching anything.
Step 10: White posts, pink cheeks
Go over your lines, then colour the posts and crossbar white, the cheeks pink and the sparkles yellow.
Step 11: Brown ball
Colour the ball brown around the eyes and cheeks. Leave the eyes white.
Your finished drawing
Follow the steps above and this is where you end up: rugby posts, drawn by you.
Every step in one picture