Watch it draw itself · tap to replay
How to Draw a Roof
Draw a roof in 11 easy steps, about 8 minutes. Free, with a printable worksheet.
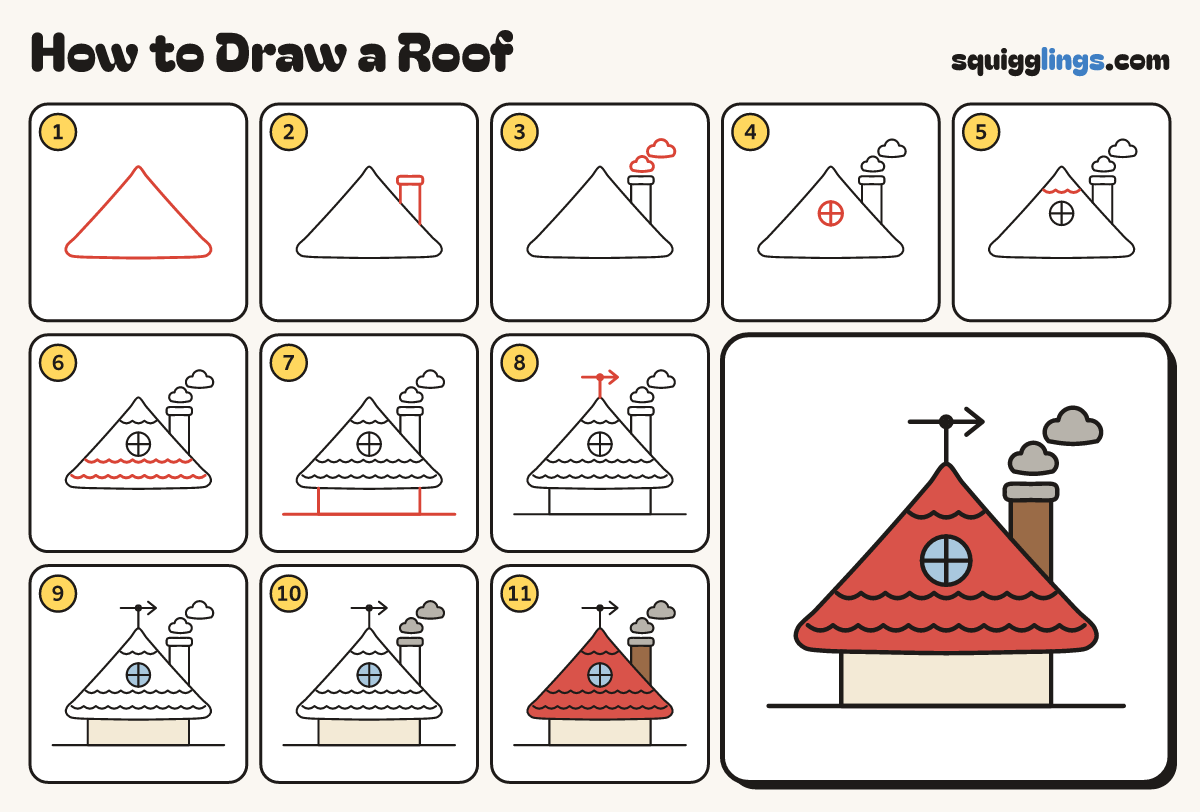
Each picture adds one red line. Draw that line, then scroll to the next picture. Rub out any dashed helper lines at the end. First up: the roof.
Step 1: The roof
Above the middle draw a big pointed roof: 2 slopes down from the peak to a thick rounded brim.
Tip The brim is thick and rounded, like a cottage roof's edge.
Step 2: The chimney
On the right slope draw a chimney from the roof up, across, and down to the roof, with a cap.
Step 3: Smoke
Draw 2 smoke clouds with 3 round bumps: a small one above the cap, a bigger one higher right.
Tip Leave a little gap between the cap and the first cloud.
Step 4: Round window
In the middle of the roof draw a round window with a cross inside: one line down, one across.
Step 5: First shingle row
Near the top draw a short row of little bumps across the roof, from the left slope to the right.
Step 6: More shingles
Under the window draw 2 more rows of bumps from slope to slope, each row wider than the one above.
Step 7: The wall
Under the brim draw a wall: a line down on each side, joined across the bottom. Add a ground line.
Step 8: Weather vane
From the peak draw a pole straight up, stopping a thumb above. Add an arrow across the top, pointing right.
Step 9: Blue window, cream wall
Go over your lines, then colour the window sky blue and the wall cream.
Step 10: Grey smoke and cap
Colour the 2 smoke clouds and the chimney cap grey.
Step 11: Red roof, brown chimney
Colour the roof red, around the window, and the chimney brown. Your roof is done!
Your finished drawing
Follow the steps above and this is where you end up: a roof, drawn by you.
Every step in one picture