Watch it draw itself · tap to replay
How to Draw a Cable-Stayed Bridge
Draw a cable-stayed bridge in 11 easy steps, about 8 minutes. Free, with a printable worksheet.
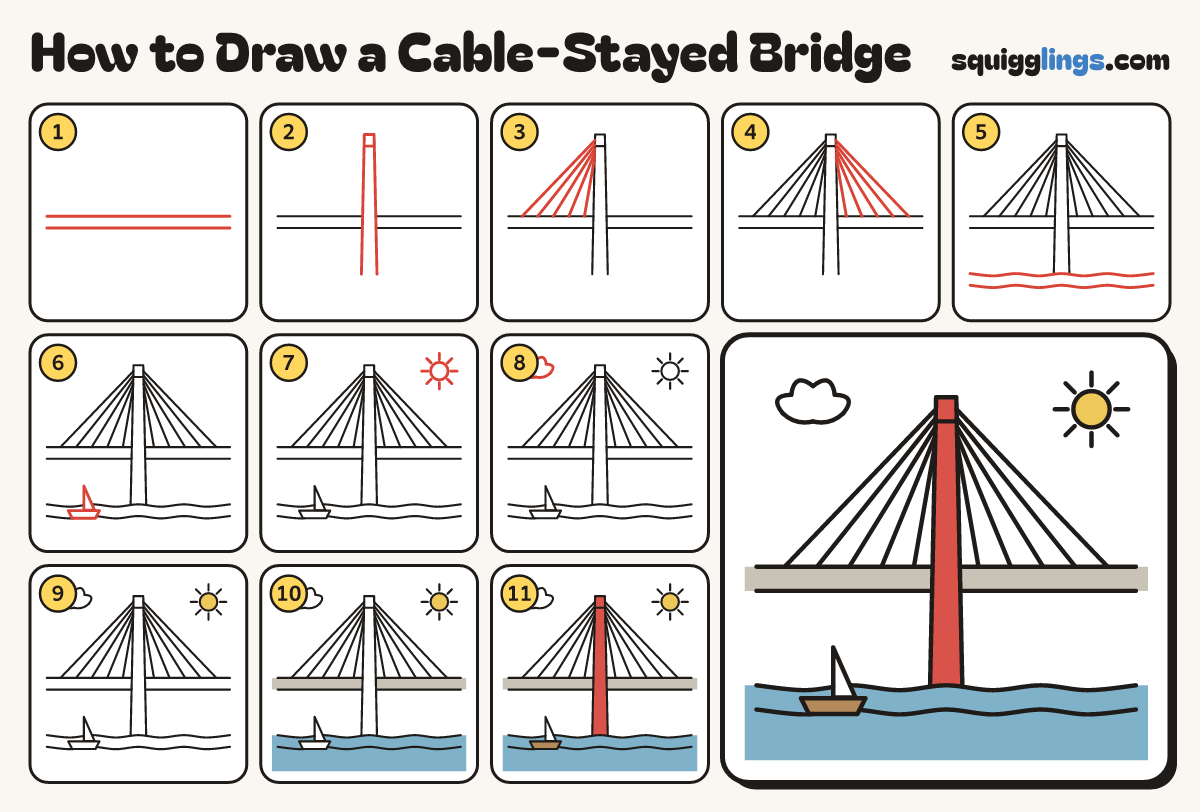
Each picture adds one red line. Draw that line, then scroll to the next picture. Rub out any dashed helper lines at the end. First up: the deck.
Step 1: The deck
Start at the left edge, below the middle. Draw 2 long lines straight across, stopping at the right edge.
Step 2: The tall tower
From low in the middle draw a tall thin tower up to a flat top. Add a bar under it.
Tip A cable-stayed bridge has one tower with cables fanning out like a sail.
Step 3: Cables on the left
Start on the tower's left side. Draw 5 straight cables fanning down, each stopping on the deck top.
Step 4: Cables on the right
Do the same on the right: start on the tower and draw 5 cables down to the deck.
Step 5: The water
Draw 2 wavy lines across the paper under the deck, the first one touching the bottom of the tower.
Step 6: A sailboat
On the water on the left draw a little boat: a flat box hull and a tall triangle sail.
Step 7: The sun
Draw a sun with short rays in the top right corner.
Step 8: A cloud
Draw a puffy cloud in the top left: little bumps on top and a flatter line underneath.
Step 9: Yellow sun
Colour the sun yellow. Leave the sail and the cloud white.
Step 10: Stone deck, blue water
Colour the deck stone grey and the water blue, around the boat, right out to the edges of the paper.
Step 11: Brown boat, red tower
Colour the boat brown and the tower red, from top to bottom. Your bridge is done!
Your finished drawing
Follow the steps above and this is where you end up: a cable-stayed bridge, drawn by you.
Every step in one picture