Watch it draw itself · tap to replay
How to Draw a Ring Pop
Draw a ring pop in 13 easy steps, about 10 minutes. Free, with a printable worksheet.
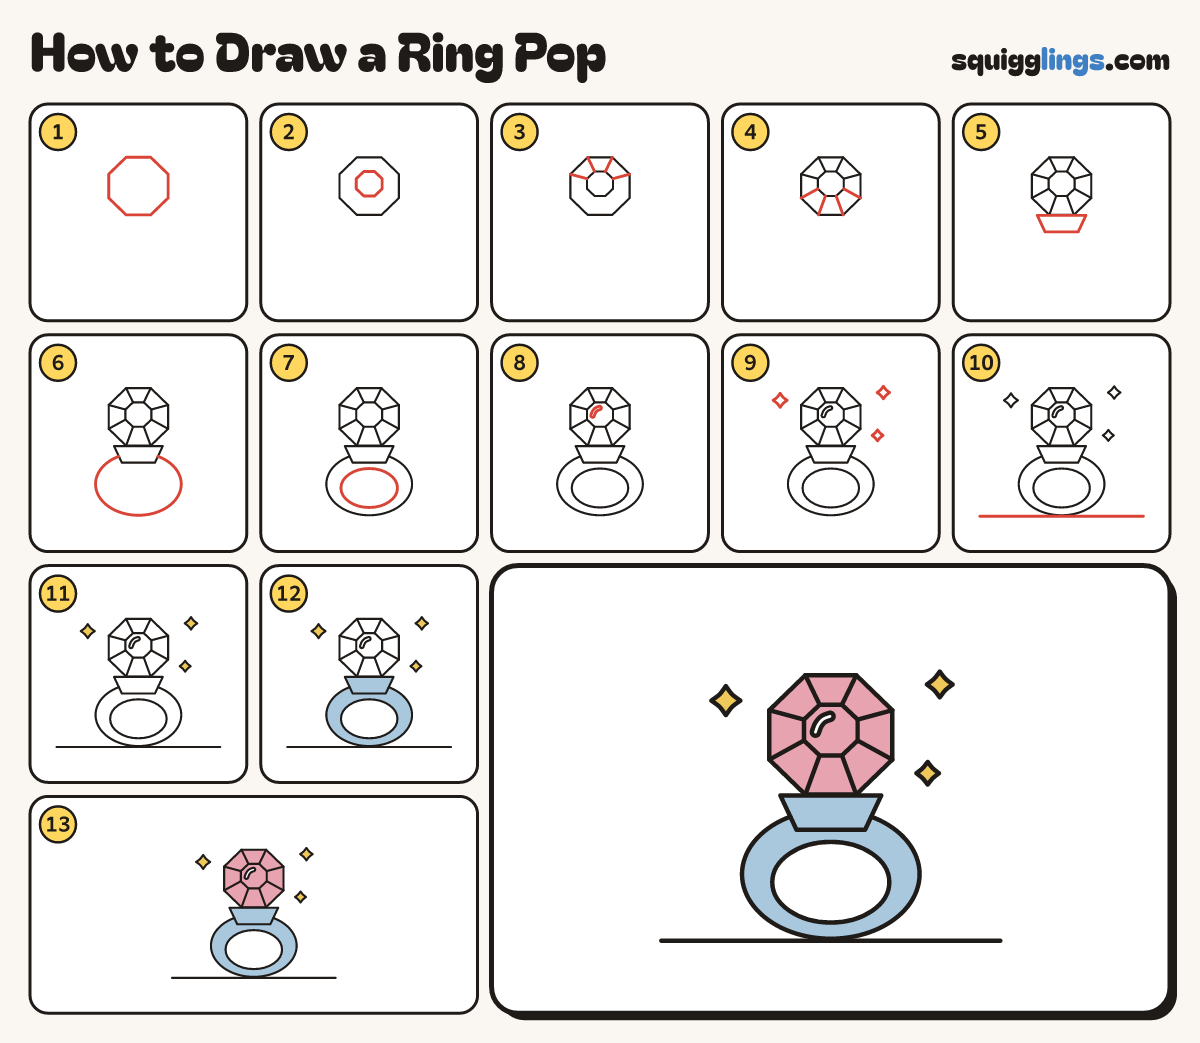
Each picture adds one red line. Draw that line, then scroll to the next picture. Rub out any dashed helper lines at the end. First up: the candy jewel.
Step 1: The candy jewel
Above the middle draw a big jewel with 8 straight sides, like a stop sign, as wide as your hand.
Tip A ring pop is a candy jewel on a ring you wear.
Step 2: The flat top
Inside it, a little above the middle, draw a small 8-sided shape for the flat top.
Step 3: Top facets
From the 4 upper corners of the small shape, draw a straight line out to the matching big corner.
Step 4: Lower facets
Draw the other 4 lines the same way, out to the lower corners.
Step 5: The plastic base
Under the jewel draw a chunky cup: a line across below its middle, 2 sides slanting in, and a bottom.
Step 6: The band
Under the base draw a big round band, a little wider than tall, so the base sits on it.
Step 7: The hole
Inside the band draw a smaller round for the finger hole, a little below the middle.
Step 8: A shine
On the flat top of the jewel, up on the left, draw a thin curved sliver for a shine.
Step 9: Sparkles
Draw a tiny 4-point sparkle to the left of the jewel, one to the right, and one lower right.
Step 10: The table
Draw a table line under the band from well left to well right, just touching its bottom.
Step 11: Yellow sparkles
Go over your lines, then colour the 3 sparkles yellow.
Step 12: Sky base and band
Colour the base and the band sky blue, going round the hole so the paper shows through.
Step 13: Pink candy
Colour the whole jewel pink, leaving the shine white, and your ring pop is done!
Your finished drawing
Follow the steps above and this is where you end up: a ring pop, drawn by you.
Every step in one picture