Watch it draw itself · tap to replay
How to Draw a Donut Box
Draw a donut box in 12 easy steps, about 9 minutes. Free, with a printable worksheet.
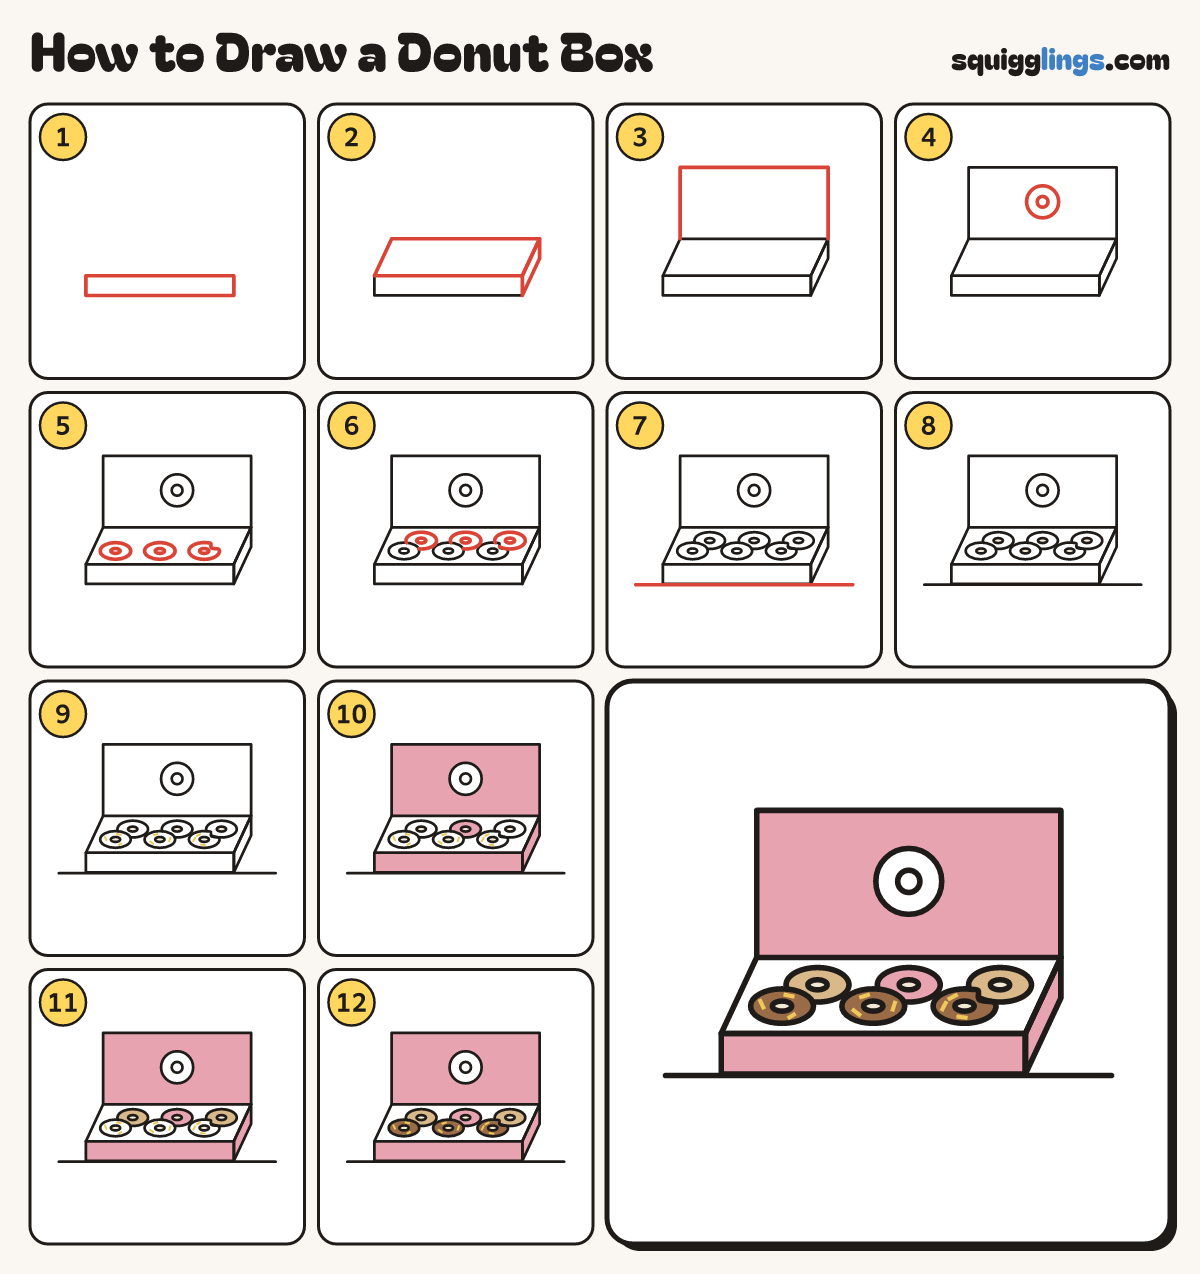
Each picture adds one red line. Draw that line, then scroll to the next picture. Rub out any dashed helper lines at the end. First up: the box front.
Step 1: The box front
Below the middle draw a long low rectangle for the front of the box, almost as wide as your paper.
Tip A donut box is wide and flat.
Step 2: The open top
From the top corners draw 2 slanted lines back and up, joined across. Add a slanted line for the end.
Step 3: The lid
From the back corners draw 2 lines straight up, joined across the top, for the lid standing open.
Tip Exactly as wide as the box, and taller than it is deep.
Step 4: A donut logo
In the middle of the lid draw a ring: a round with a small round inside it.
Step 5: Front row of donuts
In the front of the box draw 3 flat oval donuts with holes. Give the right one a round bite.
Step 6: Back row
Behind them draw 3 more donuts peeking out between and above the front ones, with their holes.
Step 7: The table
Draw a table line under the box from well left to well right, just touching its bottom.
Step 8: Cream holes
Colour the 6 donut holes cream.
Step 9: Yellow sprinkles
Colour 3 tiny yellow dashes on each front donut, tilted different ways, for sprinkles.
Step 10: Pink box and glaze
Colour the box and the middle back donut pink, around the logo and holes. Leave the inside white.
Step 11: Tan donuts
Colour the two outer back donuts tan, around their holes.
Step 12: Brown donuts
Colour the front donuts brown, around the holes and sprinkles. Your donut box is done!
Your finished drawing
Follow the steps above and this is where you end up: a donut box, drawn by you.
Every step in one picture