Watch it draw itself · tap to replay
How to Draw a Rickshaw
Draw a rickshaw in 11 easy steps, about 8 minutes. Free, with a printable worksheet.
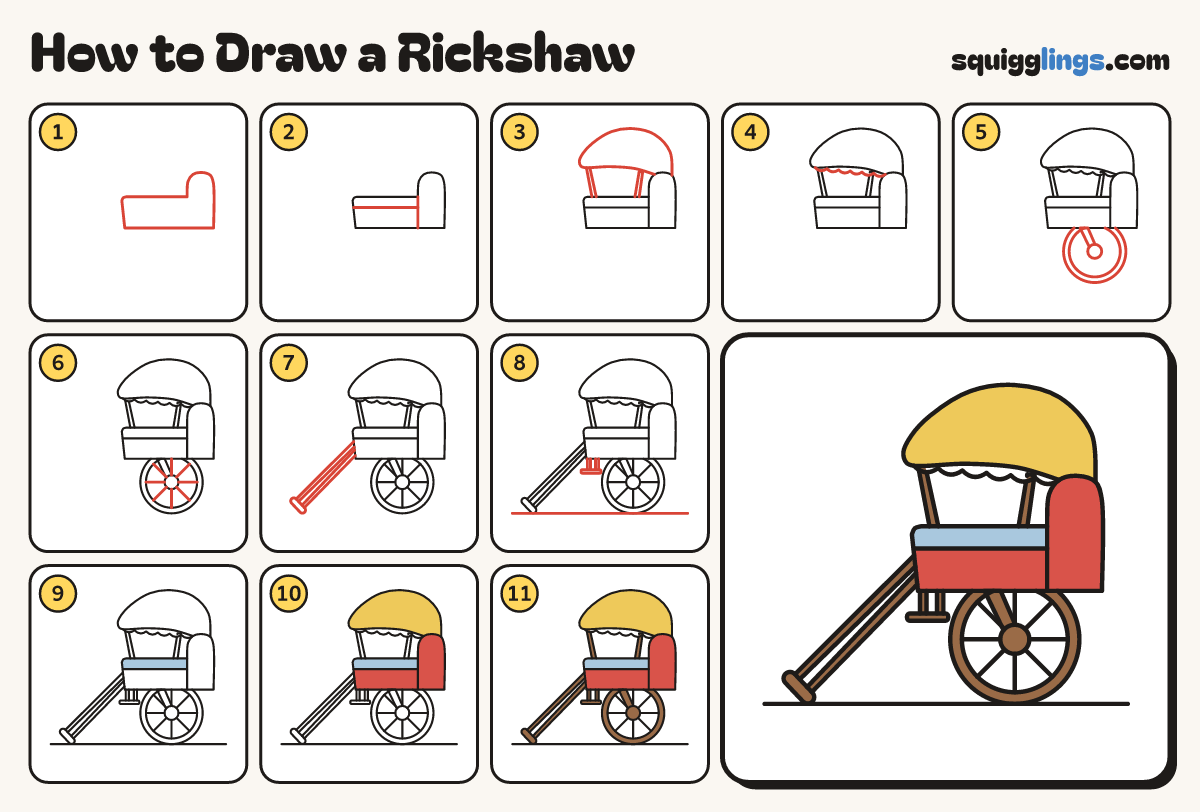
Each picture adds one red line. Draw that line, then scroll to the next picture. Rub out any dashed helper lines at the end. First up: seat and back.
Step 1: Seat and back
In the middle, draw a deep box for the seat with a tall rounded back rising from its right side.
Tip A deep box, wider than it is tall, like a tray.
Step 2: Back panel and cushion
Start where the back meets the seat. Rule a line down to the bottom. Add a cushion line across.
Step 3: The hood
Start on the tall back, arch a hood over the seat, stop on the back. Add 2 posts under it.
Tip The hood is a big quarter circle, so the rider sits in the shade.
Step 4: Fringe
Start where the hood meets the back. Draw round bumps along its inside edge, stopping at the tip.
Step 5: One big wheel
Draw a big wheel half hidden under the box. Add a rim, a hub and a strut to the box.
Tip A rickshaw has 2 wheels; from the side you see 1.
Step 6: Spokes
In the wheel, draw 4 straight lines through the hub, like cutting a pizza into 8 slices.
Step 7: Pull bars
From the front wall, draw 2 long poles slanting down to the ground. Join their ends with a handle.
Step 8: Step and ground
Under the box front, hang a thin flat board on 2 short sticks for the step. Rule a ground line.
Step 9: Blue cushion
Colour the strip above the cushion line sky blue.
Step 10: Yellow hood, red seat
Go over your lines. Colour the hood yellow. Colour the seat box and the tall back red.
Step 11: Brown wheel and bars
Colour the tyre, hub, strut, pull bars, handle, step and hood posts brown. Leave the inside of the rim white.
Your finished drawing
Follow the steps above and this is where you end up: a rickshaw, drawn by you.
Every step in one picture