Watch it draw itself · tap to replay
How to Draw Red Riding Hood
Draw Red Riding Hood in 13 easy steps, about 10 minutes. Free, with a printable worksheet.
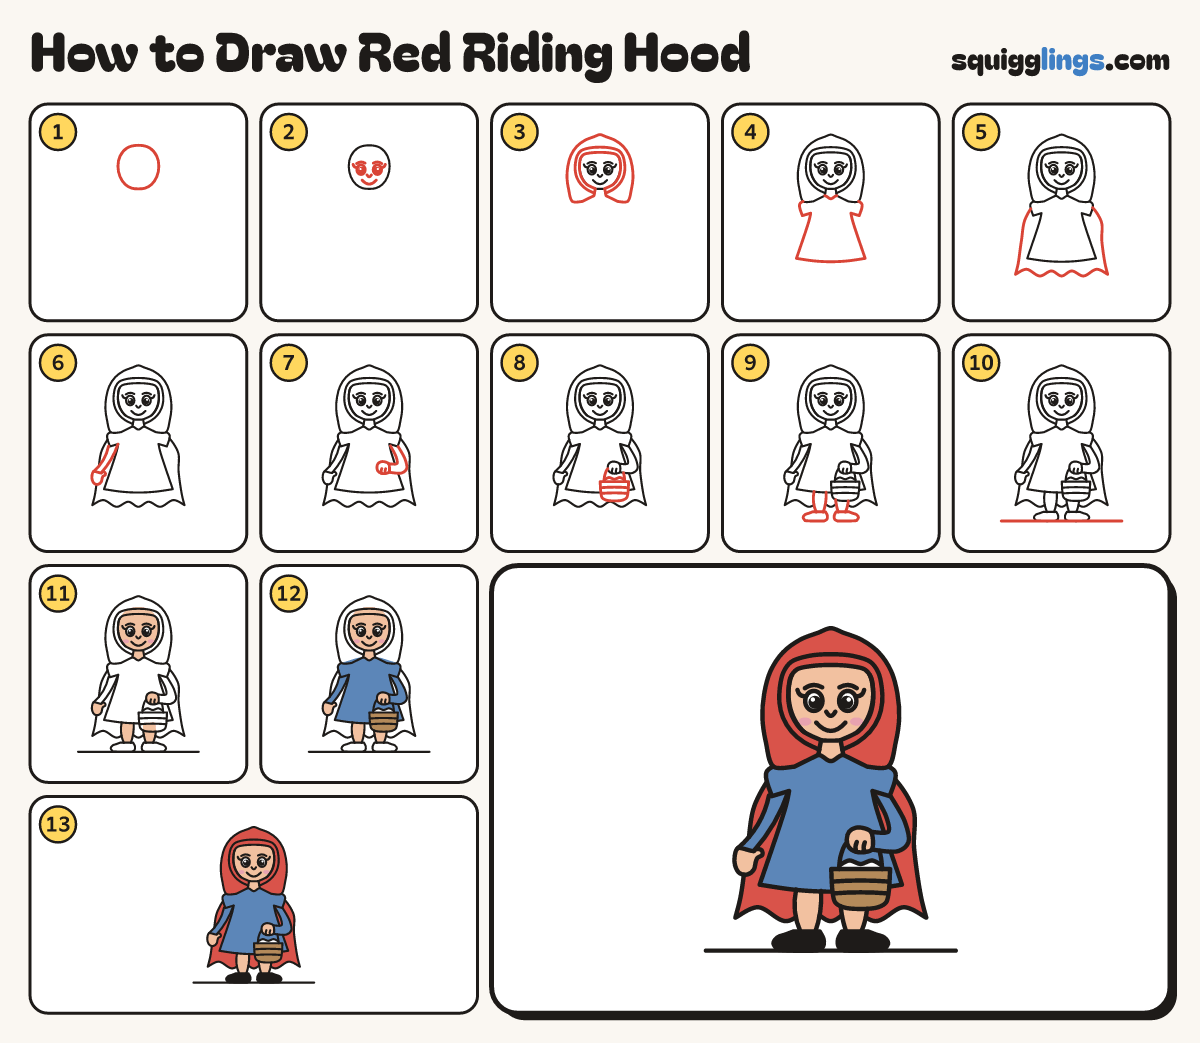
Each picture adds one red line. Draw that line, then scroll to the next picture. Rub out any dashed helper lines at the end. First up: egg head.
Step 1: Egg head
Near the top of your paper draw an egg for the head, a little narrower at the chin.
Tip Leave room round the head for the hood.
Step 2: The face
On the face draw 2 eyes, each with a dot, 1 lash and a brow. Add a nose and smile.
Step 3: Red hood
Draw a hood round the head and down each side of the neck. Add a rim round the face.
Step 4: The dress
Start at the bottom of the neck. Draw the dress down to a wide hem, then back up.
Step 5: The cape
From the bottom of the hood on each side draw the cape falling out behind the dress.
Step 6: Left arm and hand
From the left sleeve draw 2 lines down for the arm, stop at the wrist. Add a mitten hand.
Step 7: Right arm bent
From the right sleeve draw the arm down to the elbow, across to a round fist. Add 2 finger lines.
Step 8: The basket
Draw a basket under the fist. From its left corner arch a handle into the fist, stop on the right.
Step 9: Legs and shoes
Start on the hem and draw 2 legs down to thin ankles. Add a shoe under each leg.
Step 10: The ground
Draw a flat ground line under the shoes. Start left of the cape, stop past it.
Step 11: Peach skin, pink cheeks
Colour the face, neck, hands and legs peach, with pink cheeks. Keep the eyes white. Go over your lines.
Step 12: Blue dress, wood basket
Colour the dress and the sleeves blue, and the basket wood brown, leaving the cloth white.
Step 13: Red hood and cape
Colour the hood and the cape red, and the shoes black.
Your finished drawing
Follow the steps above and this is where you end up: Red Riding Hood, drawn by you.
Every step in one picture