Watch it draw itself · tap to replay
How to Draw a Recumbent Bike
Draw a recumbent bike in 12 steps, about 9 minutes. Free, with a printable worksheet.
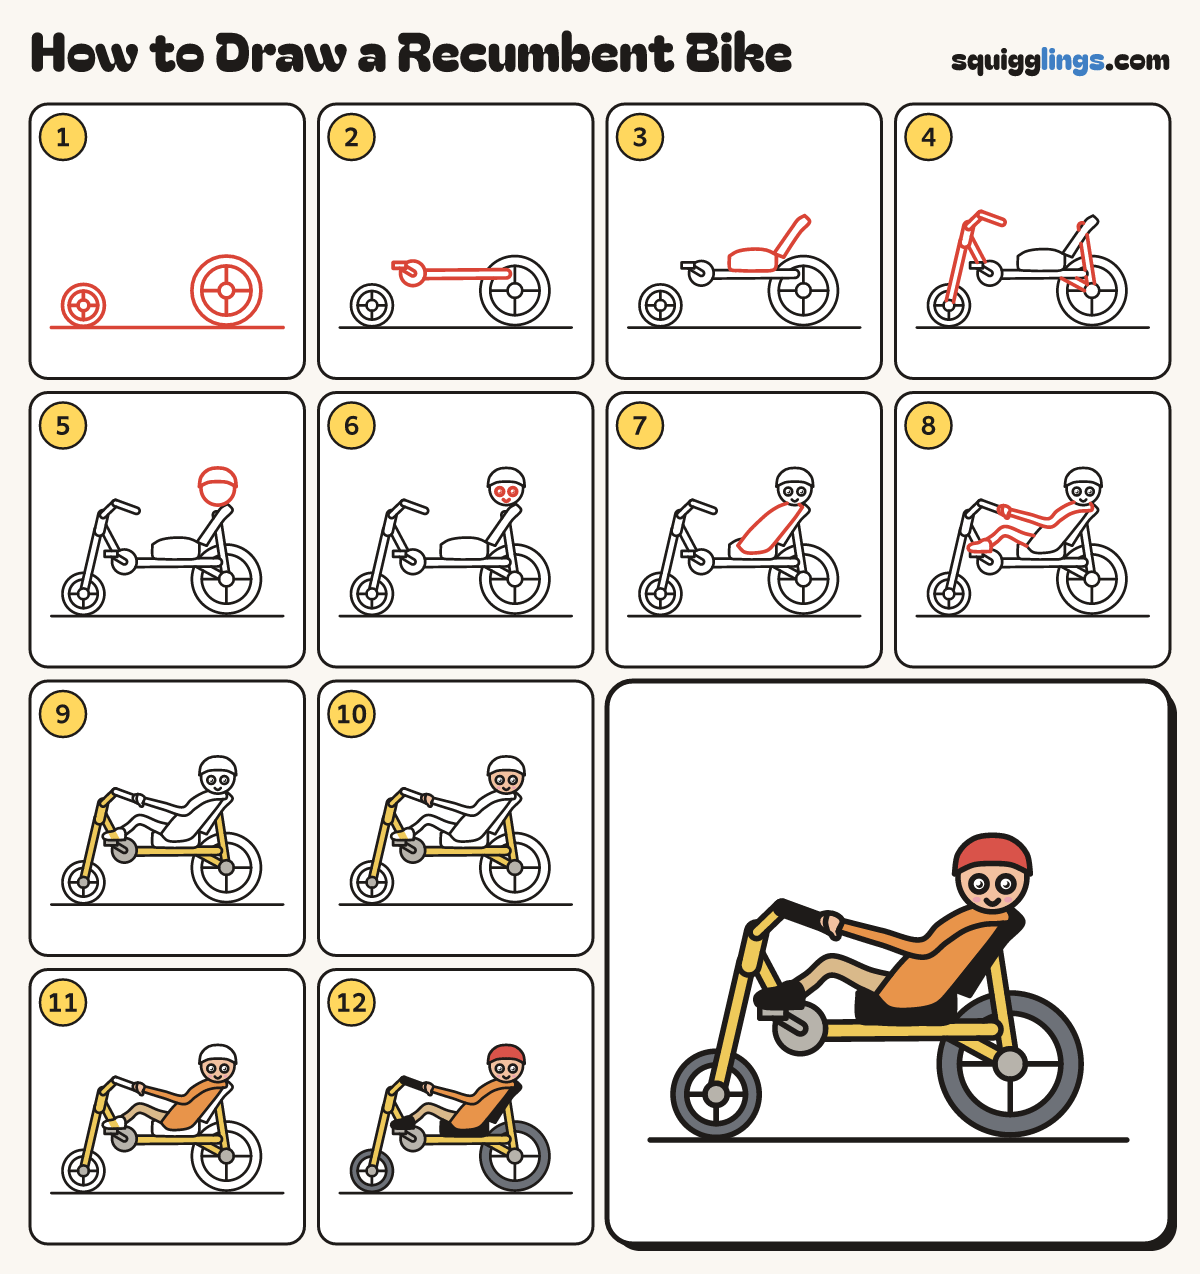
Each picture adds one red line. Draw that line, then scroll to the next picture. Rub out any dashed helper lines at the end. First up: wheels and road.
Step 1: Wheels and road
Draw a big wheel low right and a small one low left, with rims, hubs and spokes. Add a road.
Step 2: The long frame
From the front of the big wheel rule a long fat stick forward to a round chain wheel and pedal.
Tip On a recumbent the pedals are out in front.
Step 3: Seat pan and back
On the frame draw a low flat cushion. From its back end draw a tall seat back leaning back.
Tip The seat is a lounge chair: a flat pan and a reclined back.
Step 4: Front and back sticks
Draw sticks from the small hub to a pill, handlebar and frame, and 2 more up from the big hub.
Step 5: Rider's head and helmet
Above the seat back draw a round head leaning back, with a dome helmet sitting over the top of it.
Step 6: The face
Under the helmet rim draw 2 round eyes with a black dot and a shine, and a small smile below.
Step 7: Reclined body
From the seat pan draw the rider's body lying back along the seat, from the hips up to the shoulders.
Step 8: Arm and leg
Draw a bent arm from shoulder to bar, and a bent leg from hips to a shoe on the pedal.
Step 9: Yellow frame, grey hubs
Go over your lines, then colour the frame yellow, and the chain wheel, hubs and pedal grey.
Step 10: Peach face, pink cheeks
Colour the face and fist peach, and 2 pink cheeks. Leave the eyes white.
Step 11: Tan trousers, orange shirt
Colour the trousers tan and the shirt and sleeve orange.
Step 12: Red helmet, dark tyres
Colour the helmet red, the tyres dark grey around the frame, and the seat, bar and shoe black.
Your finished drawing
Follow the steps above and this is where you end up: a recumbent bike, drawn by you.
Every step in one picture