Watch it draw itself · tap to replay
How to Draw a Raised Garden Bed
Draw a raised garden bed in 12 easy steps, about 9 minutes. Free, with a printable worksheet.
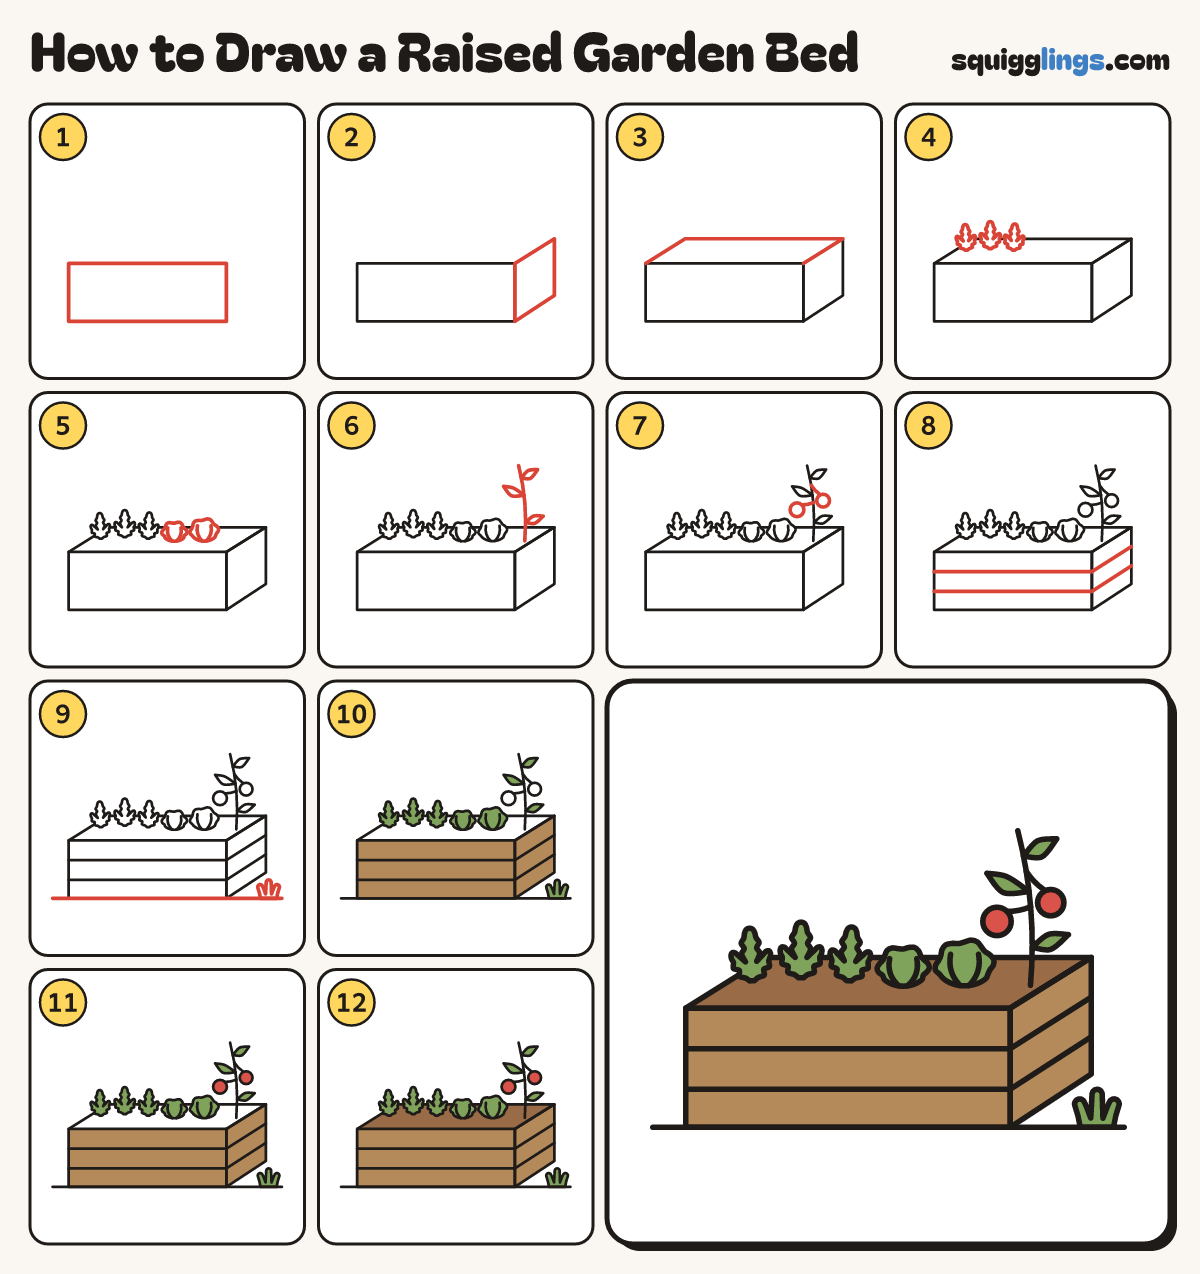
Each picture adds one red line. Draw that line, then scroll to the next picture. Rub out any dashed helper lines at the end. First up: the bed front.
Step 1: The bed front
Low on your paper draw a long wide box, not very tall, for the front of the bed.
Tip A raised bed is a big wooden box full of soil for growing vegetables.
Step 2: The end
On the right end draw the short side of the box, a slanted box going up and back.
Step 3: Soil top
Draw the soil top: a slanted line from the top left corner up and back, then across to the end.
Step 4: Carrot tops
On the left of the soil draw 3 feathery carrot tops, each 3 frilly leaves fanning up from one spot.
Step 5: Lettuces
In the middle draw two round wavy lettuces sitting on the soil, with 2 curved leaf lines in each.
Step 6: Tomato plant
From the soil at the right draw a tall, gently curved stem, stopping in the air, with 3 pointed leaves.
Step 7: Tomatoes
From the stem draw 2 short stalks curving down, one left and one right, each ending in a round tomato.
Step 8: Planks
Draw two long lines across the front and two across the end for the plank joins.
Step 9: Ground and grass
Draw a ground line under the bed from side to side, with a small tuft of grass by the end.
Step 10: Leaves and wood
Go over your lines, then colour the carrot tops, lettuces, tomato leaves and grass green, and the box brown.
Step 11: Red tomatoes
Colour the tomatoes red.
Step 12: Dark soil
Colour the soil dark brown around the plants. Lunch is growing!
Your finished drawing
Follow the steps above and this is where you end up: a raised garden bed, drawn by you.
Every step in one picture