Watch it draw itself · tap to replay
How to Draw a Pyramid
Draw a pyramid in 10 easy steps, about 8 minutes. Free, with a printable worksheet.
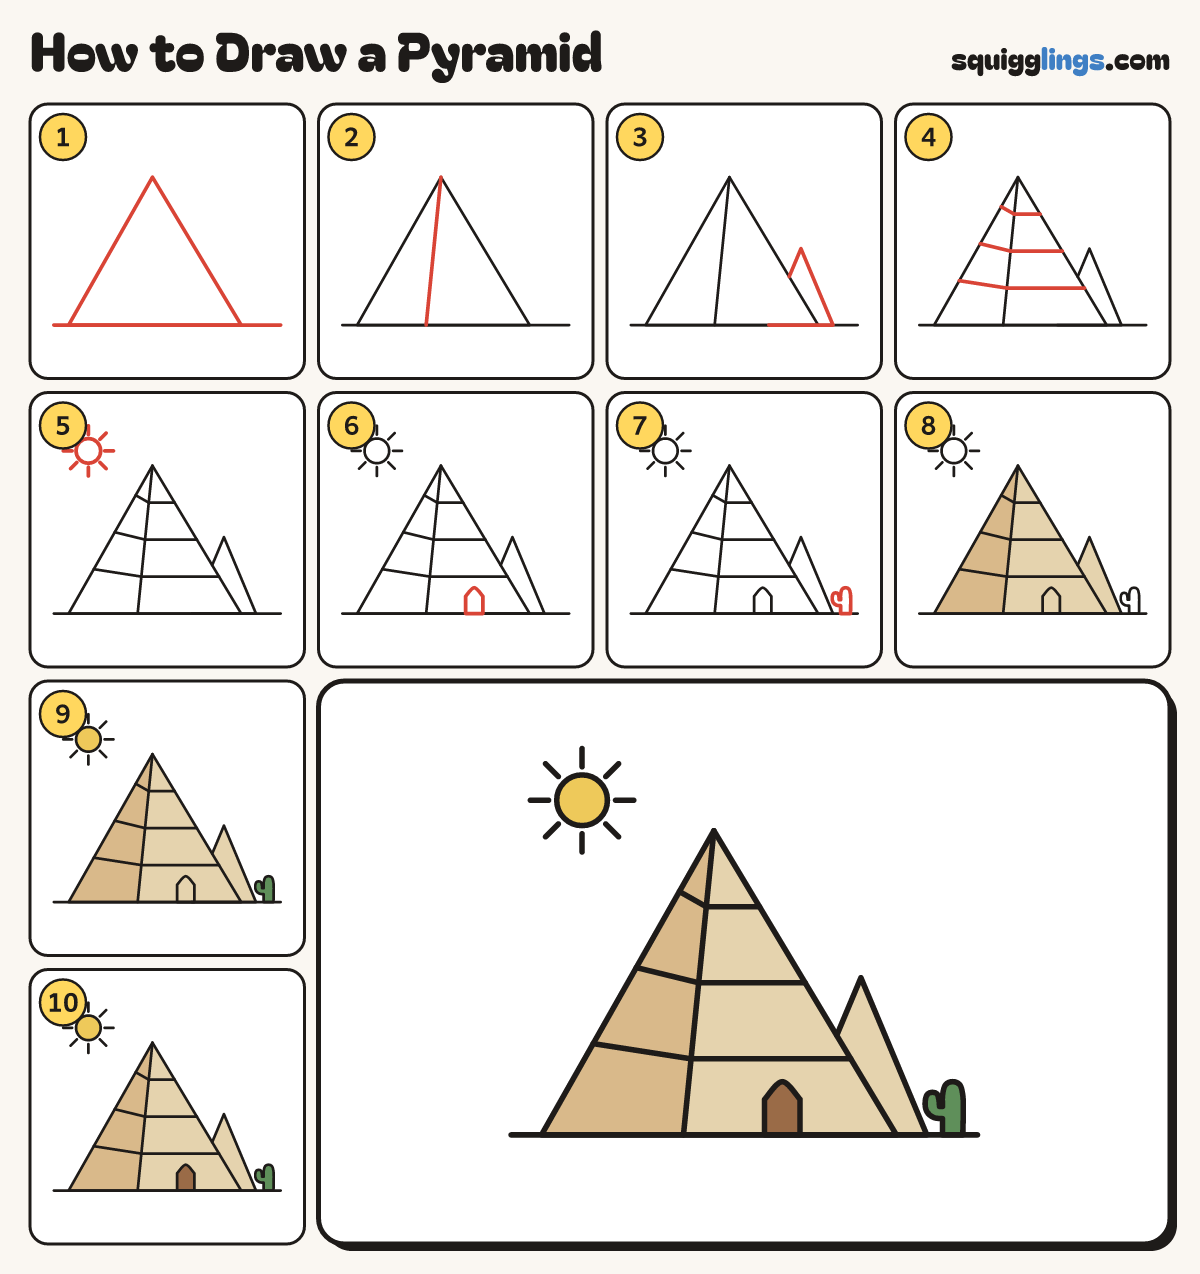
Each picture adds one red line. Draw that line, then scroll to the next picture. Rub out any dashed helper lines at the end. First up: ground and pyramid.
Step 1: Ground and pyramid
Draw a ground line low down, edge to edge. On it, draw a big wide triangle, point left of middle.
Tip A pyramid is wider than it is tall.
Step 2: The corner edge
From the point, draw a slanting line down to the ground, left of the middle. Now you see 2 faces.
Step 3: A second pyramid
Behind the big one on the right, draw a smaller triangle peeking out, down to the ground line.
Step 4: Stone rows
Draw 3 flat rows of stones across the whole pyramid, evenly spaced, from the left side to the right side.
Step 5: The sun
Near the top left corner, draw a small round sun with 8 short rays round it, like a wheel.
Step 6: A doorway
Under the lowest stone row, in the middle of the wide face, draw a small arched doorway on the ground.
Step 7: A palm tree
On the far right, draw a thin trunk up from the ground. On top, draw 5 droopy leaves.
Tip The leaves join in the middle, like a floppy star.
Step 8: Sandy pyramids
Colour the wide face and the small pyramid sand, but not the doorway. Colour the thin face tan.
Step 9: Yellow sun, green leaves
Colour the sun yellow and the palm leaves green.
Step 10: Brown door and trunk
Colour the doorway and the palm trunk brown. Go over all your lines and your pyramid is done!
Your finished drawing
Follow the steps above and this is where you end up: a pyramid, drawn by you.
Every step in one picture