Watch it draw itself · tap to replay
How to Draw a Pizzeria
Draw a pizzeria in 13 easy steps, about 10 minutes. Free, with a printable worksheet.
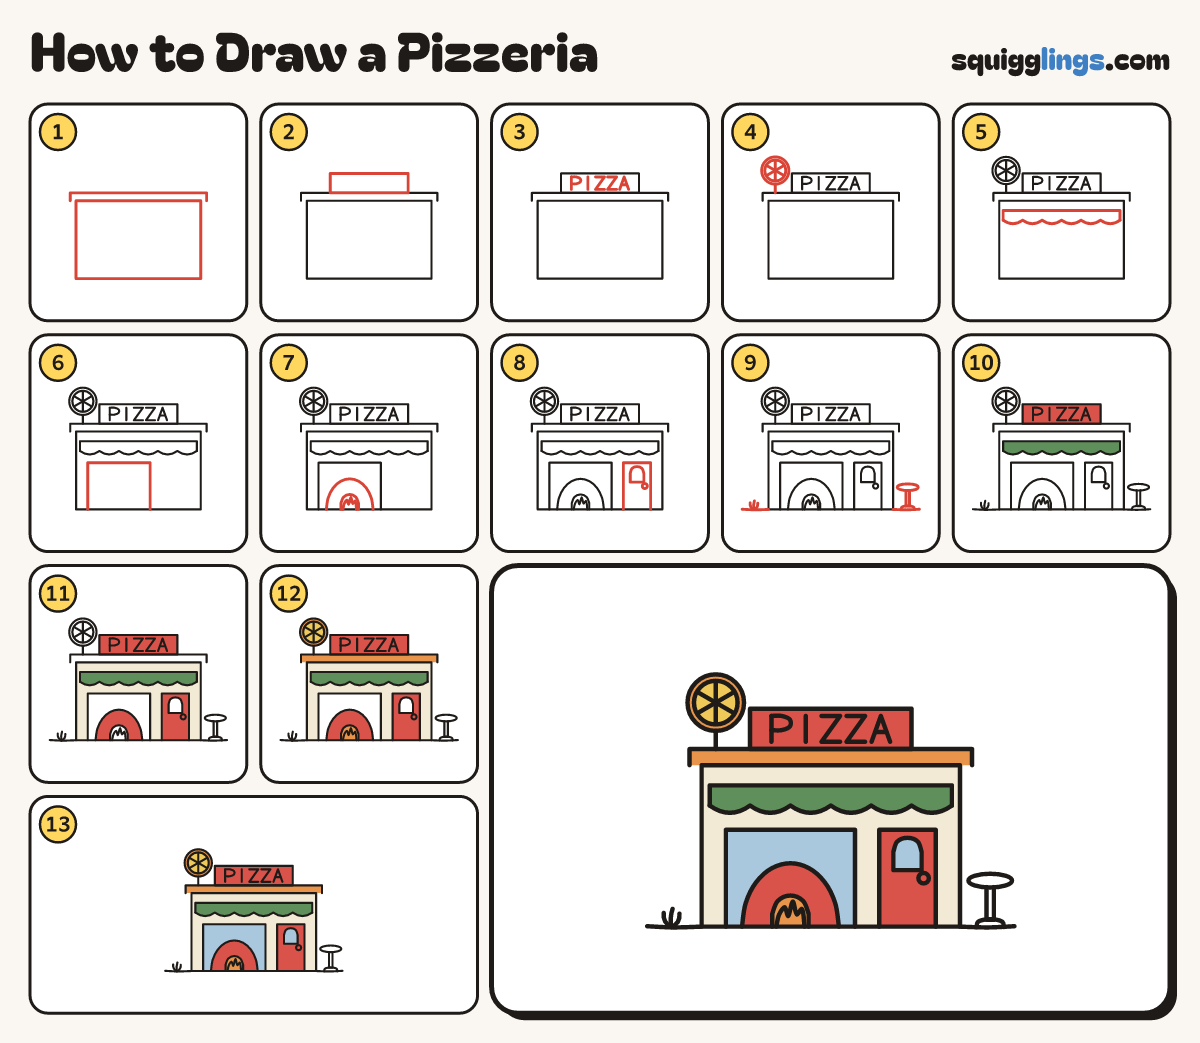
Each picture adds one red line. Draw that line, then scroll to the next picture. Rub out any dashed helper lines at the end. First up: the shop front.
Step 1: The shop front
Draw a wide box for the shop front. For the ledge, start at one top corner and stop at the other.
Step 2: The sign board
On the ledge, in the middle, draw a long box for the sign board.
Step 3: PIZZA
Write PIZZA in big capital letters across the sign board.
Step 4: The pizza sign
Start on the ledge, left of the sign board. Draw a post up, stop under a big round pizza. Add slices.
Step 5: The canopy
Start on the wall below the ledge. Draw a low canopy across, stop on the wall. Add a bumpy edge.
Step 6: The big window
On the left, start on the bottom line. Draw a big window up, across and down, stop on the line.
Step 7: The pizza oven
In the window, start on the bottom line. Draw a big dome, stop on the bottom line. Add a mouth.
Step 8: The door
On the right, start on the bottom line. Draw a tall door, stop on the line. Add a window and knob.
Step 9: Ground and table
Start at each bottom corner. Draw a ground line out, stop near the edge. Add grass and a round table.
Step 10: Green canopy, red sign
Colour the canopy green and the sign board red, going round the letters.
Step 11: Cream walls, brick oven
Colour the walls cream, around the window and door. Colour the oven and the door brick red.
Step 12: Hot fire, yellow pizza
Colour the oven mouth orange. Colour the pizza sign yellow with an orange crust, and the ledge orange too.
Step 13: Sky windows
Colour the big window and the door window sky blue, around the oven. Go over your lines. Done!
Your finished drawing
Follow the steps above and this is where you end up: a pizzeria, drawn by you.
Every step in one picture