Watch it draw itself · tap to replay
How to Draw a Pumpkin
Draw a pumpkin in 10 easy steps, about 8 minutes. Free, with a printable worksheet.
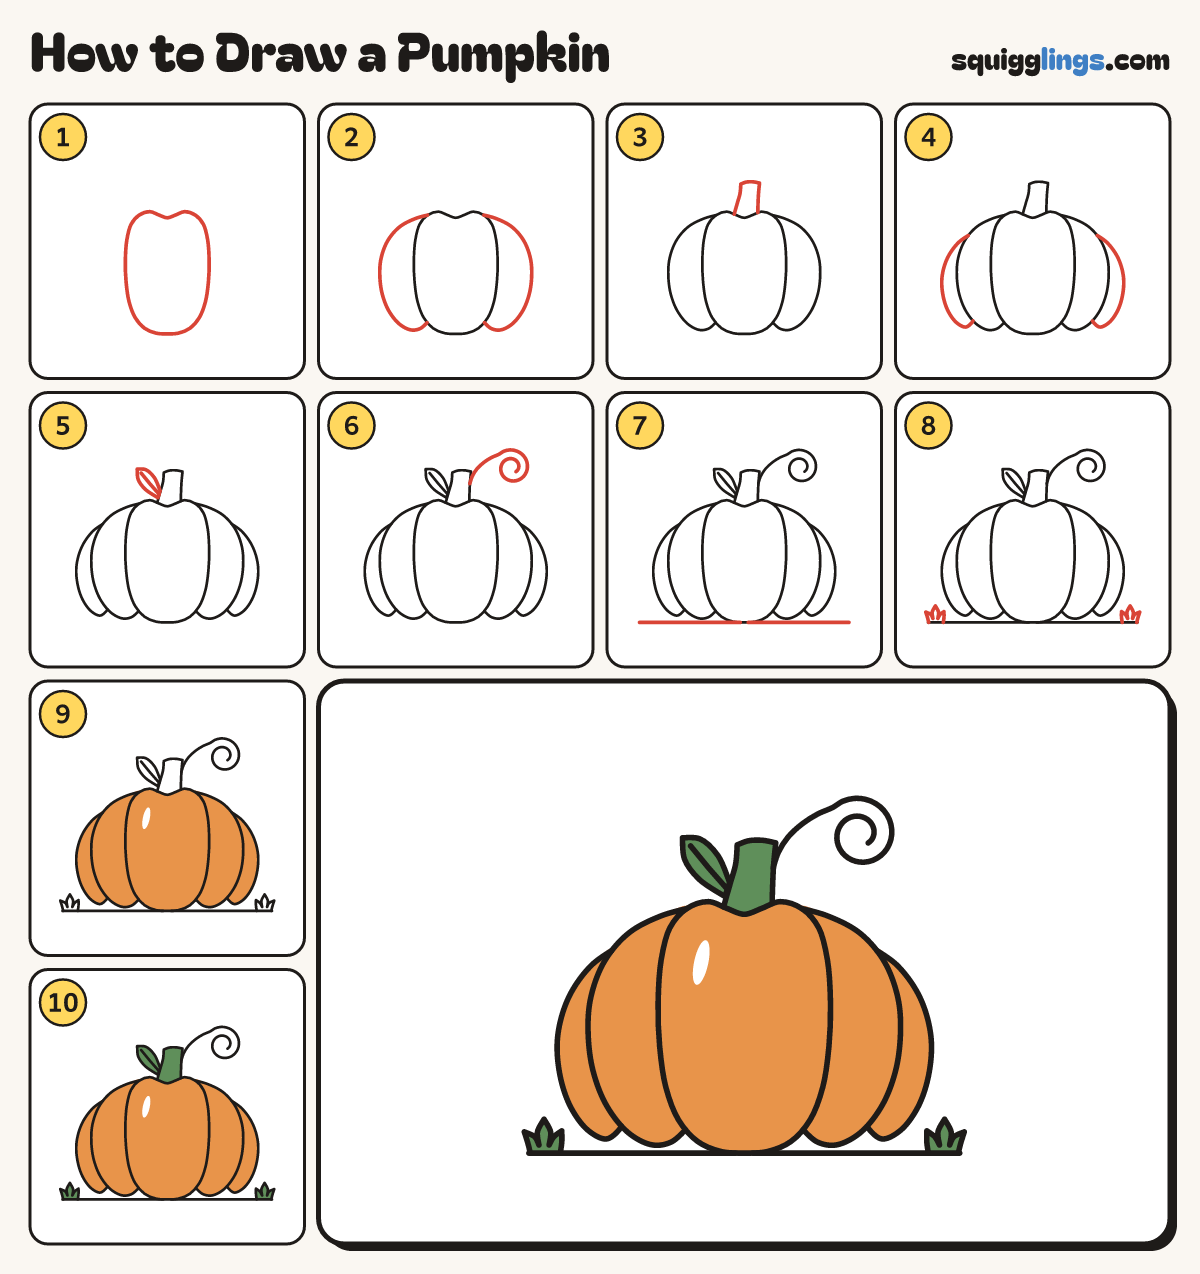
Each picture adds one red line. Draw that line, then scroll to the next picture. Rub out any dashed helper lines at the end. First up: the middle bump.
Step 1: The middle bump
Draw a tall bump, a bit taller than wide, with a shallow dip on top and a saggy bottom.
Tip Fattest a little below halfway. The stem will grow from the dip.
Step 2: Fat side bumps
Start under the middle bump's left shoulder. Draw a fat C out and down, stopping near its bottom. Repeat right.
Tip Stop a little above the bottom so a notch shows: that makes it ribbed.
Step 3: The stem
From the dip draw a stem up to a short flat top, then back down to the dip, wider below.
Tip About a quarter as tall as the pumpkin, like a little tree trunk.
Step 4: Slim outer bumps
Start high on the left side bump. Draw a slim C out and down, stopping near its bottom. Repeat right.
Tip Each bump's bottom sits a little higher than the one before.
Step 5: A leaf
Halfway up the left side of the stem draw a leaf as big as the stem, pointing up and left.
Tip A fat teardrop with a line down its middle.
Step 6: Curly vine
From the right side of the stem draw a vine swinging out and curling round into a loose swirl.
Tip About 2 fingers wide. The turns never touch.
Step 7: The ground
Start near the left edge. Draw a ground line under the pumpkin, stopping near the right edge.
Tip Lift your pencil where the line would go through the pumpkin.
Step 8: Grass
Near each end of the ground line, draw a tuft of 3 grass points, starting and stopping on the line.
Step 9: Orange pumpkin
Go over your lines, then colour the whole pumpkin orange, leaving a curved white shine on the upper left.
Step 10: Green stem and leaf
Colour the stem, the leaf and the grass tufts green.
Your finished drawing
Follow the steps above and this is where you end up: a pumpkin, drawn by you.
Every step in one picture