Watch it draw itself · tap to replay
How to Draw a Hard-Boiled Egg
Draw a hard-boiled egg in 11 easy steps, about 8 minutes. Free, with a printable worksheet.
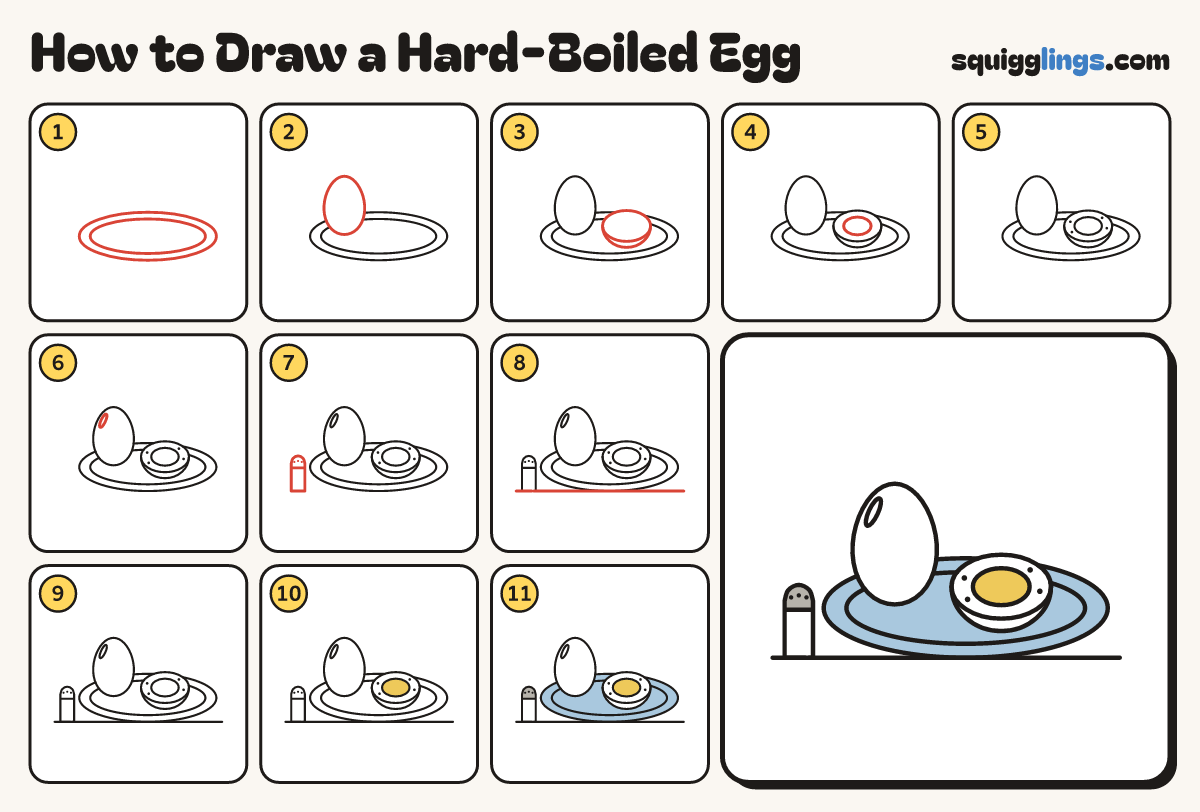
Each picture adds one red line. Draw that line, then scroll to the next picture. Rub out any dashed helper lines at the end. First up: a plate.
Step 1: A plate
Below the middle draw a long flat oval plate, with a second oval just inside it for the rim.
Tip The plate comes first; the food sits inside the rim.
Step 2: A whole egg
On the left of the plate draw a big egg standing up, narrower at the top, inside the rim.
Step 3: A half egg
On the right draw a flat oval. Curve a round U under it from one end to the other.
Step 4: The yolk
In the middle of the cut face draw a smaller flat oval for the yolk.
Step 5: Pepper
Sprinkle four tiny solid dots on the white round the yolk for pepper, scattered, not in a pattern.
Step 6: A shine
On the upper left of the whole egg draw a thin slanted oval sliver for a shine.
Step 7: A salt shaker
At the far left draw a salt shaker: a tall box with a rounded top and 3 dots on top.
Step 8: The table
Draw a table line under the plate and the shaker from well left to well right.
Step 9: Leave eggs white
Go over your lines. Leave the eggs and the shine white.
Step 10: Yellow yolk
Colour the yolk yellow.
Step 11: Sky plate, grey shaker
Colour the plate sky blue around the eggs, and the shaker top grey. Your hard-boiled egg is done!
Your finished drawing
Follow the steps above and this is where you end up: a hard-boiled egg, drawn by you.
Every step in one picture