Watch it draw itself · tap to replay
How to Draw Pumpkin Seeds
Draw pumpkin seeds in 11 easy steps, about 8 minutes. Free, with a printable worksheet.
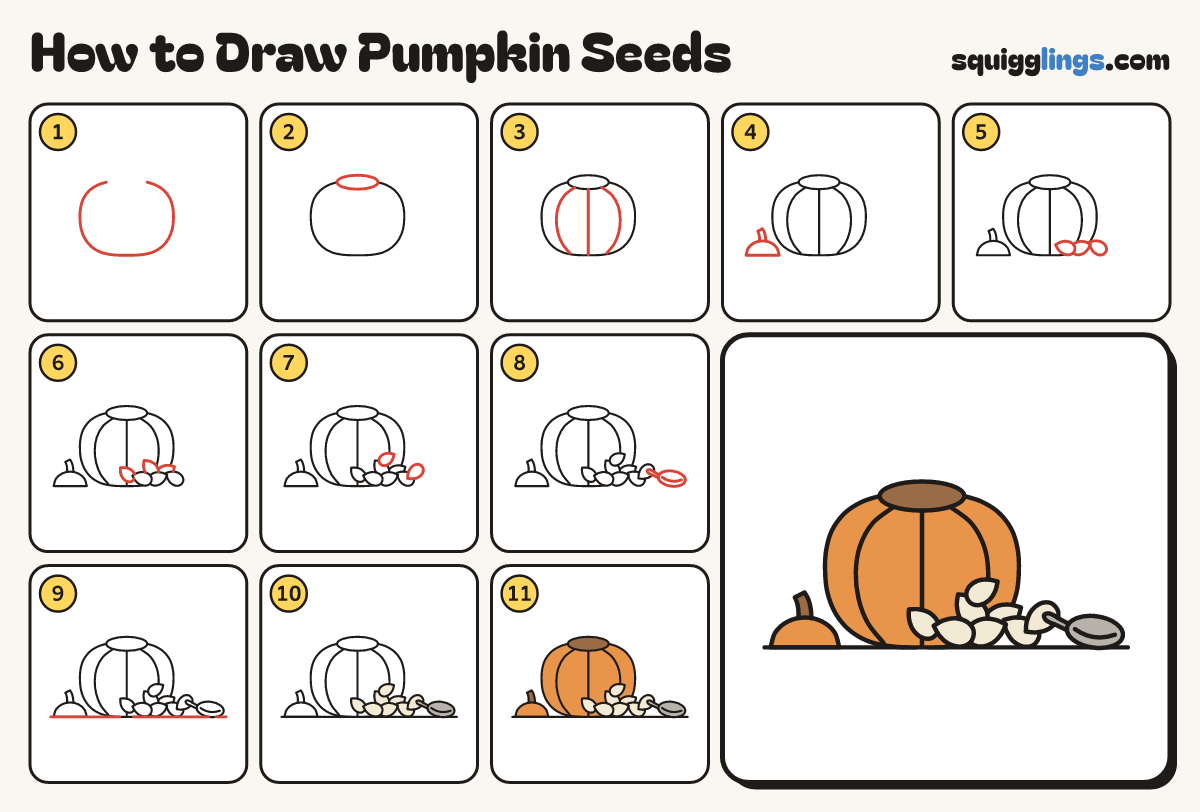
Each picture adds one red line. Draw that line, then scroll to the next picture. Rub out any dashed helper lines at the end. First up: the pumpkin.
Step 1: The pumpkin
Start at the top left. Draw a big round belly down, along the bottom and up to the top right.
Tip The top is cut off and scooped, and the seeds are heaped in front.
Step 2: The cut top
Across the open top draw a flat oval from the left end to the right end.
Step 3: Ribs
From the oval draw 3 rib lines down to the bottom. Bend the outside ones out round the belly.
Step 4: The lid
Beside the pumpkin on the left draw the cut-off lid, a little dome with a short curved stem.
Step 5: 3 seeds
In front of the pumpkin, on the right, draw 3 seeds, round at one end and pointed at the other.
Step 6: Pile them up
Draw 2 more seeds resting on top of the first 3, and one leaning against the pumpkin on the left.
Step 7: Top of the pile
Tuck one more seed on the right end of the pile and one on the very top.
Step 8: A spoon
Right of the pile draw a spoon lying down, a big oval bowl with its handle resting on the seeds.
Step 9: The table
Draw a table line under everything from far left to far right, lifting your pencil where it would cross.
Step 10: Cream seeds
Go over your lines, then colour every seed cream and the spoon grey.
Step 11: Orange pumpkin
Colour the pumpkin and lid orange around the seeds, then the hole and the stem brown. All done!
Your finished drawing
Follow the steps above and this is where you end up: pumpkin seeds, drawn by you.
Every step in one picture