Watch it draw itself · tap to replay
How to Draw a Prosthetic Leg
Draw a prosthetic leg in 13 easy steps, about 10 minutes. Free, with a printable worksheet.
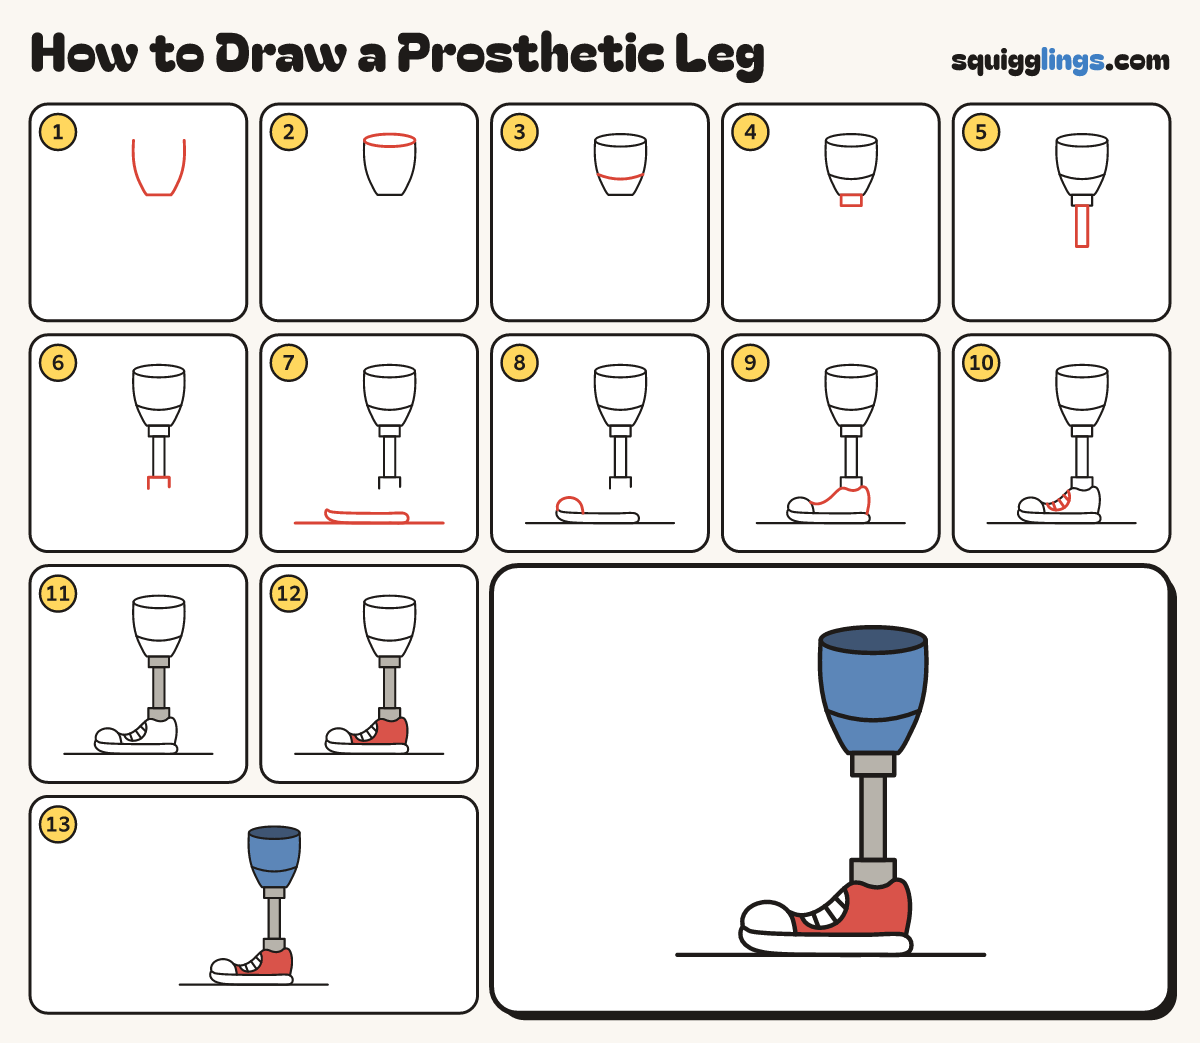
Each picture adds one red line. Draw that line, then scroll to the next picture. Rub out any dashed helper lines at the end. First up: the socket.
Step 1: The socket
Draw a tall cup for the socket. Start at the top left, go down, across, stop at the top right.
Tip The cup is wide at the top and narrow at its flat bottom.
Step 2: The opening
Join the 2 top ends with a flat oval. This is where the leg fits in.
Tip The oval is as wide as the top of the cup.
Step 3: A stripe
Start low on the left side of the socket. Draw a curved line across and stop on the right side.
Step 4: The connector
Under the socket draw a small box, a little narrower than the socket's bottom.
Step 5: The metal tube
Under the box draw a long thin tube straight down. Stop above the bottom of the page.
Tip Keep the tube straight and thin. It is a strong metal pole.
Step 6: The ankle
Under the tube draw a wider box with no bottom. Start low on the left, stop low on the right.
Tip The shoe will close the bottom of this box.
Step 7: Ground and sole
Draw a ground line near the bottom. On it draw a long fat sole, sticking out to the left.
Tip The toe end lifts up a little.
Step 8: Toe cap
Start at the toe tip of the sole. Draw a half-dome up and over, and stop on the sole.
Step 9: The sneaker
Start behind the toe cap. Climb to the ankle box, dip under it, round the heel, stop on the sole.
Tip The shoe's top line closes the bottom of the ankle box.
Step 10: Laces
Start on the shoe's top near the ankle. Curve under it and stop behind the toe cap. Add 3 laces.
Step 11: Grey metal
Colour the connector, the tube and the ankle box light grey.
Step 12: Red sneaker
Colour the sneaker red around the laces. Leave the toe cap and the sole white.
Step 13: Blue socket
Colour the socket blue and its opening dark blue. Go over your lines. Your prosthetic leg is ready!
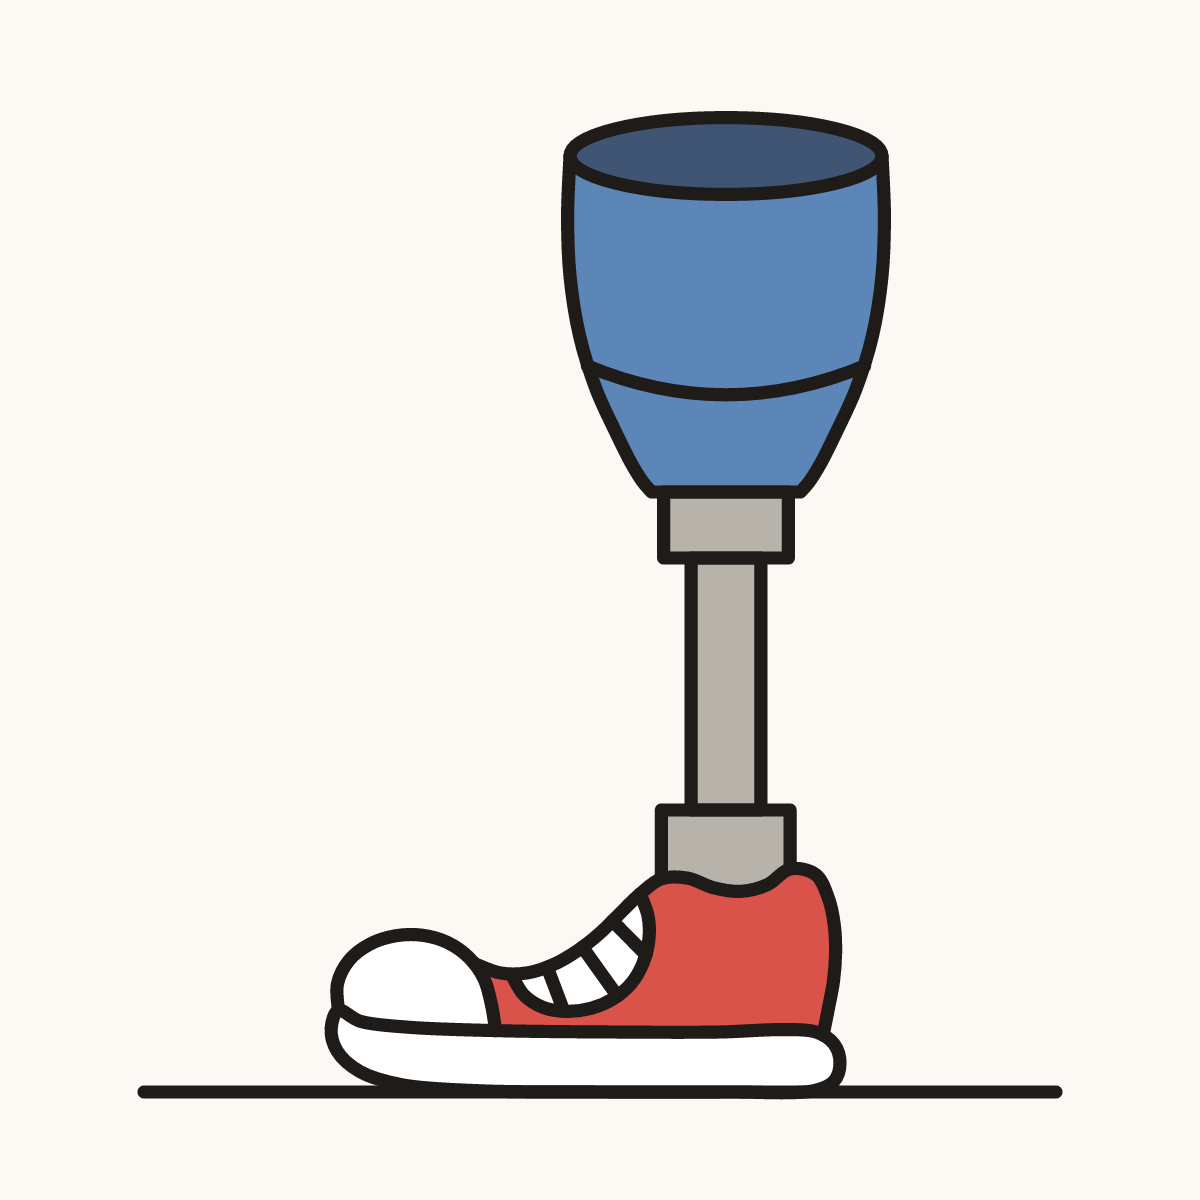
Your finished drawing
Follow the steps above and this is where you end up: a prosthetic leg, drawn by you.
Every step in one picture