Watch it draw itself · tap to replay
How to Draw a Rope Knot
Draw a rope knot in 12 easy steps, about 9 minutes. Free, with a printable worksheet.
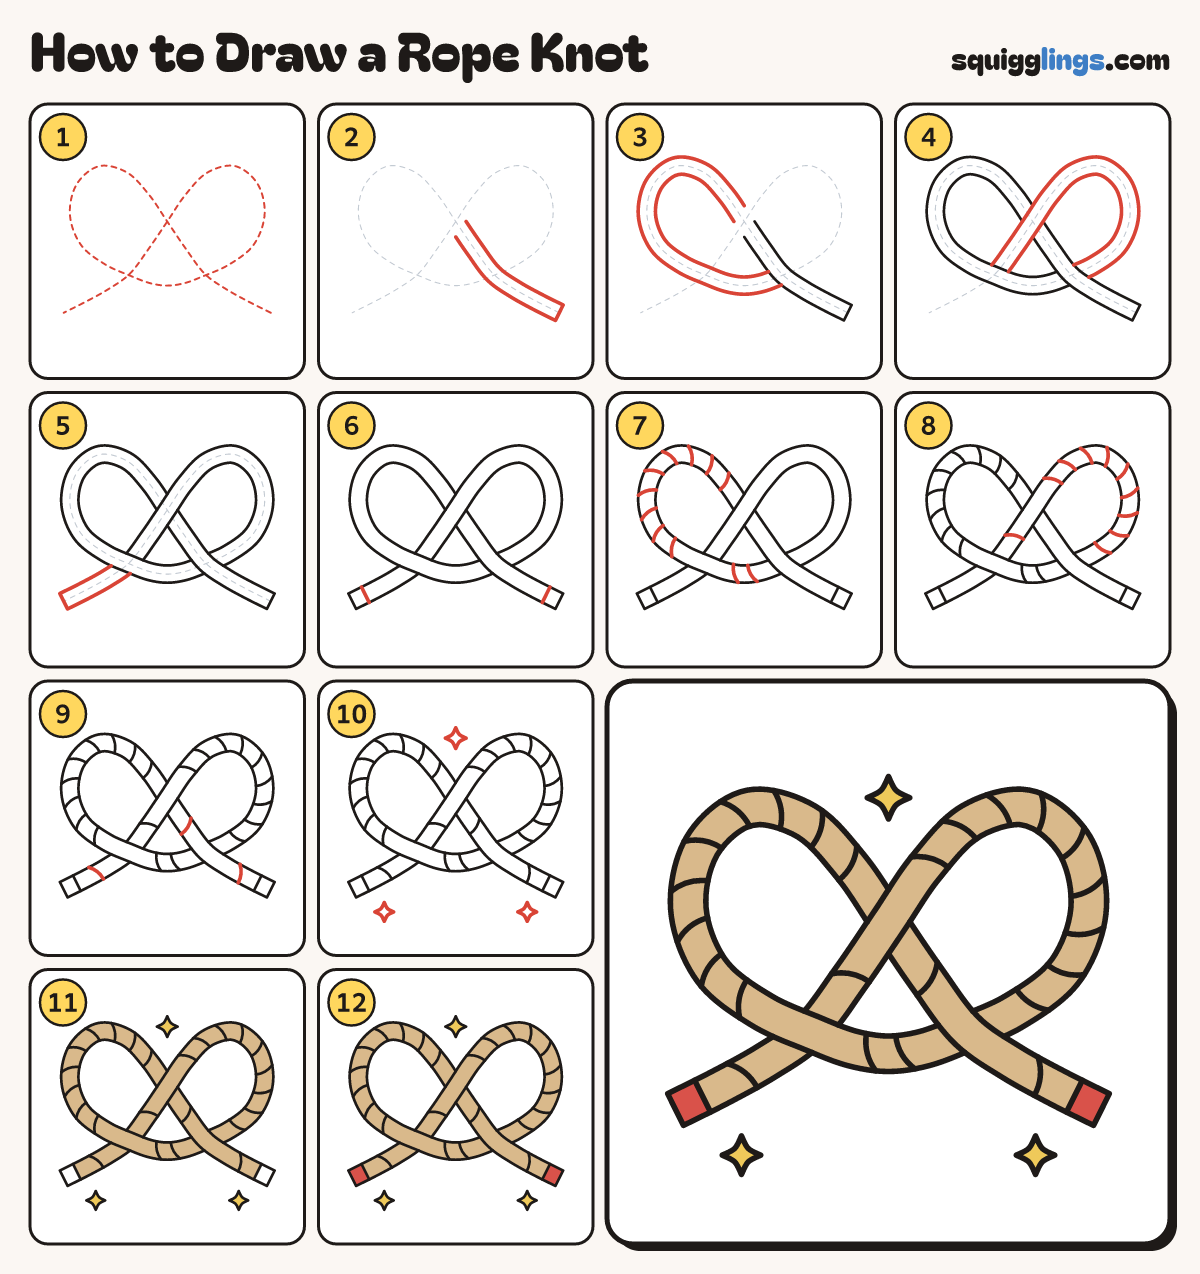
Each picture adds one red line. Draw that line, then scroll to the next picture. Rub out any dashed helper lines at the end. First up: loopy guide line.
Step 1: Loopy guide line
Draw this path lightly: from the right, loop round the left, across, loop round the right, out left.
Tip It looks like a pretzel. This light line is the middle of your rope.
Step 2: First rope end
Start at the right end. Draw a thick rope along the guide, stopping before the top crossing.
Tip Draw one line each side of the guide, a finger apart.
Step 3: Left loop
Start past the crossing. Draw the rope round the left loop and across the bottom, stopping at the first rope.
Tip This rope dives under the first one, so its lines stop when they touch it.
Step 4: Right loop
Start past the first rope. Go round the right loop, over the top crossing, and stop at the bottom rope.
Tip Over, under, over: each crossing takes its turn.
Step 5: Last rope end
Start under the bottom rope. Draw the rope out to the left end and close it.
Step 6: Taped ends
Rub out the guide line. Near each end, draw a short line across the rope for tape.
Step 7: Left loop twists
Round the left loop, draw short slanted lines from edge to edge, evenly spaced.
Tip Curve each little line like a banana, and keep clear of the crossings.
Step 8: Right loop twists
Round the right loop, draw the same slanted lines from edge to edge.
Step 9: End twists
Draw the same slanted lines along both rope ends, from edge to edge.
Step 10: Sparkles
Draw 3 little four-point sparkle stars around the knot, not touching it.
Step 11: Tan rope
Go over your lines. Colour the sparkles yellow and the rope tan, but not the taped ends.
Step 12: Red tape
Colour the 2 taped ends red. Your knot is tied!
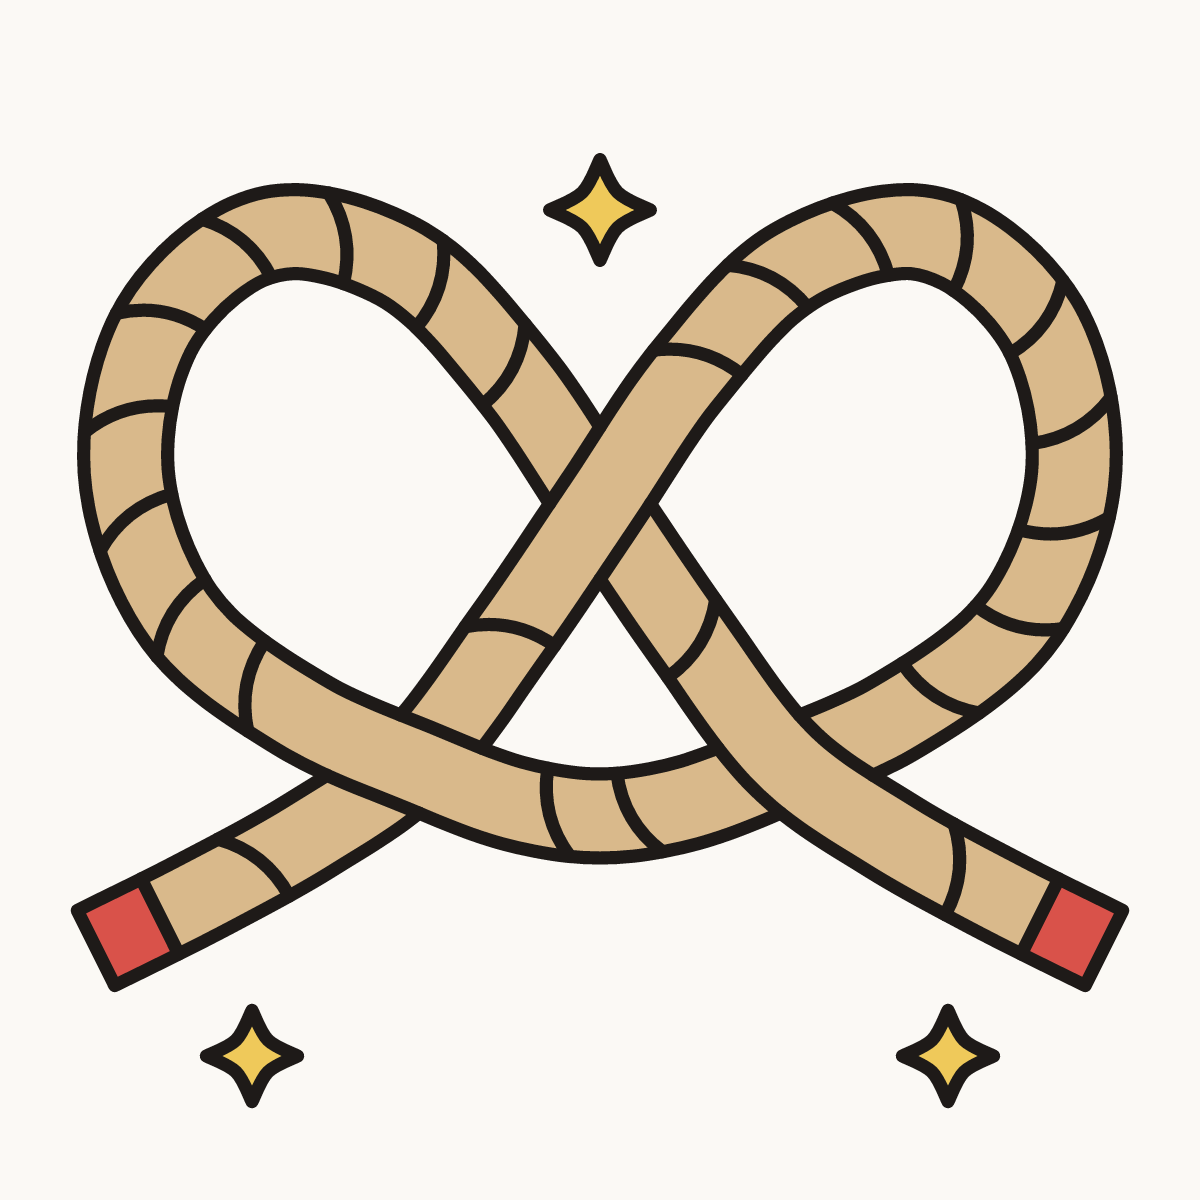
Your finished drawing
Follow the steps above and this is where you end up: a rope knot, drawn by you.
Every step in one picture