Watch it draw itself · tap to replay
How to Draw a Present
Draw a present in 12 easy steps, about 9 minutes. Free, with a printable worksheet.
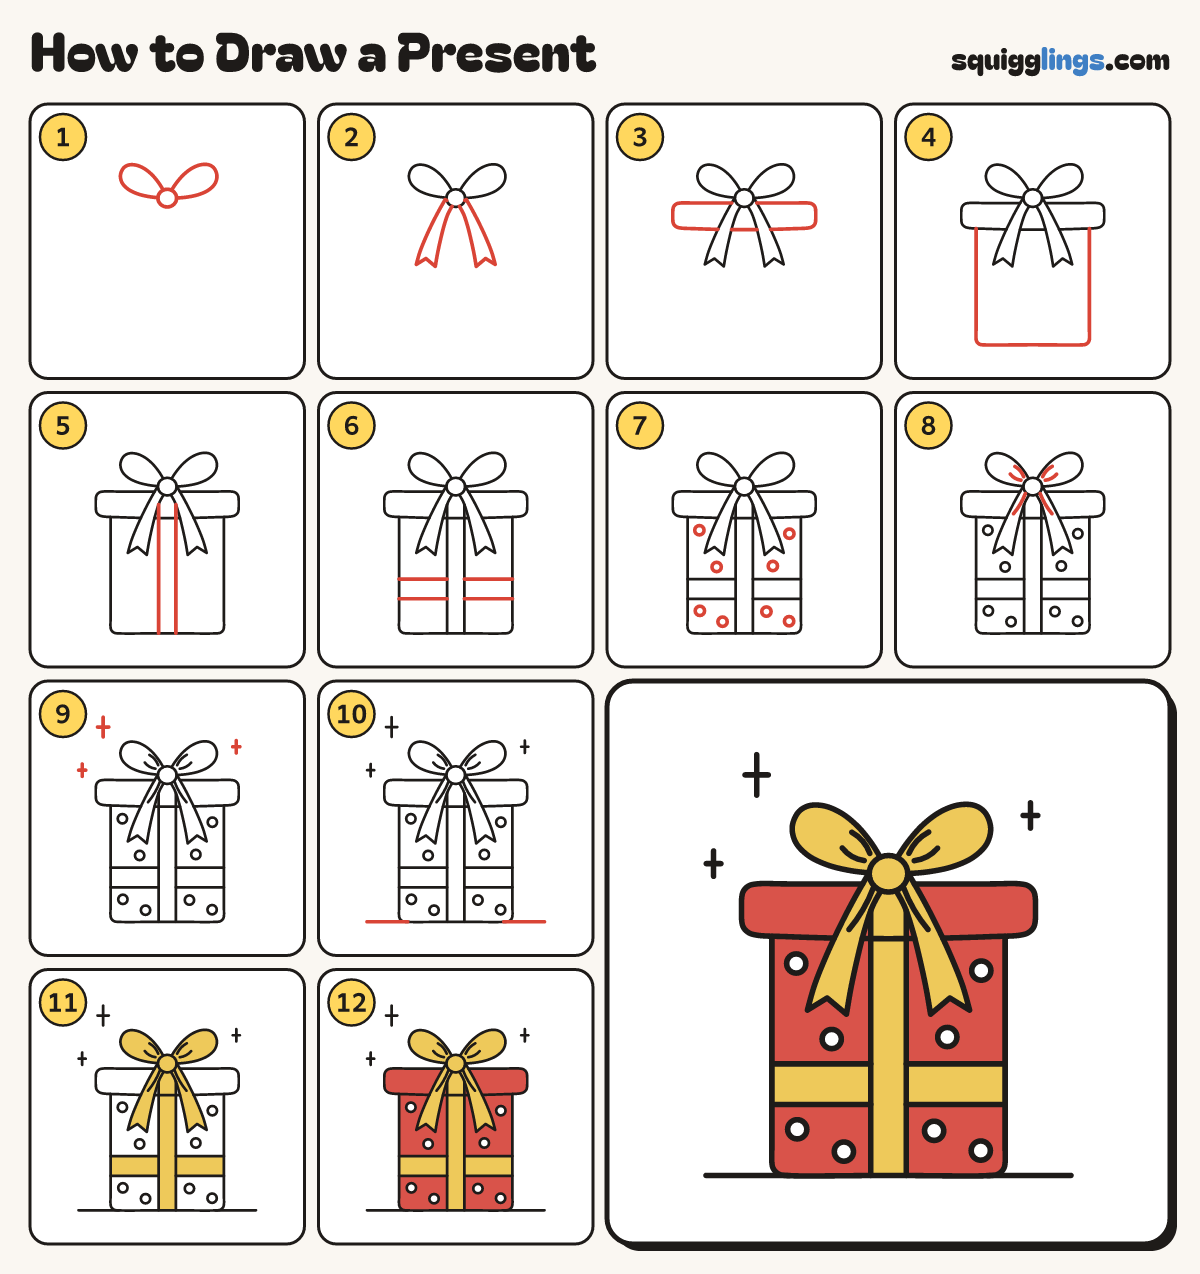
Each picture adds one red line. Draw that line, then scroll to the next picture. Rub out any dashed helper lines at the end. First up: knot and loops.
Step 1: Knot and loops
Above the middle draw a small round knot. On each side draw a big teardrop loop pointing up and out.
Tip The loops are like rabbit ears.
Step 2: Ribbon tails
From the knot draw a ribbon tail slanting down each side, getting wider, with a V notch in the end.
Tip Each tail is a wavy strip, like a fish tail.
Step 3: The lid
Behind the bow draw a long flat lid bar with round ends. Lift your pencil where the bow covers it.
Tip One finger tall. The knot and tails are in front of it.
Step 4: The box
Start under the lid's left end. Go straight down, flat along the bottom, straight up. Stop under the right end.
Tip The box is narrower than the lid, which sticks out like a hat brim.
Step 5: Ribbon up
From the bottom of the box draw 2 ribbon lines straight up, over the lid, stopping at the tails.
Tip The bow covers most of the ribbon; only bits peek out between the tails.
Step 6: Ribbon across
From each side of the box, below the middle, draw 2 lines across to the up ribbon and stop.
Step 7: Polka dots
On each side of the box draw 4 small circles, spread out, keeping them off the ribbon and lines.
Tip Don't make the 2 sides match exactly; wrapping paper never lines up.
Step 8: Ribbon creases
From the knot draw 2 short curved creases fanning into each loop, and one short curve down each tail.
Step 9: Sparkles
Draw 3 sparkles around the present: a big one up left of the bow, and 2 small ones.
Tip A sparkle is a thin cross: a long stroke and a short one across.
Step 10: The table
From each bottom corner of the box draw a straight table line out to the side, past the lid.
Step 11: Yellow ribbon and bow
Colour the ribbon, knot, loops and tails yellow.
Step 12: Red box, white dots
Colour the lid and box red around the ribbon, leaving the dots white. Your present is ready to give!
Your finished drawing
Follow the steps above and this is where you end up: a present, drawn by you.
Every step in one picture