Watch it draw itself · tap to replay
How to Draw a Pond
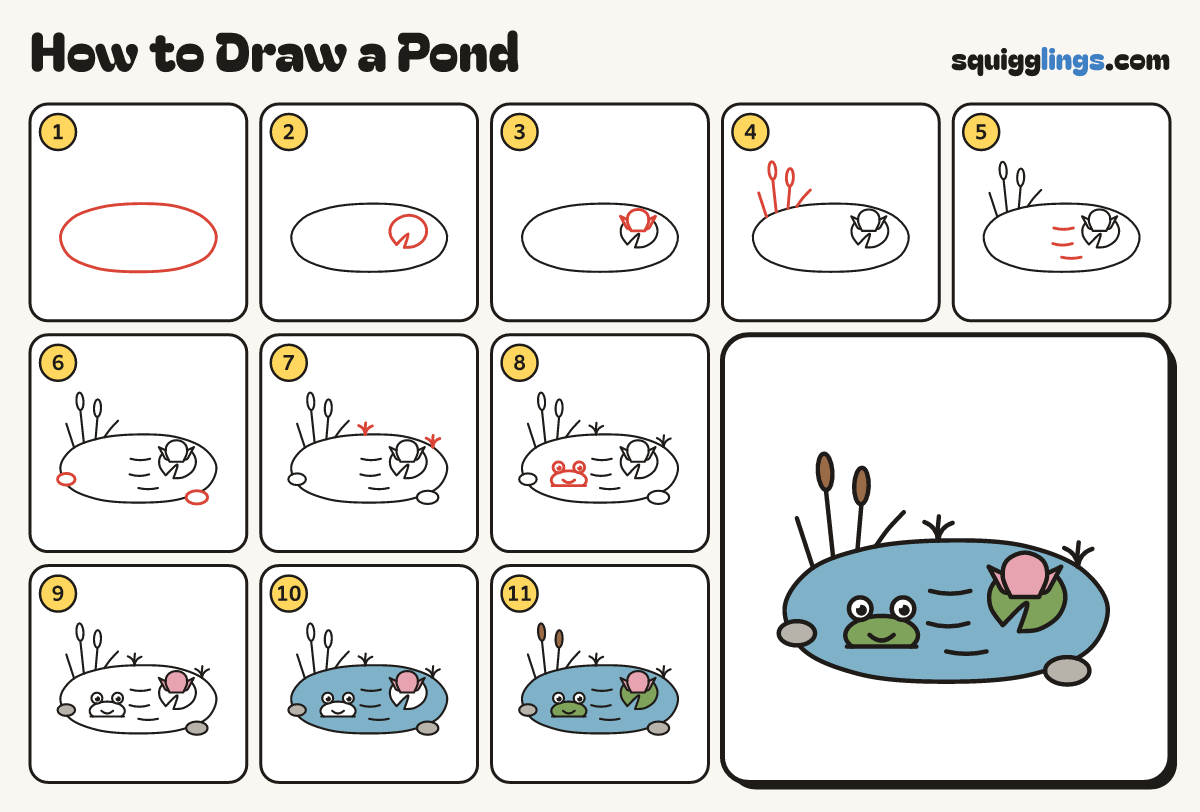
Draw a pond in 11 easy steps, about 8 minutes. Free, with a printable worksheet.
Each picture adds one red line. Draw that line, then scroll to the next picture. Rub out any dashed helper lines at the end. First up: the pond.
Step 1: The pond
In the middle of your paper draw a big wobbly pond, wider than tall, with soft bumpy edges.
Tip Like a big puddle with rounded edges.
Step 2: A lily pad
On the right of the pond draw a round leaf with a notch, like a pizza missing one slice.
Step 3: A lily flower
On the pad draw a big lily: a cup in the middle and a pointy petal leaning out each side.
Step 4: Reeds
From the pond's left edge draw 3 reeds up to different heights, 2 with sausage tops, and 1 leaning leaf.
Step 5: Ripples
On the water between the reeds and the pad draw 3 short curved ripple lines, one above the other.
Step 6: Rocks
Draw a round rock on the pond's edge at the bottom right. Add a smaller one on the left edge.
Step 7: Grass
On the pond's top edge draw 2 grass tufts, 3 short blades from one point.
Step 8: A frog
On the left draw a frog: a flat head starting and stopping on a waterline, big eyes and a smile.
Step 9: Pink lily, grey rocks
Colour the lily flower pink and the rocks grey.
Step 10: Blue pond
Colour the pond water blue, going round the lily pad and flower, the frog and the rocks.
Step 11: Green and brown
Colour the pad green around the flower, and the frog green. Colour the cattail tops brown. Your pond is done!
Tip Leave the eyes white.
Your finished drawing
Follow the steps above and this is where you end up: a pond, drawn by you.
Every step in one picture