Watch it draw itself · tap to replay
How to Draw Earth’s Layers
Draw Earth’s layers in 13 easy steps, about 10 minutes. Free, with a printable worksheet.
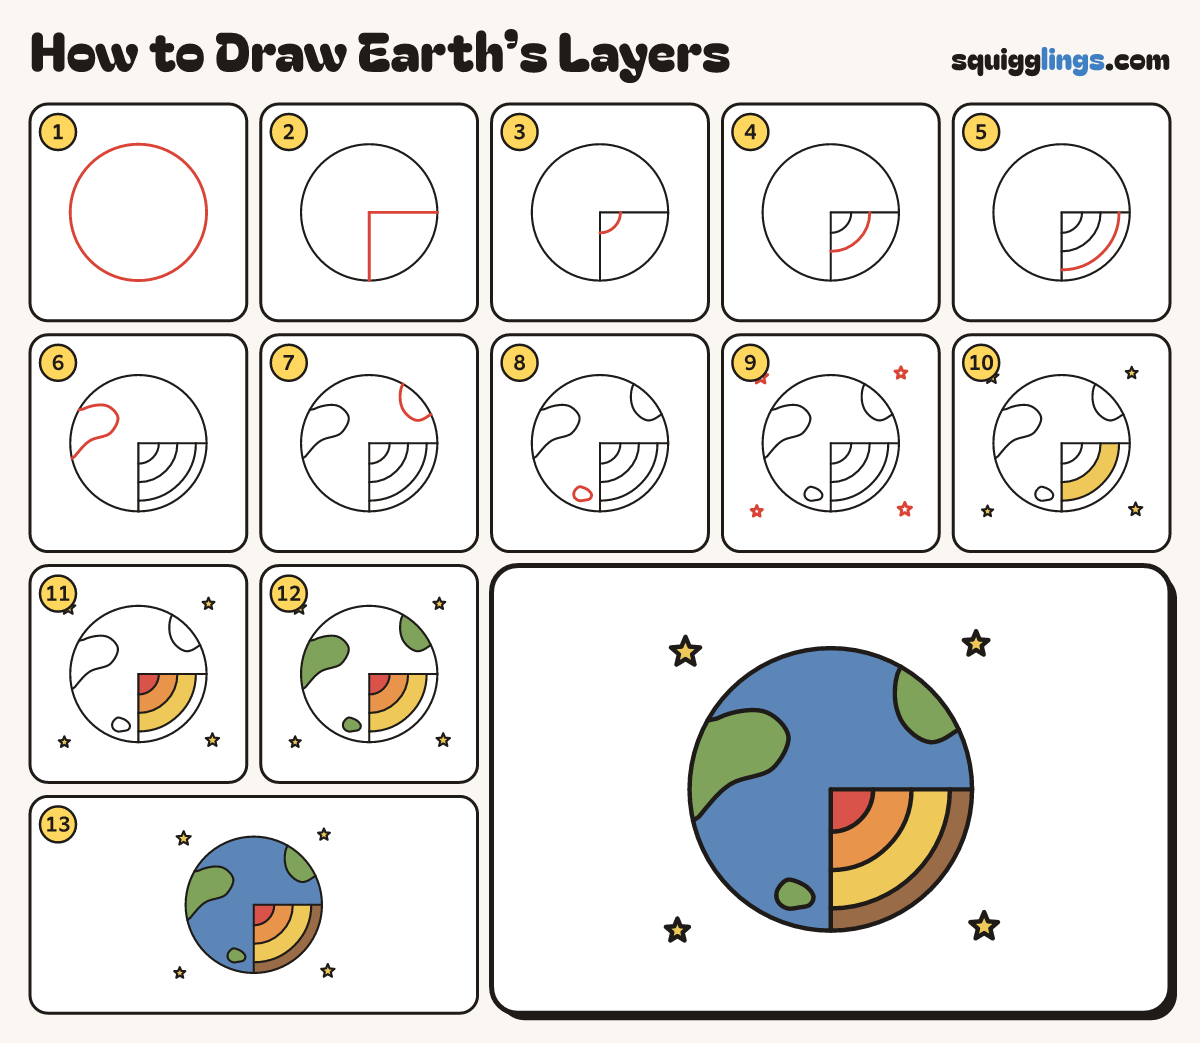
Each picture adds one red line. Draw that line, then scroll to the next picture. Rub out any dashed helper lines at the end. First up: the planet.
Step 1: The planet
In the middle of your paper draw a big round planet that fills most of the page.
Step 2: A slice cut out
From the planet's middle draw a straight line out to the right edge, and another down to the bottom.
Tip The slice is the bottom-right quarter, like a quarter of a pie.
Step 3: The inner core
Inside the slice, close to the middle, draw a small curve from the right line round to the bottom line.
Step 4: The outer core
Draw a bigger curve: start on the right line, halfway out, and curve round to the bottom line.
Step 5: The mantle
Draw one more curve: start on the right line near the planet's edge and curve round to the bottom line.
Tip Leave a thin band for the crust. The slice shows 4 layers.
Step 6: A continent
Start on the planet's left edge, above the middle. Draw a wobbly land shape back to the edge lower down.
Step 7: Another continent
Start on the planet's top-right edge. Draw a wobbly land shape dipping down and swinging back out to the edge.
Step 8: A little island
Low on the left of the planet, left of the cut, draw one small wobbly blob for an island.
Step 9: Stars
Around the planet draw 4 small stars, one near each corner.
Step 10: Yellow mantle and stars
Inside the slice colour the mantle yellow, and colour the 4 stars yellow too.
Step 11: Orange and red core
Colour the outer core orange, then the little inner core in the middle red.
Step 12: Green land
Colour the 2 continents and the little island leaf green.
Step 13: Blue sea, brown crust
Colour the sea blue around the land, then the thin crust band brown. Go over your lines and you're done!
Your finished drawing
Follow the steps above and this is where you end up: Earth’s layers, drawn by you.
Every step in one picture